-
United Kingdom+44 (20) 4577-20-00
-
USA+1 (929) 431-18-18
-
Israel+972 (55) 507-70-81
-
Brazil+55 (61) 3772-18-88
-
Canada+1 (416) 850-13-33
-
Czech Republic+420 (736) 353-668
-
Estonia+372 (53) 683-380
-
Greece+30 (800) 000-02-04
-
Ireland+353 (1) 699-43-88
-
Iceland+354 (53) 952-99
-
Lithuania+370 (700) 660-08
-
Netherlands+31 (970) 1027-77-87
-
Portugal+351 (800) 180-09-04
-
Romania+40 (376) 300-641
-
Sweden+46 (79) 008-11-99
-
Slovakia+421 (2) 333-004-23
-
Switzerland+41 (22) 508-77-76
-
Moldova+373 (699) 33-1-22
 English
Installing WSL 2 in Windows 10
- Main
- Knowledge base
- Installing WSL 2 in Windows 10
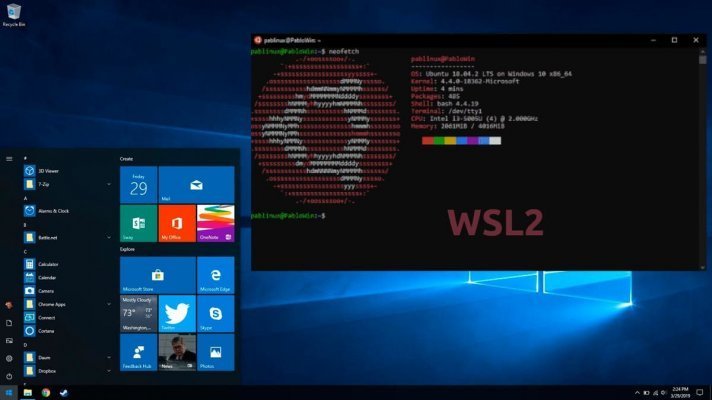
WSL 2 (Windows Subsystem for Linux 2) is an environment for running the Linux operating system on Windows 10 computers. It is an improved version of the previous WSL and provides the ability to run Linux applications and commands directly from the Windows command line, without having to install a separate virtual machine.
WSL 2 is based on virtualization and uses a built-in hypervisor to run the Linux kernel. This allows for better compatibility, performance and the ability to use official Linux images, making WSL 2 a powerful tool for developers and system administrators.
What tasks does it perform?
WSL 2 performs the following tasks:
- Running and executing Linux applications: provides the ability to run and use Linux applications and commands such as Bash, SSH, Git, Python, and others directly from the Windows command line.
- Development and Testing: WSL 2 provides an environment for developing, testing, and debugging Linux applications. Developers can use Linux programming tools and languages on their Windows computers.
- Access to Linux tools and features: allows you to import Linux tools and features that may not be available on Windows. This includes advanced command line capabilities, batch managers, runtime environments, and other tools.
- Windows integration: provides integration between Linux and Windows. This means you can easily share files and data between systems, utilize network resources available on Windows, and integrate Linux applications into your Windows workflow.
- Updates and security: It offers regular security updates to ensure that your Linux environment is safe and stable to use on Windows computers.
These are some of the tasks that WSL 2 performs, but it also provides other features, depending on the user's needs and goals.
WSL 2 installation instructions
To install WSL 2 on Windows 10, follow these steps:
- Make sure your operating system is Windows 10 version 2004 or later. You can check your Windows 10 version by right-clicking on the Start button in the lower left corner of your screen, selecting "System" and looking under "System Information".
- Open Windows "Preferences" by pressing the Win+I keyboard shortcut, or look for the "Preferences" icon on the Start menu.
- From the "Preferences" menu, select "Update & Security" and then click on "Check for updates". Make sure your operating system is fully updated.
- Open Windows "Settings" again and select "Applications."
- Under "Apps and Features", select "Settings Manager" and enable the "Developer" option if it's not already enabled.
- Open Windows Settings again and select "Update and Security."
- From the "Update and Security" menu, select "For Developers" and check the "Developer Mode" checkbox.
- Go to the "Control Panel" of Windows, find and select "Programs" and then select "Enable or disable Windows components".
- In the "Windows Features" window, find "Windows Subsystem for Linux" and check the box next to it. Then click "OK."
- Go to the Microsoft Store and find the Linux distribution you want to install (like Ubuntu, Debian, or any other). Click on it and select "Get" or "Install"
- Run the WSL program you installed and follow the instructions to set up and configure your new Linux environment.
You should now have WSL 2 installed on Windows 10, and you can use Linux distributions within your operating system.
How to uninstall WSL 2
To uninstall WSL 2 (Windows Subsystem for Linux 2) from Windows 10, you need to follow a few steps:
- Open PowerShell as administrator: right-click on the Start button and select "Windows PowerShell (administrator)".
- Run the command to disable WSL Subsystem 2: Type the following command and press Enter:
wsl --set-version <distributeve_name> 1 - Replace <distributeve_name> with the name of the Linux distribution you are using (for example, Ubuntu).
- Remove the Linux distribution: Type the following command to remove the Linux distribution and press Enter:
wsl --unregister <distributeve_name> - Here also replace <distributeve_name> with the name of your distribution.
- Uninstall the WSL 2 service: run Windows services
(services.msc) and find the"LxssManager" service. Right click on it and select "Stop". - After that, select "Properties" and change the startup type to "Disabled".
Once these steps are finished, WSL 2 will be removed from your system. Please note that uninstalling WSL 2 will cause you to lose all data and files that have been saved in your Linux distribution, so make sure you don't have any important information to save before uninstalling.


