-
United Kingdom+44 (20) 4577-20-00
-
USA+1 (929) 431-18-18
-
Israel+972 (55) 507-70-81
-
Brazil+55 (61) 3772-18-88
-
Canada+1 (416) 850-13-33
-
Czech Republic+420 (736) 353-668
-
Estonia+372 (53) 683-380
-
Greece+30 (800) 000-02-04
-
Ireland+353 (1) 699-43-88
-
Iceland+354 (53) 952-99
-
Lithuania+370 (700) 660-08
-
Netherlands+31 (970) 1027-77-87
-
Portugal+351 (800) 180-09-04
-
Romania+40 (376) 300-641
-
Sweden+46 (79) 008-11-99
-
Slovakia+421 (2) 333-004-23
-
Switzerland+41 (22) 508-77-76
-
Moldova+373 (699) 33-1-22
 English
How to connect and configure X-ui on the server
- Main
- Knowledge base
- How to connect and configure X-ui on the server
After ordering a virtual server and installing X-ui, you will need to configure the connection. To connect to the panel you should follow the link (when installing the panel you can specify a mailbox to which an e-mail with connection details will be sent).
Setup and connection
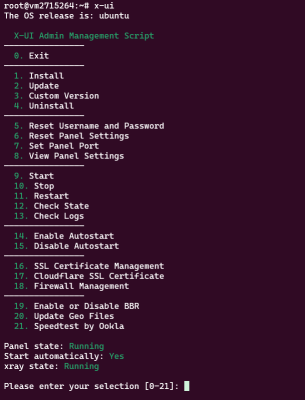
If you didn't check the "send to mailbox" option during installation, you can view connection details on the server itself by connecting via SSH and executing the x-ui command.
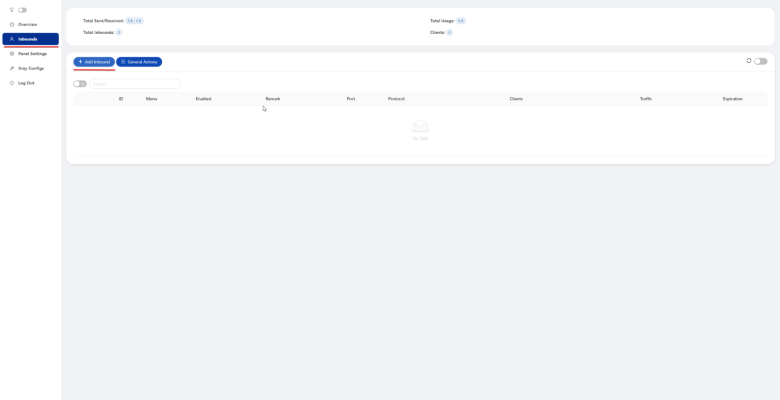
After going to the panel, you will need to add a connection
The dialog of adding a new connection looks like this.
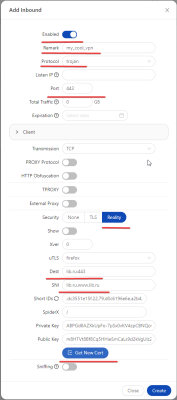
Here, you need to enable the connection if you plan to use it immediately. In the "Remark" field, enter a random name for your connection. In the "Protocol" field, we recommend choosing "Trojan", which is the most relevant protocol at the moment.
In the field "Dest" and "SNI" you need to select the name of the site that will be displayed if a non VPN connection is initialized to your server. This way the VPN looks like a regular web service. In the "Port" field it is highly recommended to use the value "443". This is a standard HTTPS port and the service will look like a normal web server. Next, you need to click the "Get new cert" button to automatically generate the keys. Click the "Create" button to finish.
Please note that you can create multiple users here; the "Clients" option.
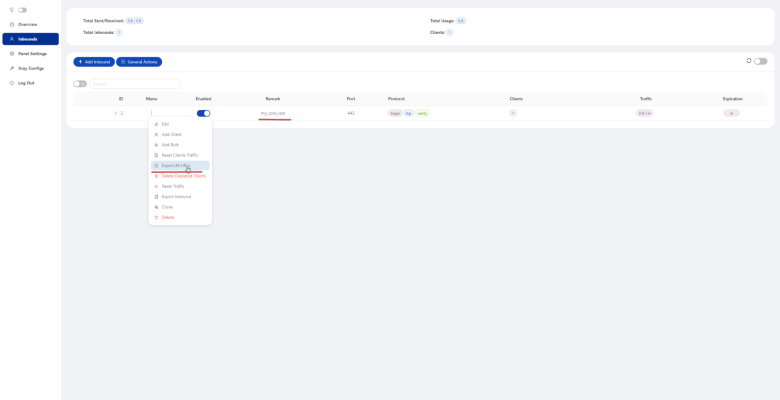
Next, you need to add your VPN to your device. You need to copy the connection string.
Select the following option:
Copy or download the connection string:
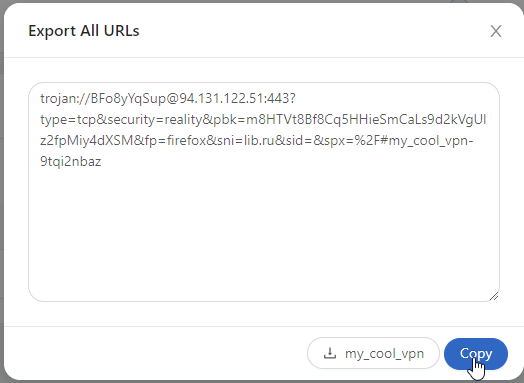
If you, as in this example, added two users, two strings will be displayed.
Connecting a mobile app to a proxy. Using the example of the mobile application "NekoBox for Android " https://play.google.com/store/apps/details?id=moe.nb4a.
If you copied the connection string to the clipboard, click the "+" button in the toolbar
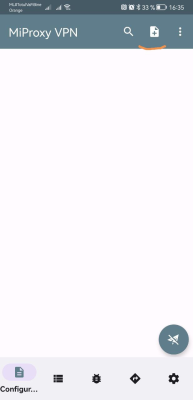
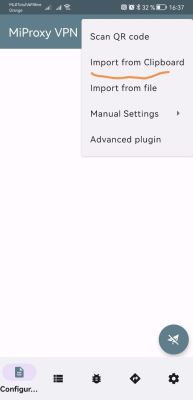
Select "Import from Clipboard"
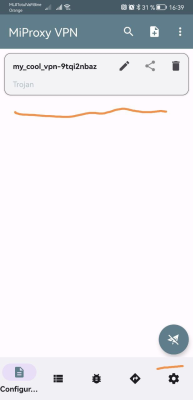
A new connection will appear in the list. Select it and click the "connect" button.
Connecting to the X-ui proxy using the NekoRay application in Microsoft Windows as an example.
You can download the application archive by going to releases and selecting the release for the desired platform. In our case, this file is nekoray-3.17-2023-08-17-windows64.zip
Unpack the archive to the desired location and run the file nekoray.exe
The main application window looks as follows.
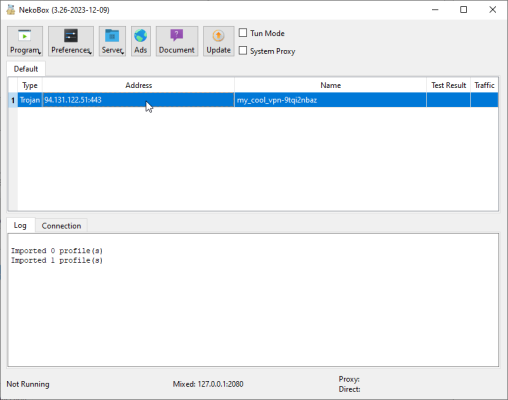
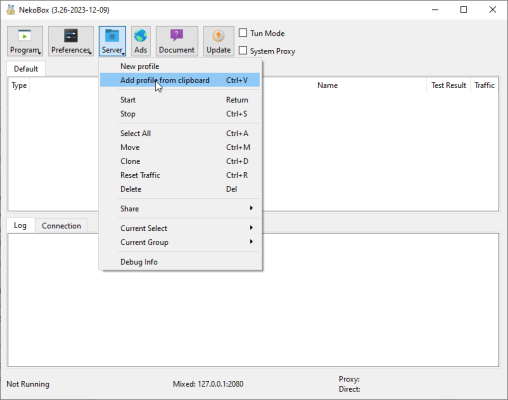
Click on the "Server" button and select "Add profile from clipboard" item
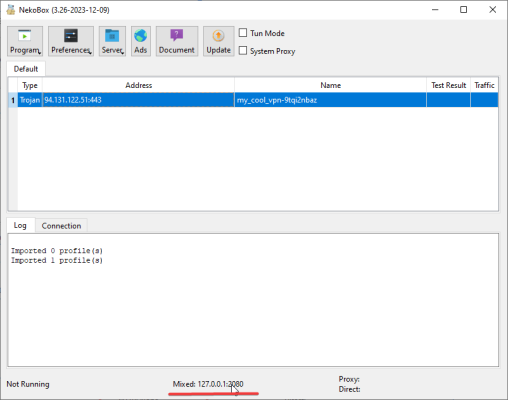
Activate the selected connection

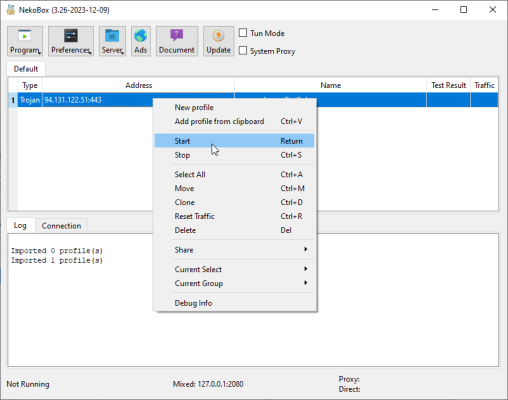
NekoRay has three modes of operation. If you want only a certain application that supports proxying via sock5 to be proxied - specify in the proxy settings the values that are displayed in the application status bar.
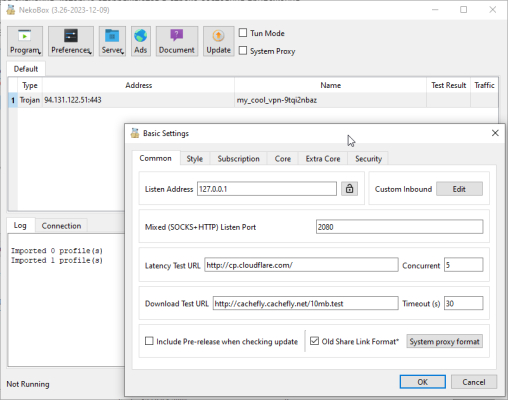
The second mode is "System proxy" and this mode is required for applications that use operating system proxy settings. Examples of such applications are Google Chrome and Microsoft Edge browsers. The corresponding checkbox is present in the top panel of the application. Please note that for this mode to work it is necessary to activate the incoming HTTP proxy connection in the settings as on the screenshot.
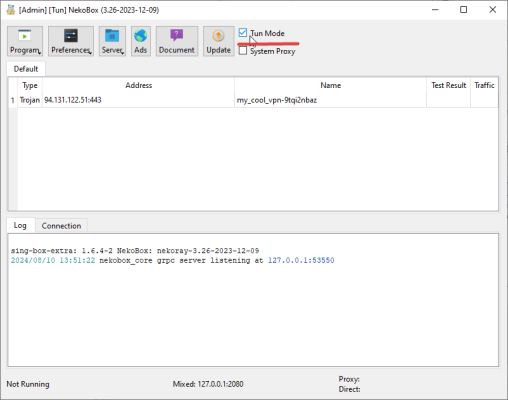
The third mode is tun-mode. It is enabled in the toolbar. This mode is necessary if you want to proxy all traffic from your computer through the proxy. This mode creates a virtual network tun-interface through which all traffic is routed.
After setting up the application you can verify the connection by checking the ip address.


