-
United Kingdom+44 (20) 4577-20-00
-
USA+1 (929) 431-18-18
-
Israel+972 (55) 507-70-81
-
Brazil+55 (61) 3772-18-88
-
Canada+1 (416) 850-13-33
-
Czech Republic+420 (736) 353-668
-
Estonia+372 (53) 683-380
-
Greece+30 (800) 000-02-04
-
Ireland+353 (1) 699-43-88
-
Iceland+354 (53) 952-99
-
Lithuania+370 (700) 660-08
-
Netherlands+31 (970) 1027-77-87
-
Portugal+351 (800) 180-09-04
-
Romania+40 (376) 300-641
-
Sweden+46 (79) 008-11-99
-
Slovakia+421 (2) 333-004-23
-
Switzerland+41 (22) 508-77-76
-
Moldova+373 (699) 33-1-22
 English
Cutting an object in Gimp
- Main
- Knowledge base
- Cutting an object in Gimp
One of the most popular and handy image editing programs in the Gimp operating system is a program called Gimp. In this program, you can do everything we are used to doing in Photoshop, but it often requires more effort. In this tutorial we will tell you how to cut an object in the Gimp program and insert it into another image.
Cutting an object in Gimp
There are several ways to cut an object. If the background is homogeneous, then no difficulty with this work will not arise, but if it is not homogeneous, you will have to make a little more effort. In this case, the outline is simply highlighted manually.
Object on a homogeneous background
There is the following task: you need to cut the Linux logo from a homogeneous background and insert it into another image.
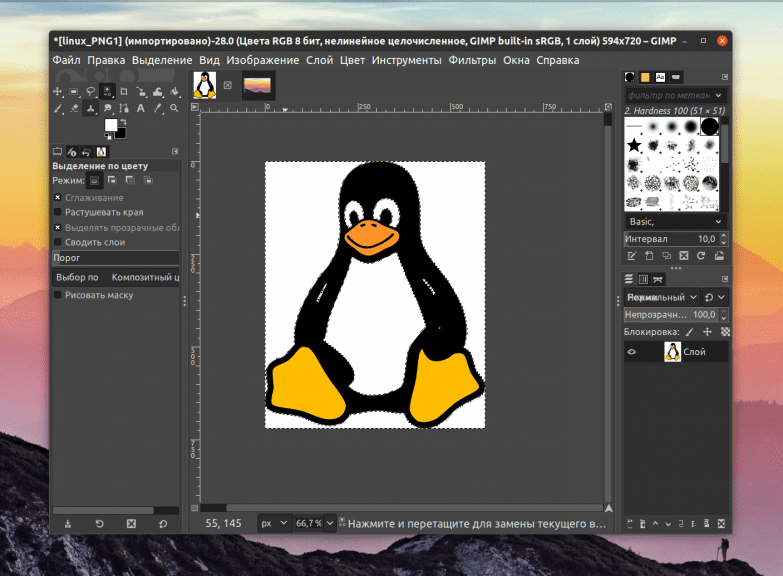
First of all, open the selection menu and select by color. Click on the background color and the entire background will be selected. The result will be like this:
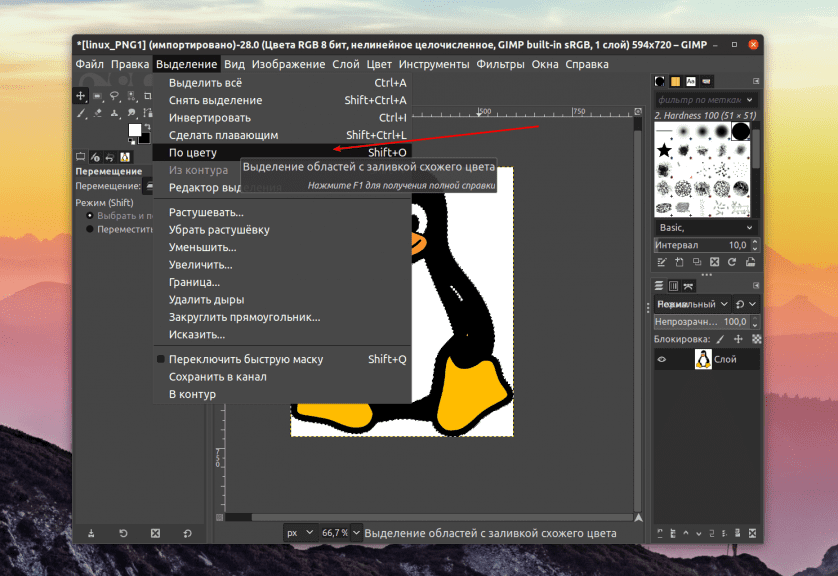
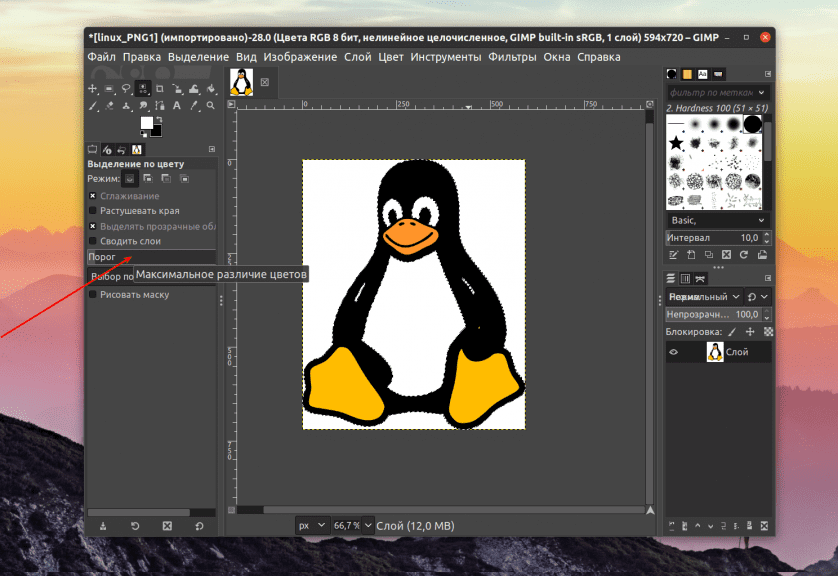
There are times when the background is not quite homogeneous, you can fix the situation in this case by changing the value of the thresholds in the sidebar upwards. But keep in mind that this method works only when there is a strong contrast between the object itself and the background.
Since the background is now selected, and we need to select the object, so we open the "Selection" menu and choose the "Invert" function. Now we can copy the object by using the context menu or the keyboard shortcut Ctrl+C. After copying, we can paste it to another image.
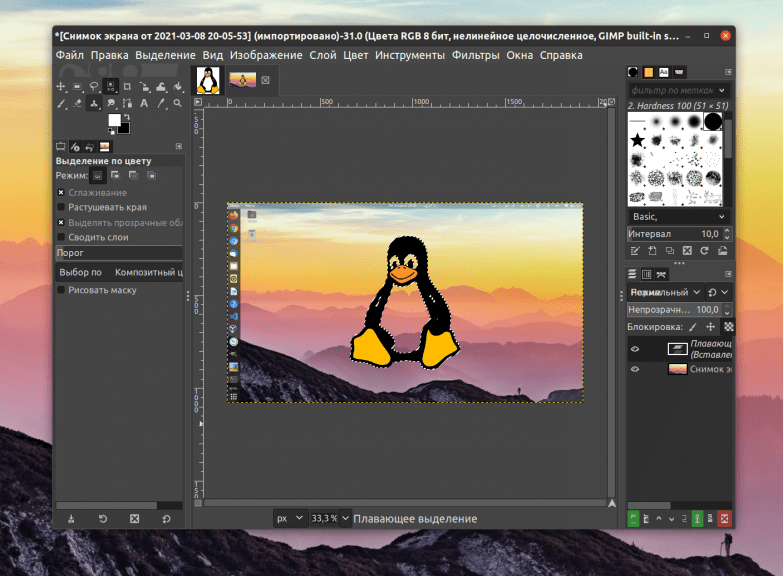
The object is copied and we can paste it onto a blank background or any other image.
Manually selecting an object in Gimp
If the task is quite complex, i.e. the object is very different from the background, we need to select it manually. For this purpose, the Gimp program has a tool called "Free Selection".
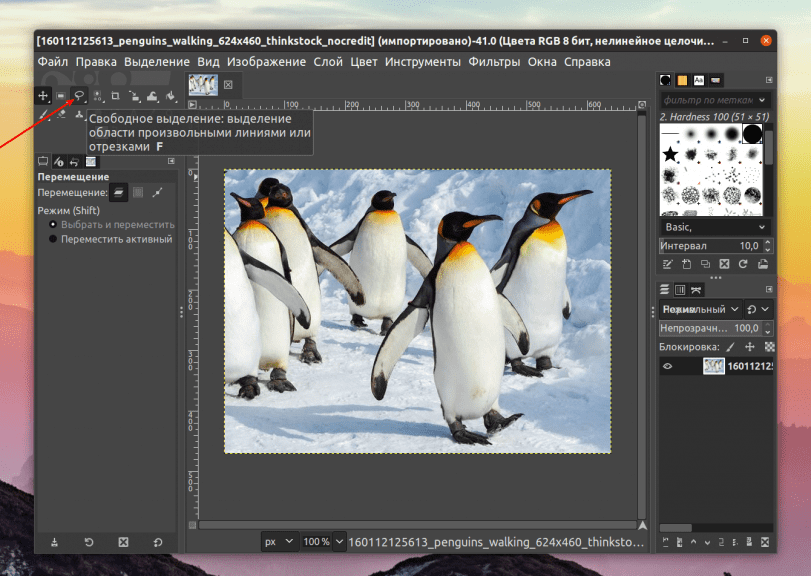
Activate it, then carefully click on the outline of our object and select it completely. In order to increase the convenience of work, you can enlarge the object. Use the computer mouse wheel for this - scroll it with simultaneous pressing of Ctrl.
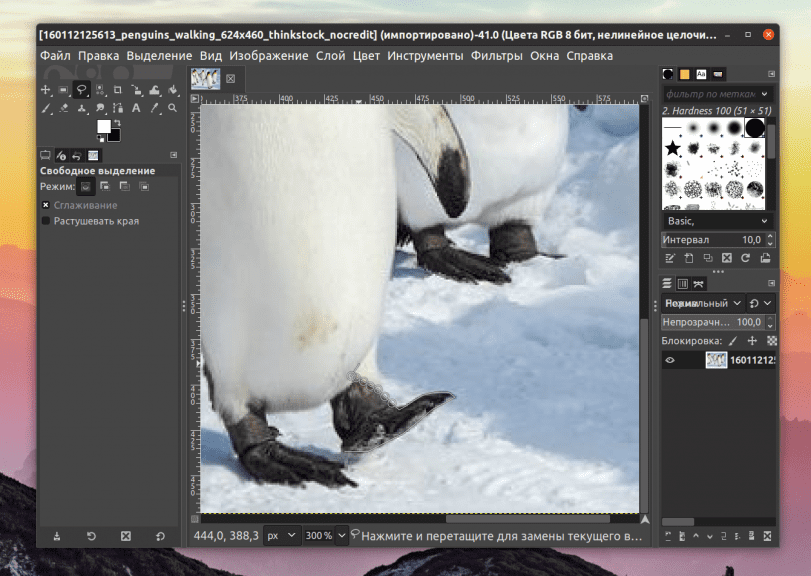
Use the side scrollers to move, but do not click on the object itself, as you will have to do the whole work again. The user's task is to select the whole object by closing the contour, i.e. you need to return to the original position - the point.
If you do everything correctly, the object will be selected:
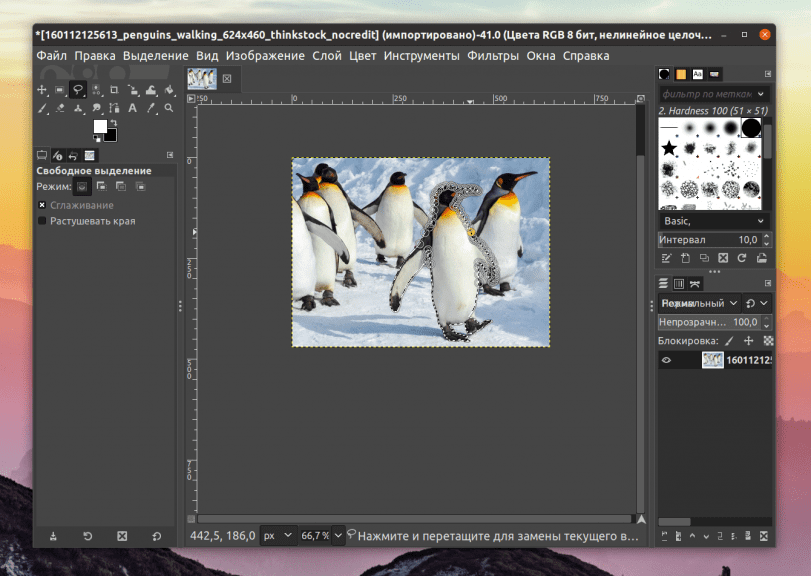
It can now be copied (in any way discussed above) and pasted into another image.
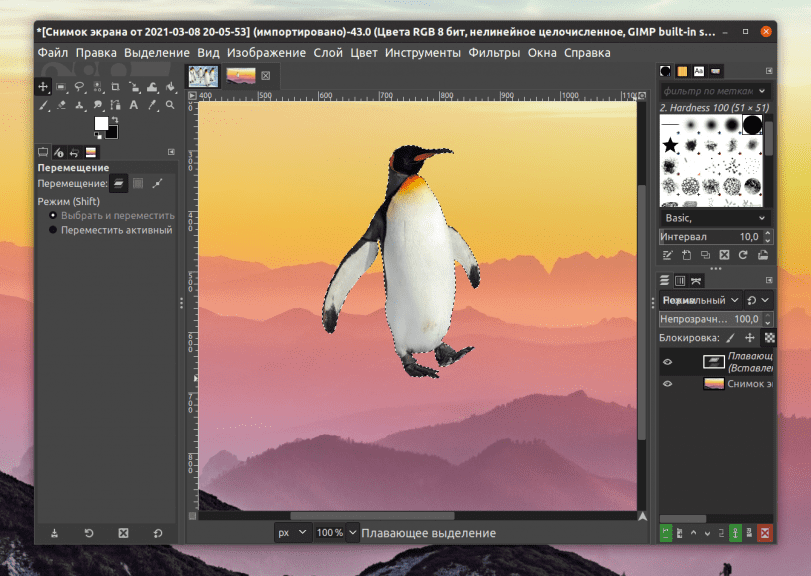
Complex objects are quite difficult to cut out, but with simple shapes there will definitely be no problems.
Now you know how to cut an object in Gimp and use it in another image.


