-
United Kingdom+44 (20) 4577-20-00
-
USA+1 (929) 431-18-18
-
Israel+972 (55) 507-70-81
-
Brazil+55 (61) 3772-18-88
-
Canada+1 (416) 850-13-33
-
Czech Republic+420 (736) 353-668
-
Estonia+372 (53) 683-380
-
Greece+30 (800) 000-02-04
-
Ireland+353 (1) 699-43-88
-
Iceland+354 (53) 952-99
-
Lithuania+370 (700) 660-08
-
Netherlands+31 (970) 1027-77-87
-
Portugal+351 (800) 180-09-04
-
Romania+40 (376) 300-641
-
Sweden+46 (79) 008-11-99
-
Slovakia+421 (2) 333-004-23
-
Switzerland+41 (22) 508-77-76
-
Moldova+373 (699) 33-1-22
 English
Installing PgAdmin4 in Ubuntu 20.04
- Main
- Knowledge base
- Installing PgAdmin4 in Ubuntu 20.04
Everyone knows that pgAdmin is called an open source application that was developed to facilitate the administration of the PostgreSQL database management system. This program is based on Python and Javascript languages. It is implemented as an embeddable framework. Its peculiarity is that it is possible to extend its functionality by connecting additional modules. pgAdmin is a graphical client and web interface, with which you can create, modify and perform other actions with the database. It is possible to use the application to perform all operations present in PostgreSQL, for example, to perform SQL queries, create and delete users, add permissions. in this instruction we will consider how to install pgAdmin4 in Ubuntu 20.04.
Installing pgAdmin4
Before installing gAdmin4 on Ubuntu 20.04, you should make sure that the PostgreSQL server is running. The PostgreSQL version should be higher than 9.6. To check the status of the Postgresql service you need to execute the command:
$ systemctl status postgresqlIf the status field does not have the word active highlighted in green, it should be added. We need to figure out why the service is not running and fix the problems. If all the conditions are met, then you can proceed with the installation.
Adding a repository
The first step in installing pgAdmin4 is to add the repository of the program developers to the system. To do this, first install the public key using the command:
$ sudo wget https://www.pgadmin.org/static/packages_pgadmin_org.pub | sudo apt-key add packages_pgadmin_org.pub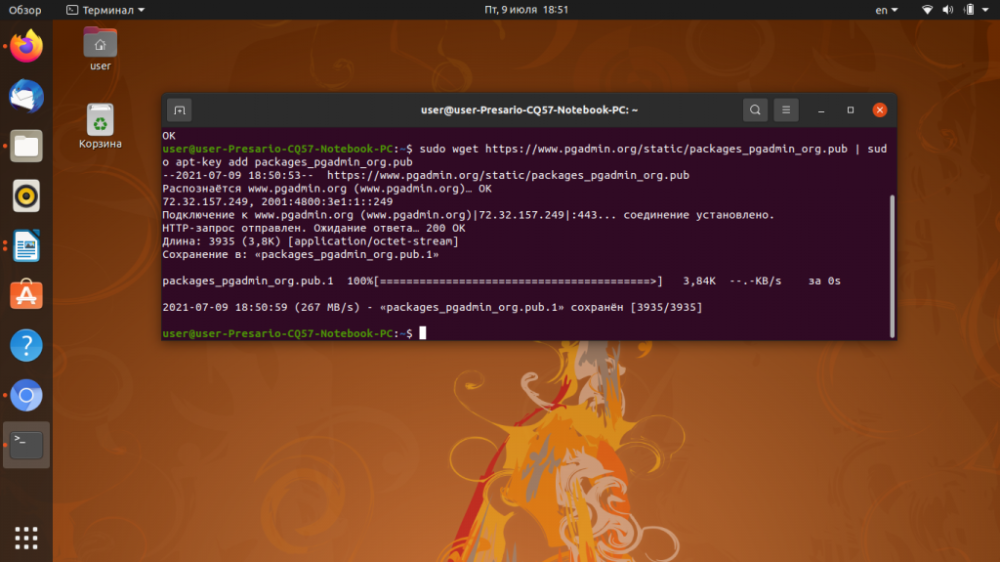
Next, you need to add the pgAdmin repository entry to the /etc/apt/sources.list.d/pgadmin4.list file:
$ echo "deb https://ftp.postgresql.org/pub/pgadmin/pgadmin4/apt/$(lsb_release -cs) pgadmin4 main" > sudo tee /etc/apt/sources.list.d/pgadmin4.list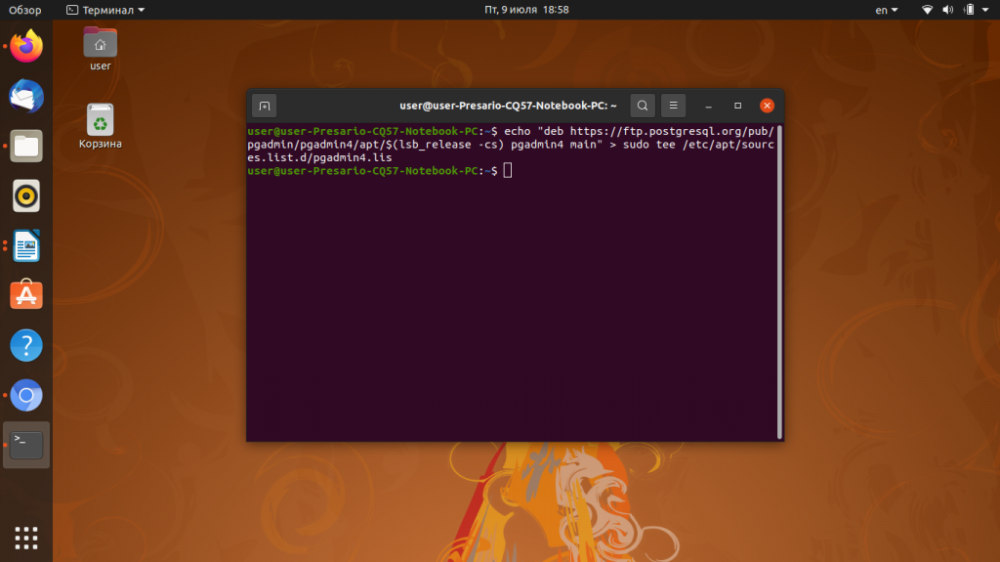
The package list needs to be updated:
$ sudo apt updateInstalling PgAdmin4
To start installing pgAdmin4, enter the command:
$ sudo apt install pgadmin4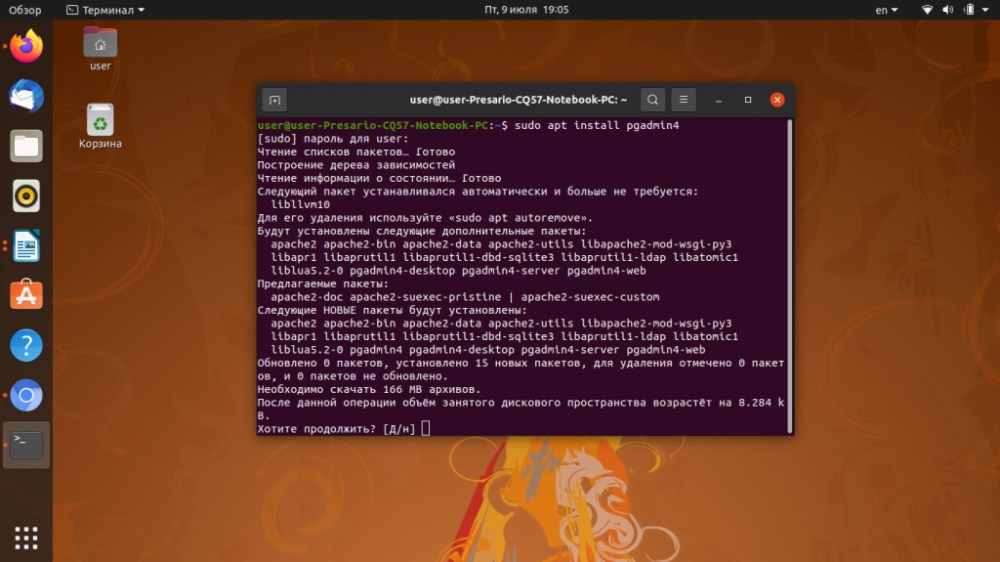
This will install both the desktop and web-mode versions. If you only need the desktop version, run the command:
$ sudo apt install pgadmin4-desktopTo install the web-mode version, type the following command in the terminal:
$ sudo apt install pgadmin4-webIf the question "Do you want to continue?" appears during the installation, type the letter D and press Enter.
Configuring PgAdmin4
After installation, the pgAdmin4 program will appear in the main menu of the Ubuntu operating system. To launch it, open the main menu and type pgAdmin in the search bar, then click on the program icon.

When you run the application for the first time, it will ask you to set a master password for pgAdmin. You need to think of and enter a secret word and click OK.
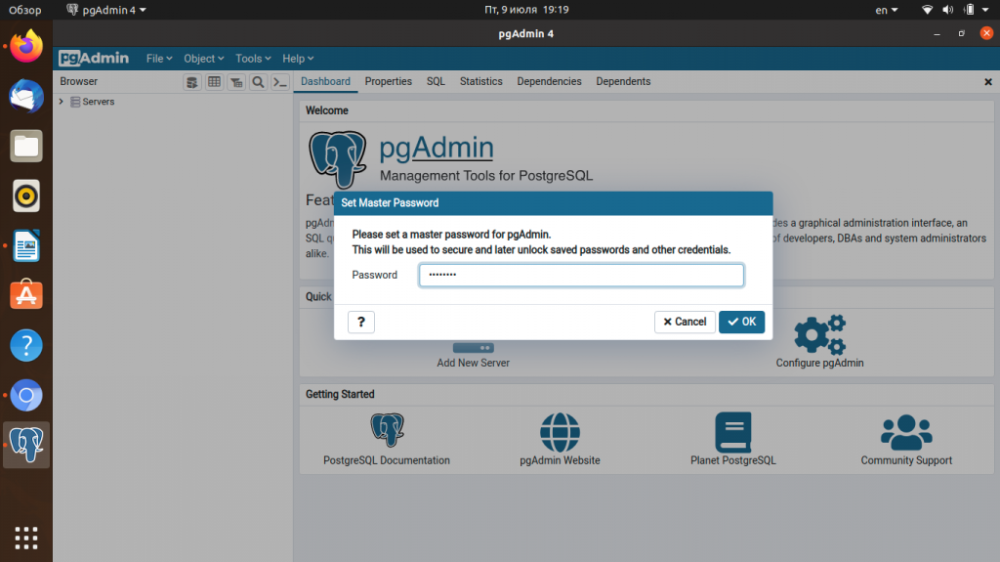
Next, a new window will appear.
Perform Russification
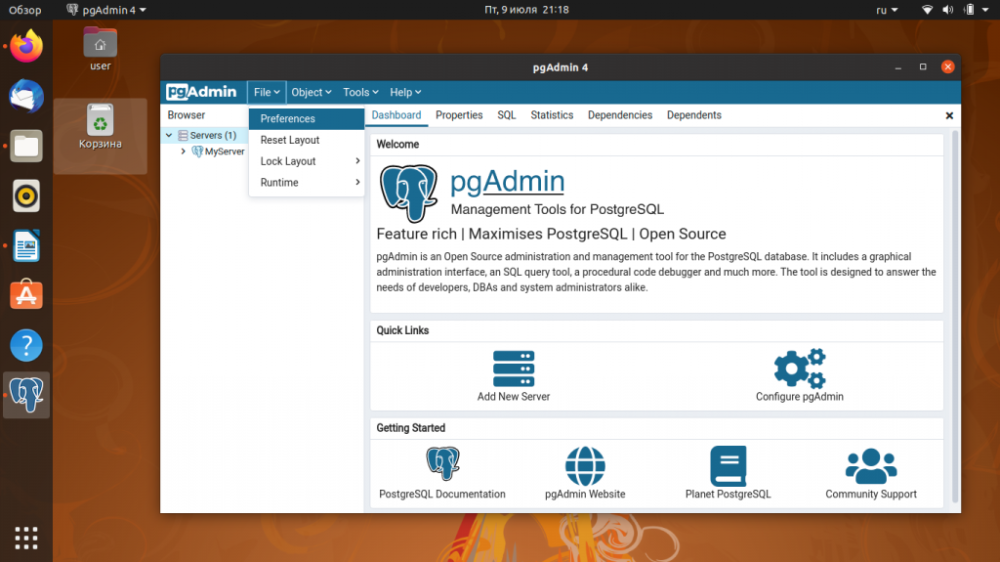
To change the language you need to select File in the main menu, then select Preferences.
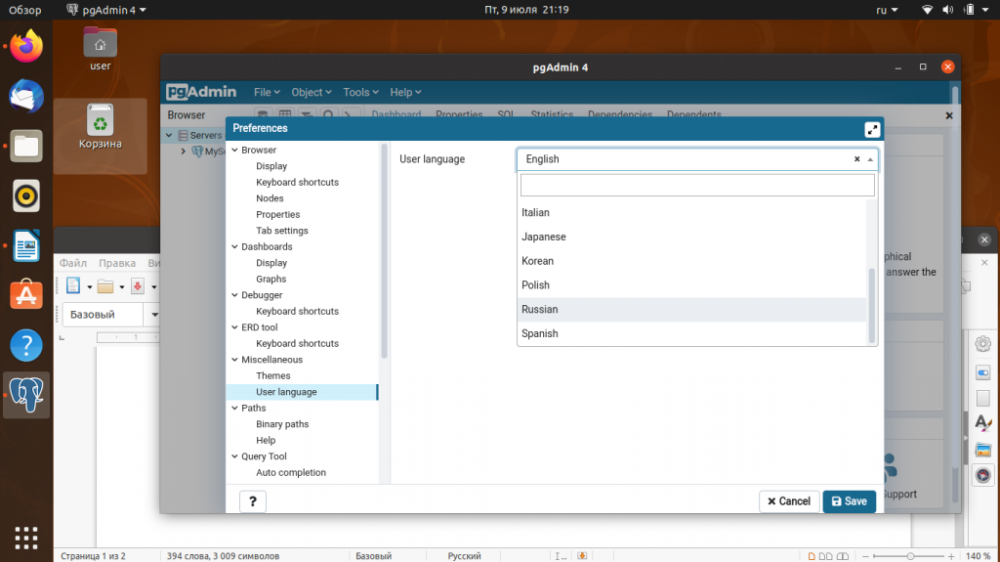
In this section in the Miscellaneous section you need to select User Language and in the drop-down list that will appear in the right part of the window, select Russian.
Getting access to the web service
To configure the web-interface, enter the following line in the terminal:
$ sudo /usr/pgadmin4/bin/setup-web.sh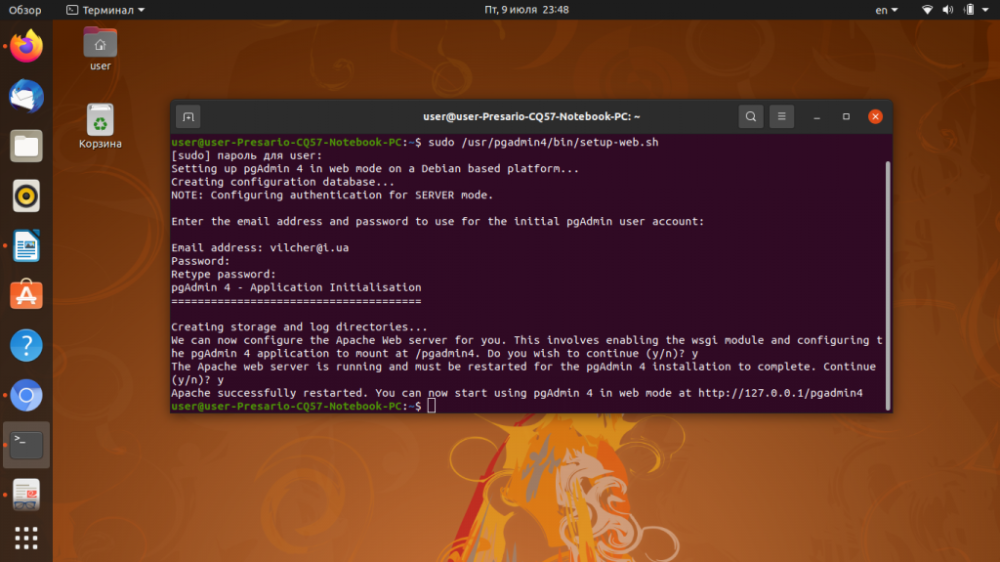
While executing the command, the user should enter a valid email address that will be used as a login and password to access the web-interface. When the command is finished, type in the address bar of the browser:
http://127.0.0.1/pgadmin4
This completes the installation of PgAdmin4 Ubuntu 20.04. Now you can move on to connecting to the database server.
Making a connection to POSTGRESQL
To connect to PostgreSQL you need to add the server to the program. To do this on the main window of pgAdmin4 there is a shortcut Add a new server. Click on it. In the opened window, on the first tab General, in the Name field, set the name of the database server.
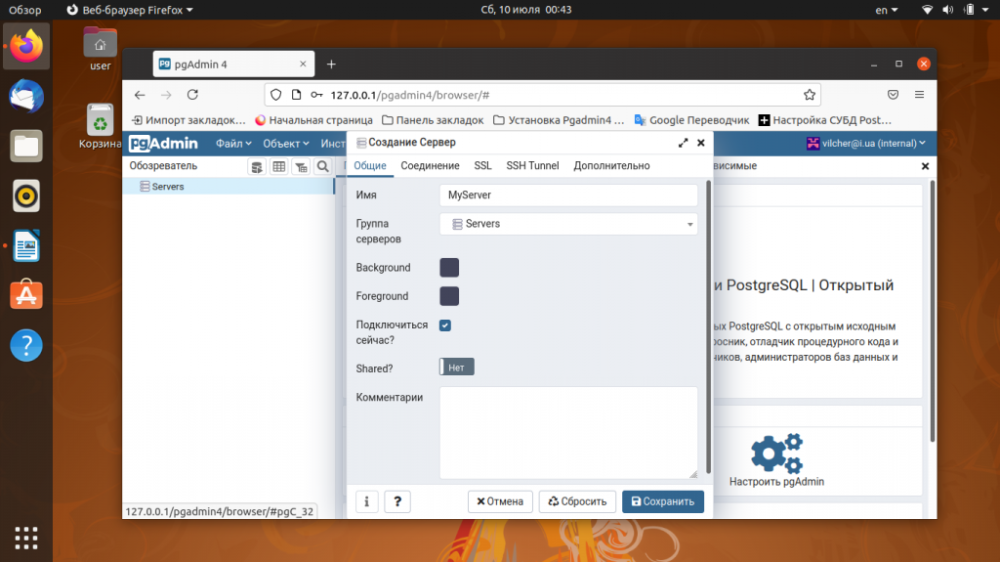
On the Connection tab, fill in the fields:
- Server name/address - if the server is installed on a local computer type localhost.
- Service database - the default database.
- User name - database user name, you can use postgres.
- Password - the password of the database user.
In order to avoid the need to constantly enter the password, check the box next to the line Save password? Then to finish creating the server click the Save button.
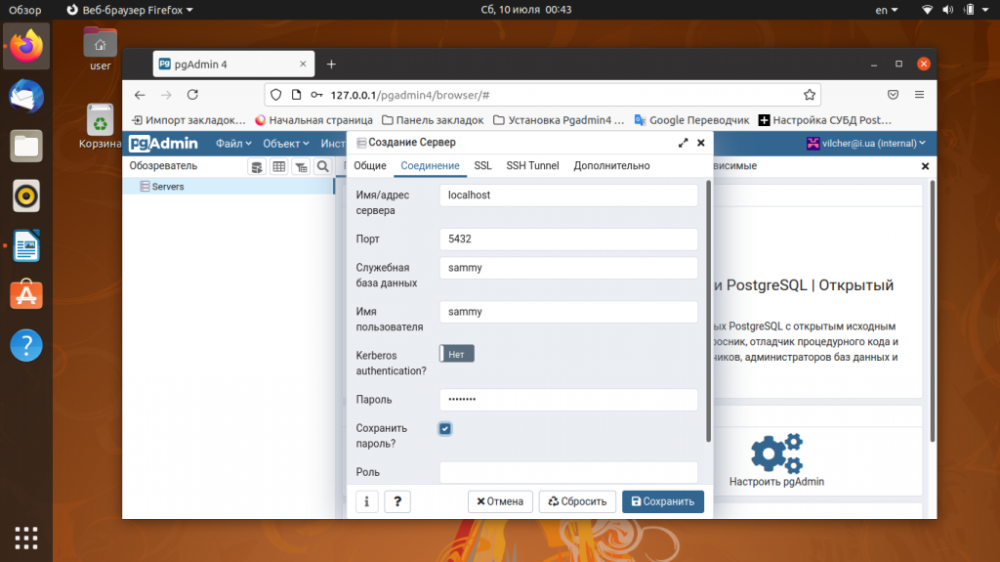
Now the databases hosted on this server will appear in the list.
After reading the instructions, you have learned how to install Pgadmin Ubuntu 20.04, how to configure this platform, launch the web interface, and connect to PostgreSQL.


