-
United Kingdom+44 (20) 4577-20-00
-
USA+1 (929) 431-18-18
-
Israel+972 (55) 507-70-81
-
Brazil+55 (61) 3772-18-88
-
Canada+1 (416) 850-13-33
-
Czech Republic+420 (736) 353-668
-
Estonia+372 (53) 683-380
-
Greece+30 (800) 000-02-04
-
Ireland+353 (1) 699-43-88
-
Iceland+354 (53) 952-99
-
Lithuania+370 (700) 660-08
-
Netherlands+31 (970) 1027-77-87
-
Portugal+351 (800) 180-09-04
-
Romania+40 (376) 300-641
-
Sweden+46 (79) 008-11-99
-
Slovakia+421 (2) 333-004-23
-
Switzerland+41 (22) 508-77-76
-
Moldova+373 (699) 33-1-22
 English
How to broadcast your videos on YouTube using VPS
- Main
- Knowledge base
- How to broadcast your videos on YouTube using VPS
How do you make sure that it is a video broadcast? It should be 24/7, flexible, as autonomous as possible, and not depend on a computer in any way. This is what we will talk about next.
Step 1 - choosing a server
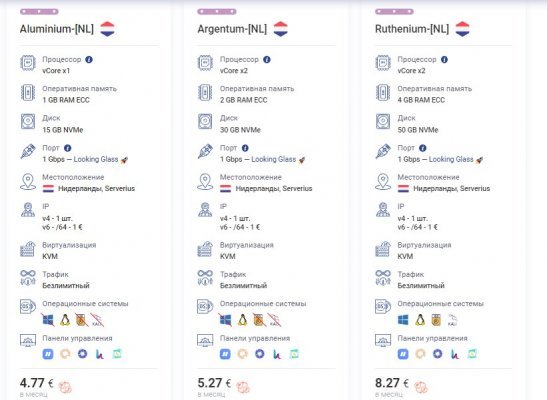
The ideal solution is to rent a virtual server. You can choose VPS/VDS from the range of offered tariffs on our website. The prices are democratic. The quality is high.
Step 2 - server configuration
After creating a server, the first thing you need to do is to connect to it via SSH. You can use the Secure Shell App, which runs in Google Chrome. After that, you need to change the hostname, configure time synchronization, update the system, configure iptables, and perform a few other actions. While these steps are not required, I found it interesting to set up the server and get the satisfaction of successfully completing the tasks.
There are a few specific steps that need to be followed:
- Connect the
EPELrepository. - Install an FTP server
(vsftp). - Install
ffmpeg.
ffmpeg is a free and open source set of libraries that allows you to record, convert, and transfer digital audio and video recordings in a variety of formats.
Using ffmpeg, you can extract sound from a video, cut a video fragment without transcoding, convert from one format to another, and many other actions. For example, a file can be converted to a stream and redirected to YouTube.
You need to follow some specific steps and use the appropriate tools to set up the server to stream and convert the video.
Step 3 - Setting up the broadcast
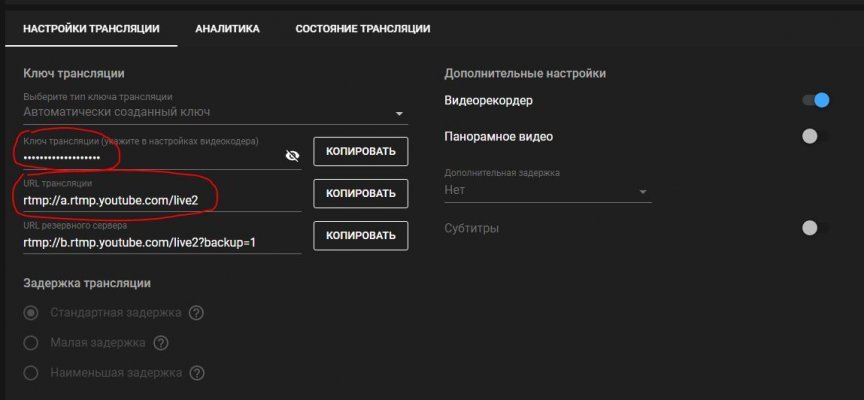
Next, let's create a YouTube broadcast, for this we will need a broadcast link and key that we will need to use in the broadcast setup step. It's easiest to quickly find them on the YouTube page where the broadcast is being created.
Next, we need to upload the video files we want to broadcast to the server. If you have a more convenient way of uploading files, you don't need to set up an FTP server.
To start the broadcast, we need to run ffmpeg with a few attributes. Creating a short command for this purpose was quite a complicated process, but if done correctly, YouTube should successfully detect the stream being streamed.
Once YouTube has detected the stream, click the "Start Broadcast" button in the control panel and the broadcast will be successfully started.
Step 4 - Offline
The above script will help you create a 24/7 broadcast from video files. It is important to run the process in the background using the nohup bash command. Now you can customize your broadcast and let it run regardless of your presence. Don't forget that the key to your broadcast must be spelled out in the appropriate command.
Command 1... (start broadcast of lecture1.mp4 file)
Command 2... (start broadcasting lecture2.mp4)
Command 3... (start broadcasting lecture3.mp4) bash start.sh
Script version:
ffmpeg -re -i lecture1.mp4 -f flv rtmp://a.rtmp.youtube.com/live2/%BROADCAST_KEY%ffmpeg -re -i lecture2.mp4 -f flv rtmp://a.rtmp.youtube.com/live2/%BROADCAST_KEY%ffmpeg -re -i lecture3.mp4 -f flv rtmp://a.rtmp.youtube.com/live2/%BROADCAST_KEY% nohup bash start.sh $We wish you a successful broadcast!
Step 5 - fine-tuning ffmpeg
Let's do some fine-tuning for better broadcasting
ffmpeg -re -i lecture1.mp4 -vf "drawtext=text='Lecture 1':x=(w-text_w)/2:y=(h-text_h)/2:fontcolor=white:fontsize=30:box=1:boxcolor=black@0.5" -f flv rtmp://a.rtmp.youtube.com/live2/%BROADCAST_KEY%In this example, the text "Lecture 1" will be superimposed on the center of the video. The font size is 30 pixels. The background of the text will be transparent with a black stroke.
You will need to change the text in the command for each lecture. And to automate this process and get rid of manual input, you will need to create a .sh file with a list of all the lectures and their names. Like this:
lecture1.mp4 Lecture 1 lecture2.mp4 Lecture 2 lecture3.mp4 Lecture 3
Next, we need to write a script that will read this file and automatically add text to the video.
Here is such a script:
while read line; do
    file=$(echo $line | cut -d' ' -f1)
    text=$(echo $line | cut -d' ' -f2-)
    ffmpeg -re -i $file -vf "drawtext=text='$text':x=(w-text_w)/2:y=(h-text_h)/2:fontcolor=white:fontsize=30:box=1:boxcolor=black@0.5" -f flv rtmp://a.rtmp.youtube.com/live2/%BROADCAST_KEY%
done < lectures.txt
In this script, we read each line from the lectures .txt file, highlighting the file name and the lecture title. Then we use the ffmpeg command to add the text to the video.
So now we have a broadcast with lecture titles, which will make it more convenient for viewers and make it easier for them to find the content they need.


