-
 United Kingdom+44 (20) 4577-20-00
 -
 USA+1 (929) 431-18-18
 -
 Israel+972 (55) 507-70-81
 -
 Brazil+55 (61) 3772-18-88
 -
 Canada+1 (416) 850-13-33
 -
 Czech Republic+420 (736) 353-668
 -
 Estonia+372 (53) 683-380
 -
 Greece+30 (800) 000-02-04
 -
 Ireland+353 (1) 699-43-88
 -
 Iceland+354 (53) 952-99
 -
 Lithuania+370 (700) 660-08
 -
 Netherlands+31 (970) 1027-77-87
 -
 Portugal+351 (800) 180-09-04
 -
 Romania+40 (376) 300-641
 -
 Sweden+46 (79) 008-11-99
 -
 Slovakia+421 (2) 333-004-23
 -
 Switzerland+41 (22) 508-77-76
 -
 Moldova+373 (699) 33-1-22
English
How to use Proxy from PQ.Hosting
- Main
- Knowledge base
- How to use Proxy from PQ.Hosting
In this article we will show you how to use a proxy from PQ.Hosting. We will show you the complete process of use, from the purchase itself to accessing blocked resources. In the article you will see examples of connecting proxy on different OS: Windows, macOS and Linux.
Buying a Proxy
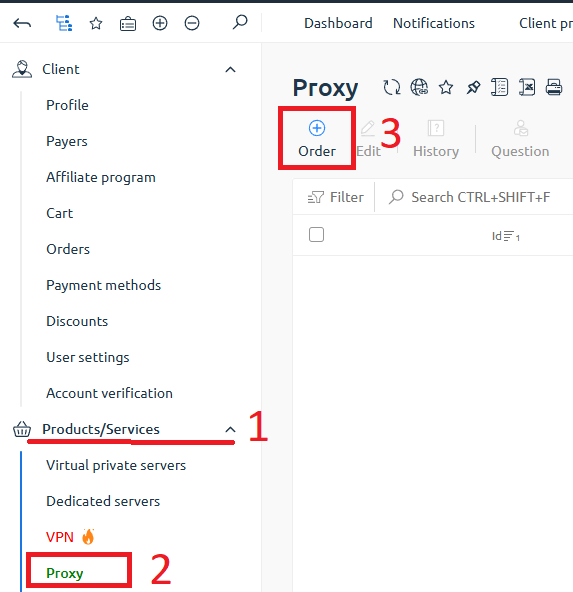
To make a proxy purchase, go to billing.
Under "Products and Services" - select "Proxy".
Click "Order."
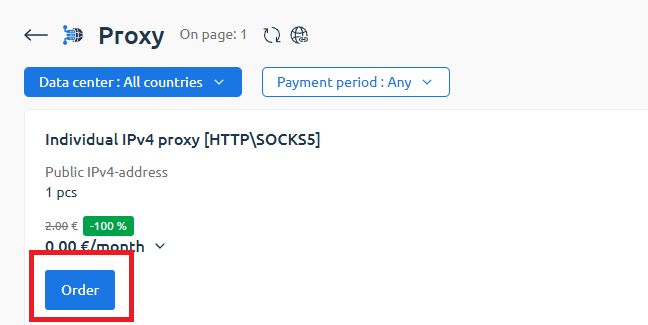
A window will open with product selection, click "Order".
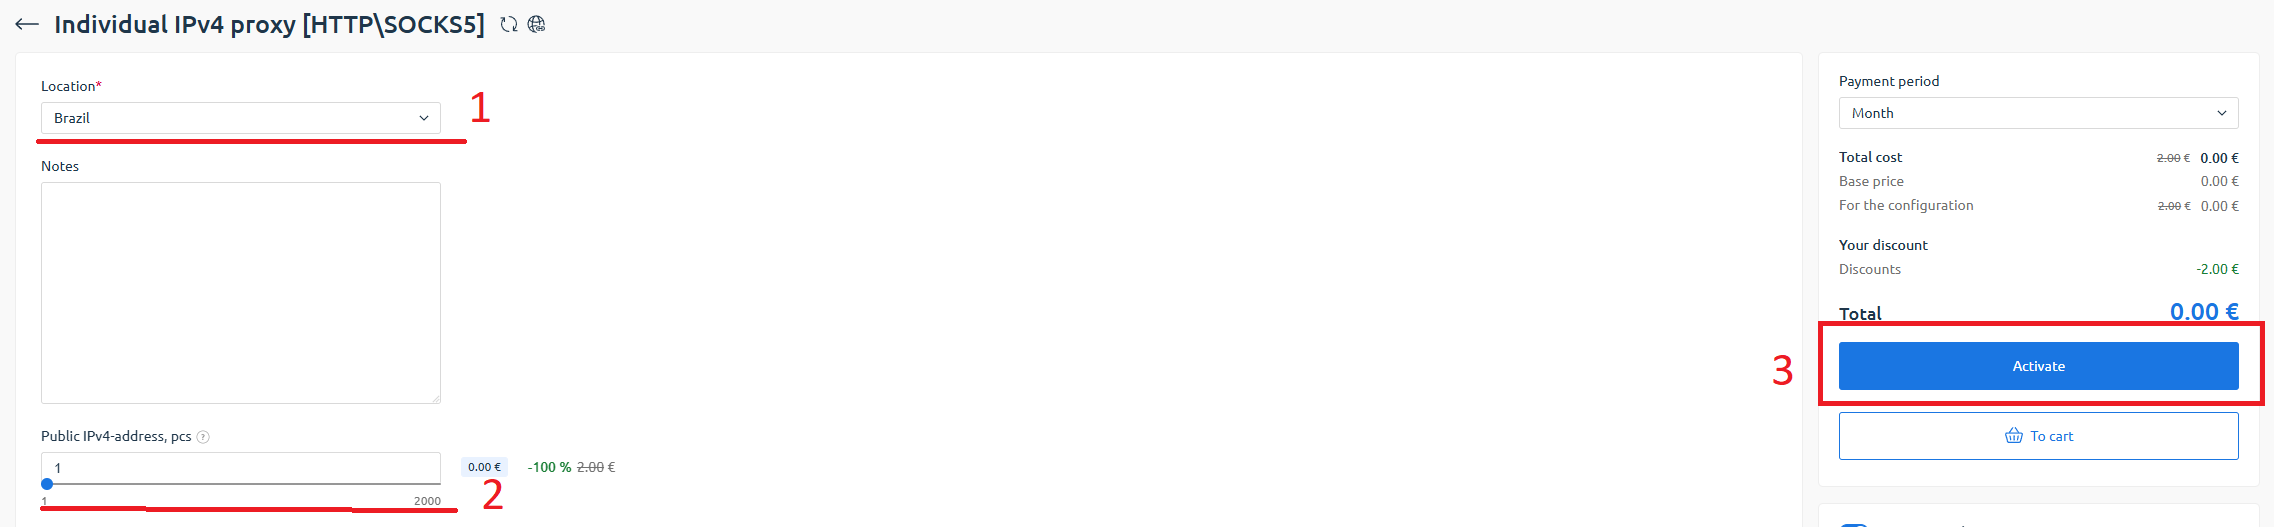
Select the country where the proxy server will be located, the number of required proxies and click on "Activate".
Next, select the proxy you purchased and click on "Instructions".
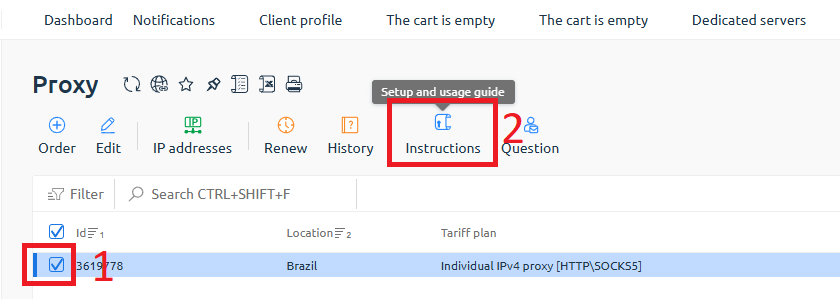
A window will open where you can download a text document with the proxy you purchased.
Note in which format the data will be provided in the text document.
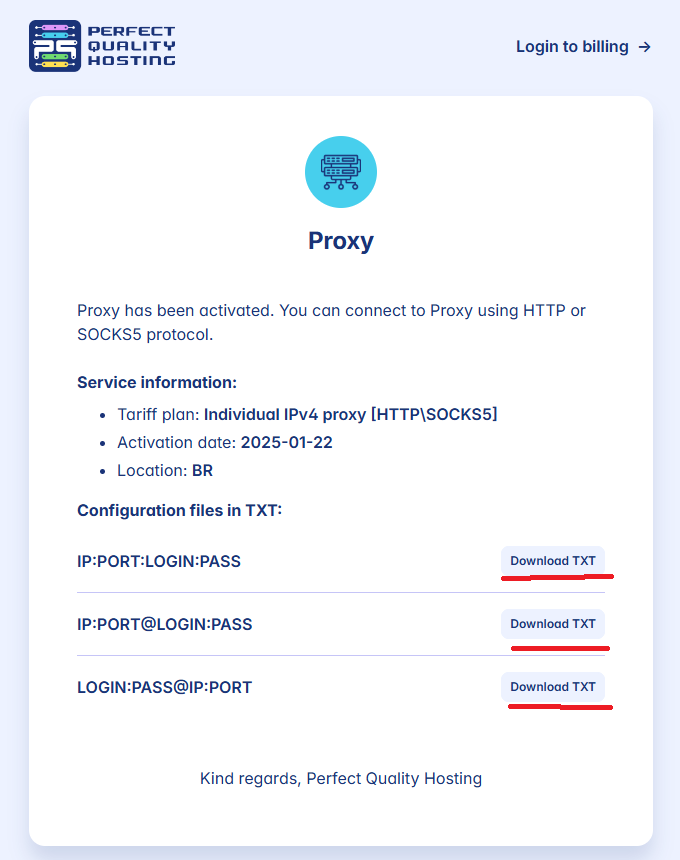
Once you have purchased and downloaded a text document from your proxy - it needs to be connected.
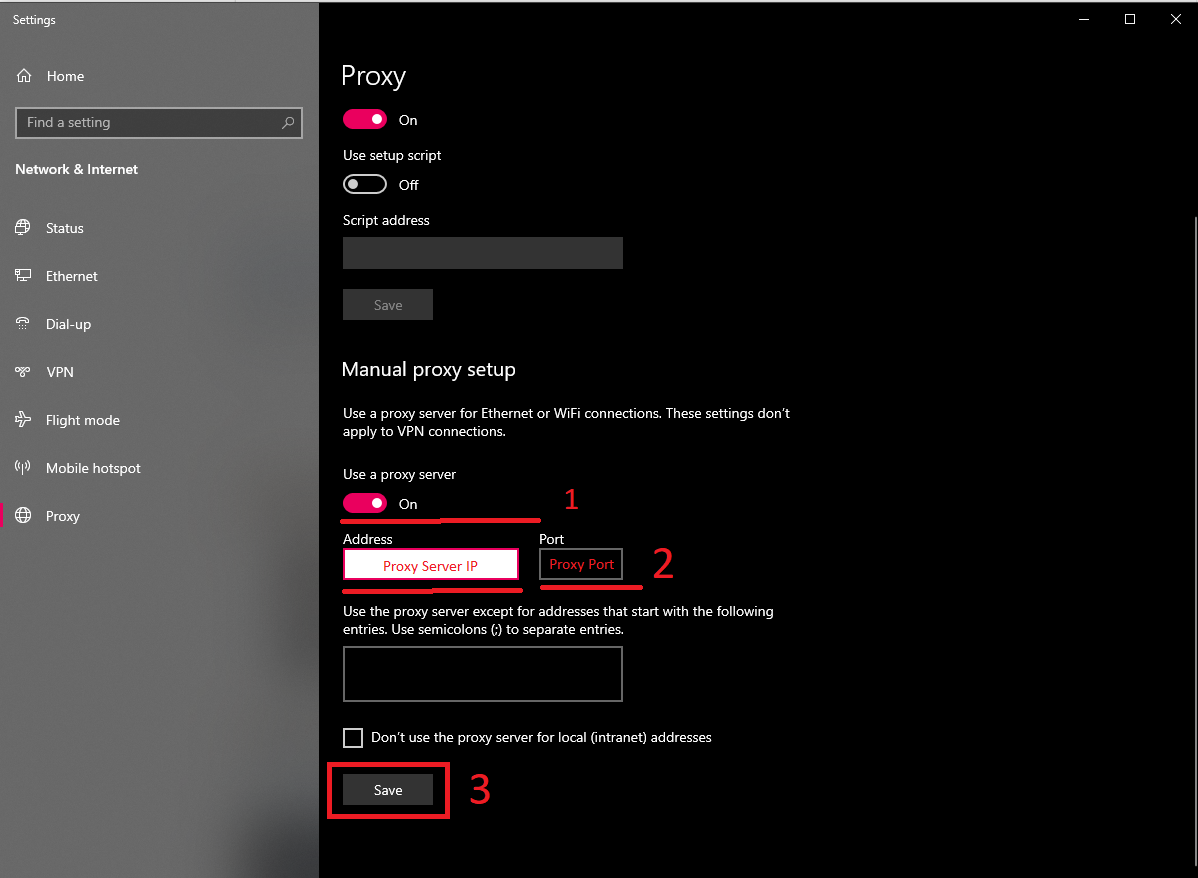
Proxy Connection on Windows
- Type "Proxy" in the Windows search bar.

- Click on "Proxy Settings".

- Click on "Use Proxy Server."
- Enter the IP Address and Port of the proxy server.
- Click "Save."
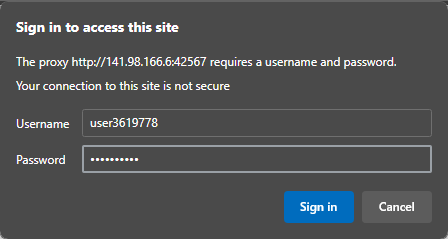
When we surf the browser, we will be asked to enter the login and password of the proxy server:
Proxy Connection on macOS
The fastest way to connect a Proxy is to use the search bar.
Tear it off and the search field write "Proxie", then - go to the settings:

Next, select the type of proxy and fill in the fields: Server, Port, Username and Password. (This is the same data that is in the txt document we downloaded.
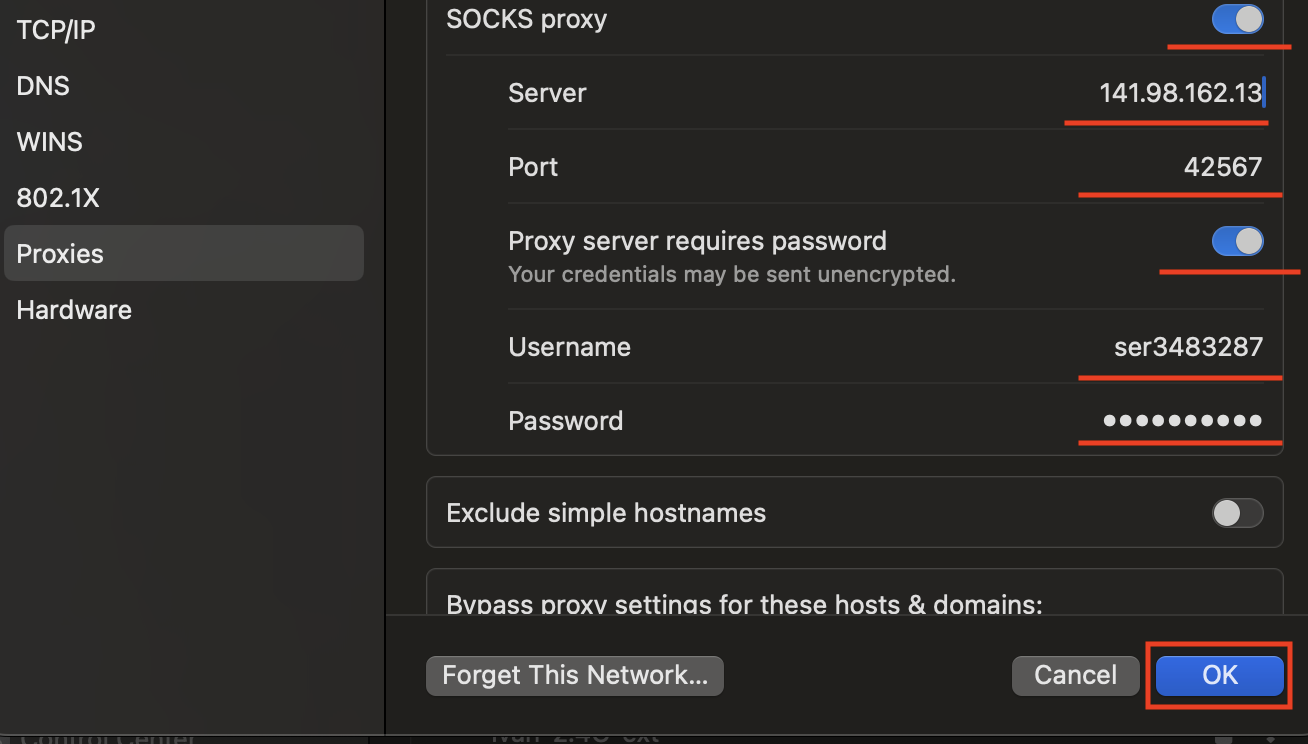
Click on "ok" and it's done!
Connecting a proxy on Linux
Configuring via Network Manager (GUI)
- Open the system settings and go to the Network section.
- Select the connection you are using (Wi-Fi or Ethernet) and click on "Configure".
- Go to the Proxy tab.
- Select "Manual" in the proxy settings.
- Specify proxy settings for SOCKS5:
- In the Host/Address field, enter the IP address of the proxy server.
- In the Port field, enter the port number.
- Click Apply to save the settings.
- Check the connection to make sure the proxy is working correctly.
Configuring a proxy for the system level
- Open a terminal and run the following commands to add system environment variables:
export http_proxy="socks5://<proxy_ip>:<proxy_port>"
export https_proxy="socks5://<proxy_ip>:<proxy_port>"
export ftp_proxy="socks5://<proxy_ip>:<proxy_port>"
export no_proxy="localhost,127.0.0.1,::1"
Replace <
proxy_ip> and <proxy_port> with the IP address and port of your SOCKS5 proxy. - Apply the changes to the current session:
source ~/.bashrc - Permanent setting (for all sessions):
Open the environment configuration file:
nano ~/.bashrcAdd lines with SOCKS5 proxy settings there:
export http_proxy="socks5://<proxy_ip>:<proxy_port>"
export https_proxy="socks5://<proxy_ip>:<proxy_port>"
export ftp_proxy="socks5://<proxy_ip>:<proxy_port>"
export no_proxy="localhost,127.0.0.1,::1"
Save your changes and reload the file:
source ~/.bashrc - Work verification:
Use the curl command to test the connection:
curl ifconfig.meOther articles of the section


