-
United Kingdom+44 (20) 4577-20-00
-
USA+1 (929) 431-18-18
-
Israel+972 (55) 507-70-81
-
Brazil+55 (61) 3772-18-88
-
Canada+1 (416) 850-13-33
-
Czech Republic+420 (736) 353-668
-
Estonia+372 (53) 683-380
-
Greece+30 (800) 000-02-04
-
Ireland+353 (1) 699-43-88
-
Iceland+354 (53) 952-99
-
Lithuania+370 (700) 660-08
-
Netherlands+31 (970) 1027-77-87
-
Portugal+351 (800) 180-09-04
-
Romania+40 (376) 300-641
-
Sweden+46 (79) 008-11-99
-
Slovakia+421 (2) 333-004-23
-
Switzerland+41 (22) 508-77-76
-
Moldova+373 (699) 33-1-22
 English
How to change user in Ubuntu
- Main
- Knowledge base
- How to change user in Ubuntu
Ubuntu is designed to work under a single user account, so you don't have to change users in the system very often. To work it is enough to enter login and password, i.e. to pass authorization, and use the system until the work is finished. If administrative privileges are needed, sudo is provided for this purpose. Nevertheless, there are still situations when you need to change the user in Ubuntu. In this article, we will talk about how to do this in the GUI and in the terminal.
How to change user in Ubuntu
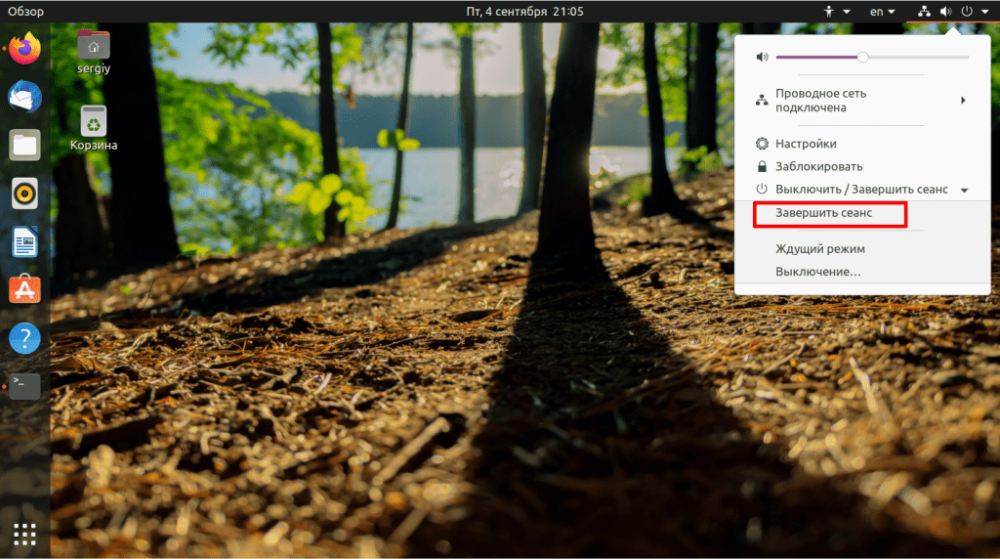
Find the shutdown icon in the bottom right corner, click on it, select "End Session" or "Change User":
Now confirm to end the session or change:

Next, a standard login window will open, where you can select a user from the list or enter their login in the input field. The user will then be back on the Ubuntu desktop.

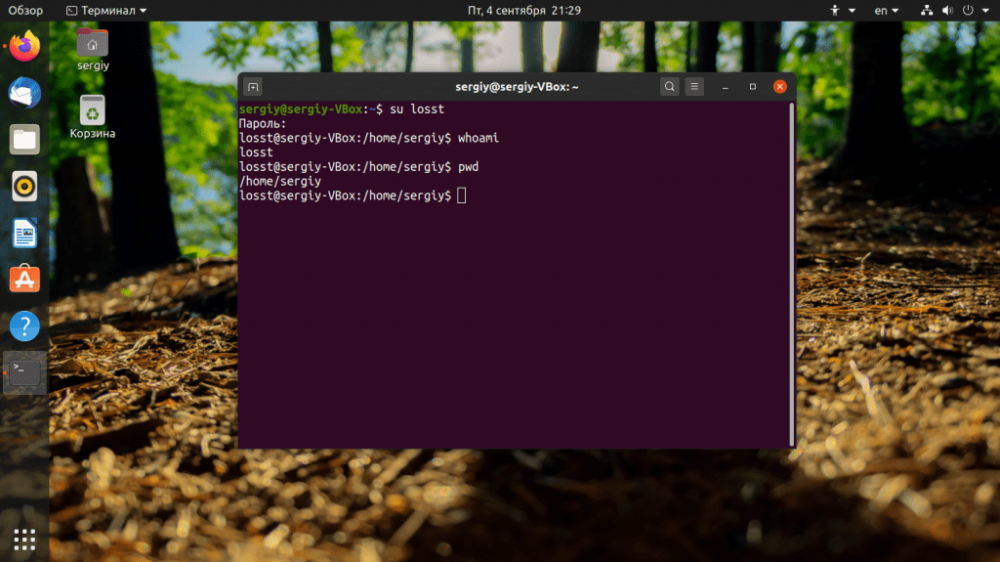
Let's talk about how the user change is performed in the terminal. To do this, you need to use the su command. For example, to change the user to losst it is enough to execute:
$ su losstThe program will ask for the password of the user losst after which it will open the command line on his behalf:

If you want the home folder path and all other environment variables for the user to be updated, use the -l or --login option. You can also just add a dash "-" instead. For example:
$ su - losst
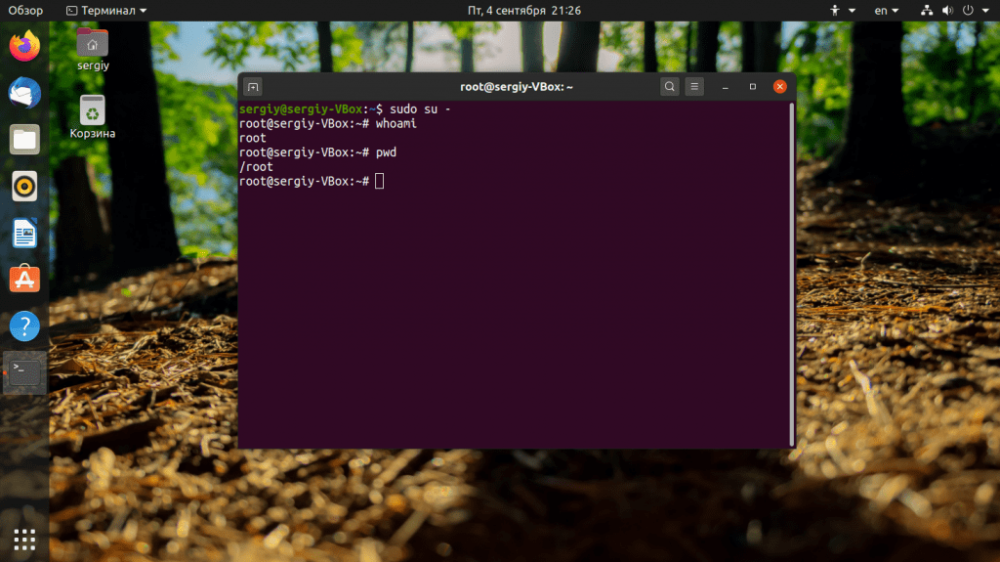
You can run the utility without parameters, then you will log in as the root user. But since the root password is not set by default, you should add sudo in front of it:
$ sudo suSometimes it is easier to use the -i option of the sudo command:
$ sudo -iIn this tutorial, we have covered how to change user in Ubuntu. Good luck!


