-
 United Kingdom+44 (20) 4577-20-00
 -
 USA+1 (929) 431-18-18
 -
 Israel+972 (55) 507-70-81
 -
 Brazil+55 (61) 3772-18-88
 -
 Canada+1 (416) 850-13-33
 -
 Czech Republic+420 (736) 353-668
 -
 Estonia+372 (53) 683-380
 -
 Greece+30 (800) 000-02-04
 -
 Ireland+353 (1) 699-43-88
 -
 Iceland+354 (53) 952-99
 -
 Lithuania+370 (700) 660-08
 -
 Netherlands+31 (970) 1027-77-87
 -
 Portugal+351 (800) 180-09-04
 -
 Romania+40 (376) 300-641
 -
 Sweden+46 (79) 008-11-99
 -
 Slovakia+421 (2) 333-004-23
 -
 Switzerland+41 (22) 508-77-76
 -
 Moldova+373 (699) 33-1-22
English
How to deploy the Trojan/VLESS VPN protocol using 3x-ui
- Main
- Knowledge base
- How to deploy the Trojan/VLESS VPN protocol using 3x-ui
Create a private VPN server in a few minutes
First, you need to prepare a server with the 3X-UI panel installed. This can be done in two ways - choose the one that suits you best.
1.1 First method
To do this, you first need to purchase a server in the desired location. In our case we will choose the basic tariff Aluminium[FR]
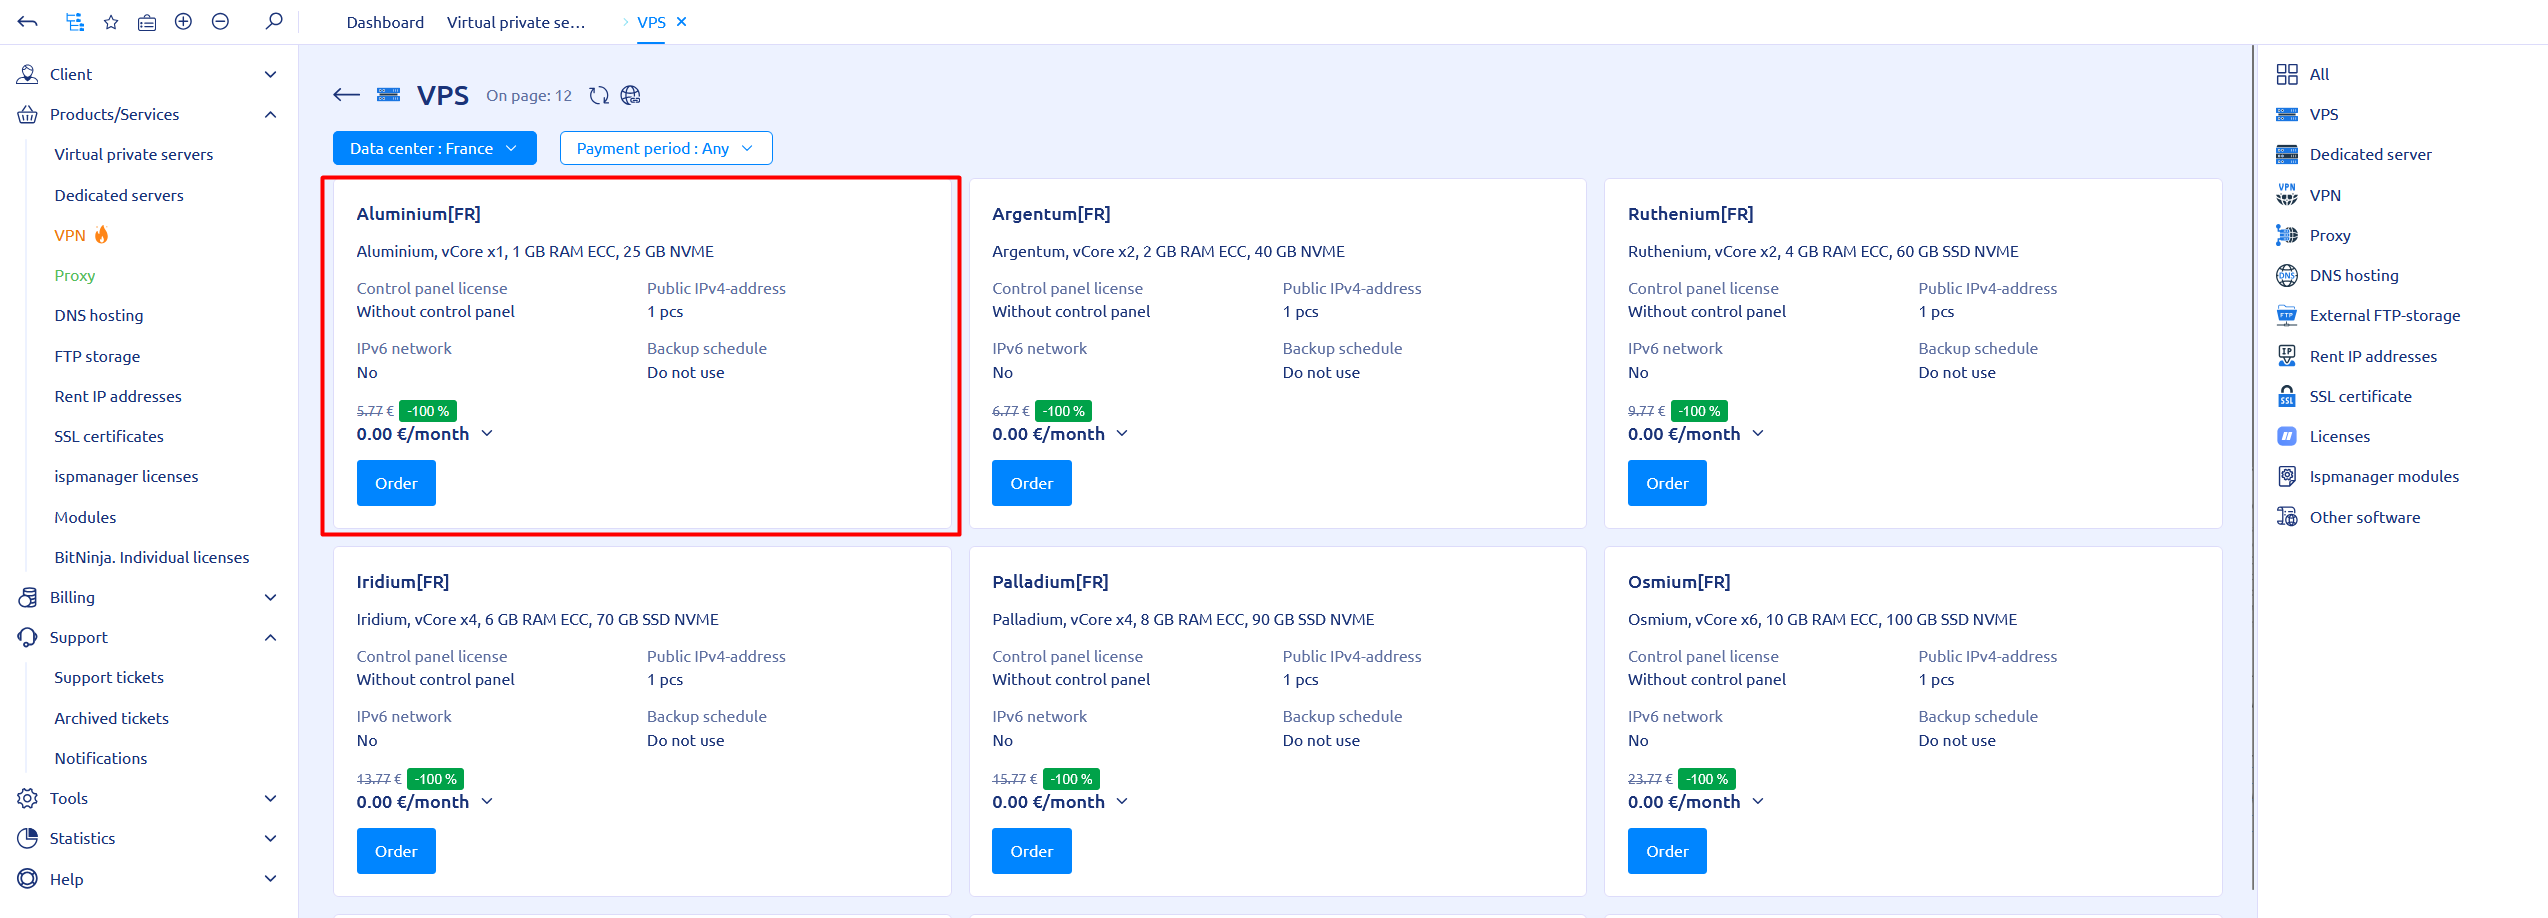
Click the "Order" button: during the ordering process we select Ubuntu 24.04 System and "PQ | X-UI" pre-installed software and click the Activate button.
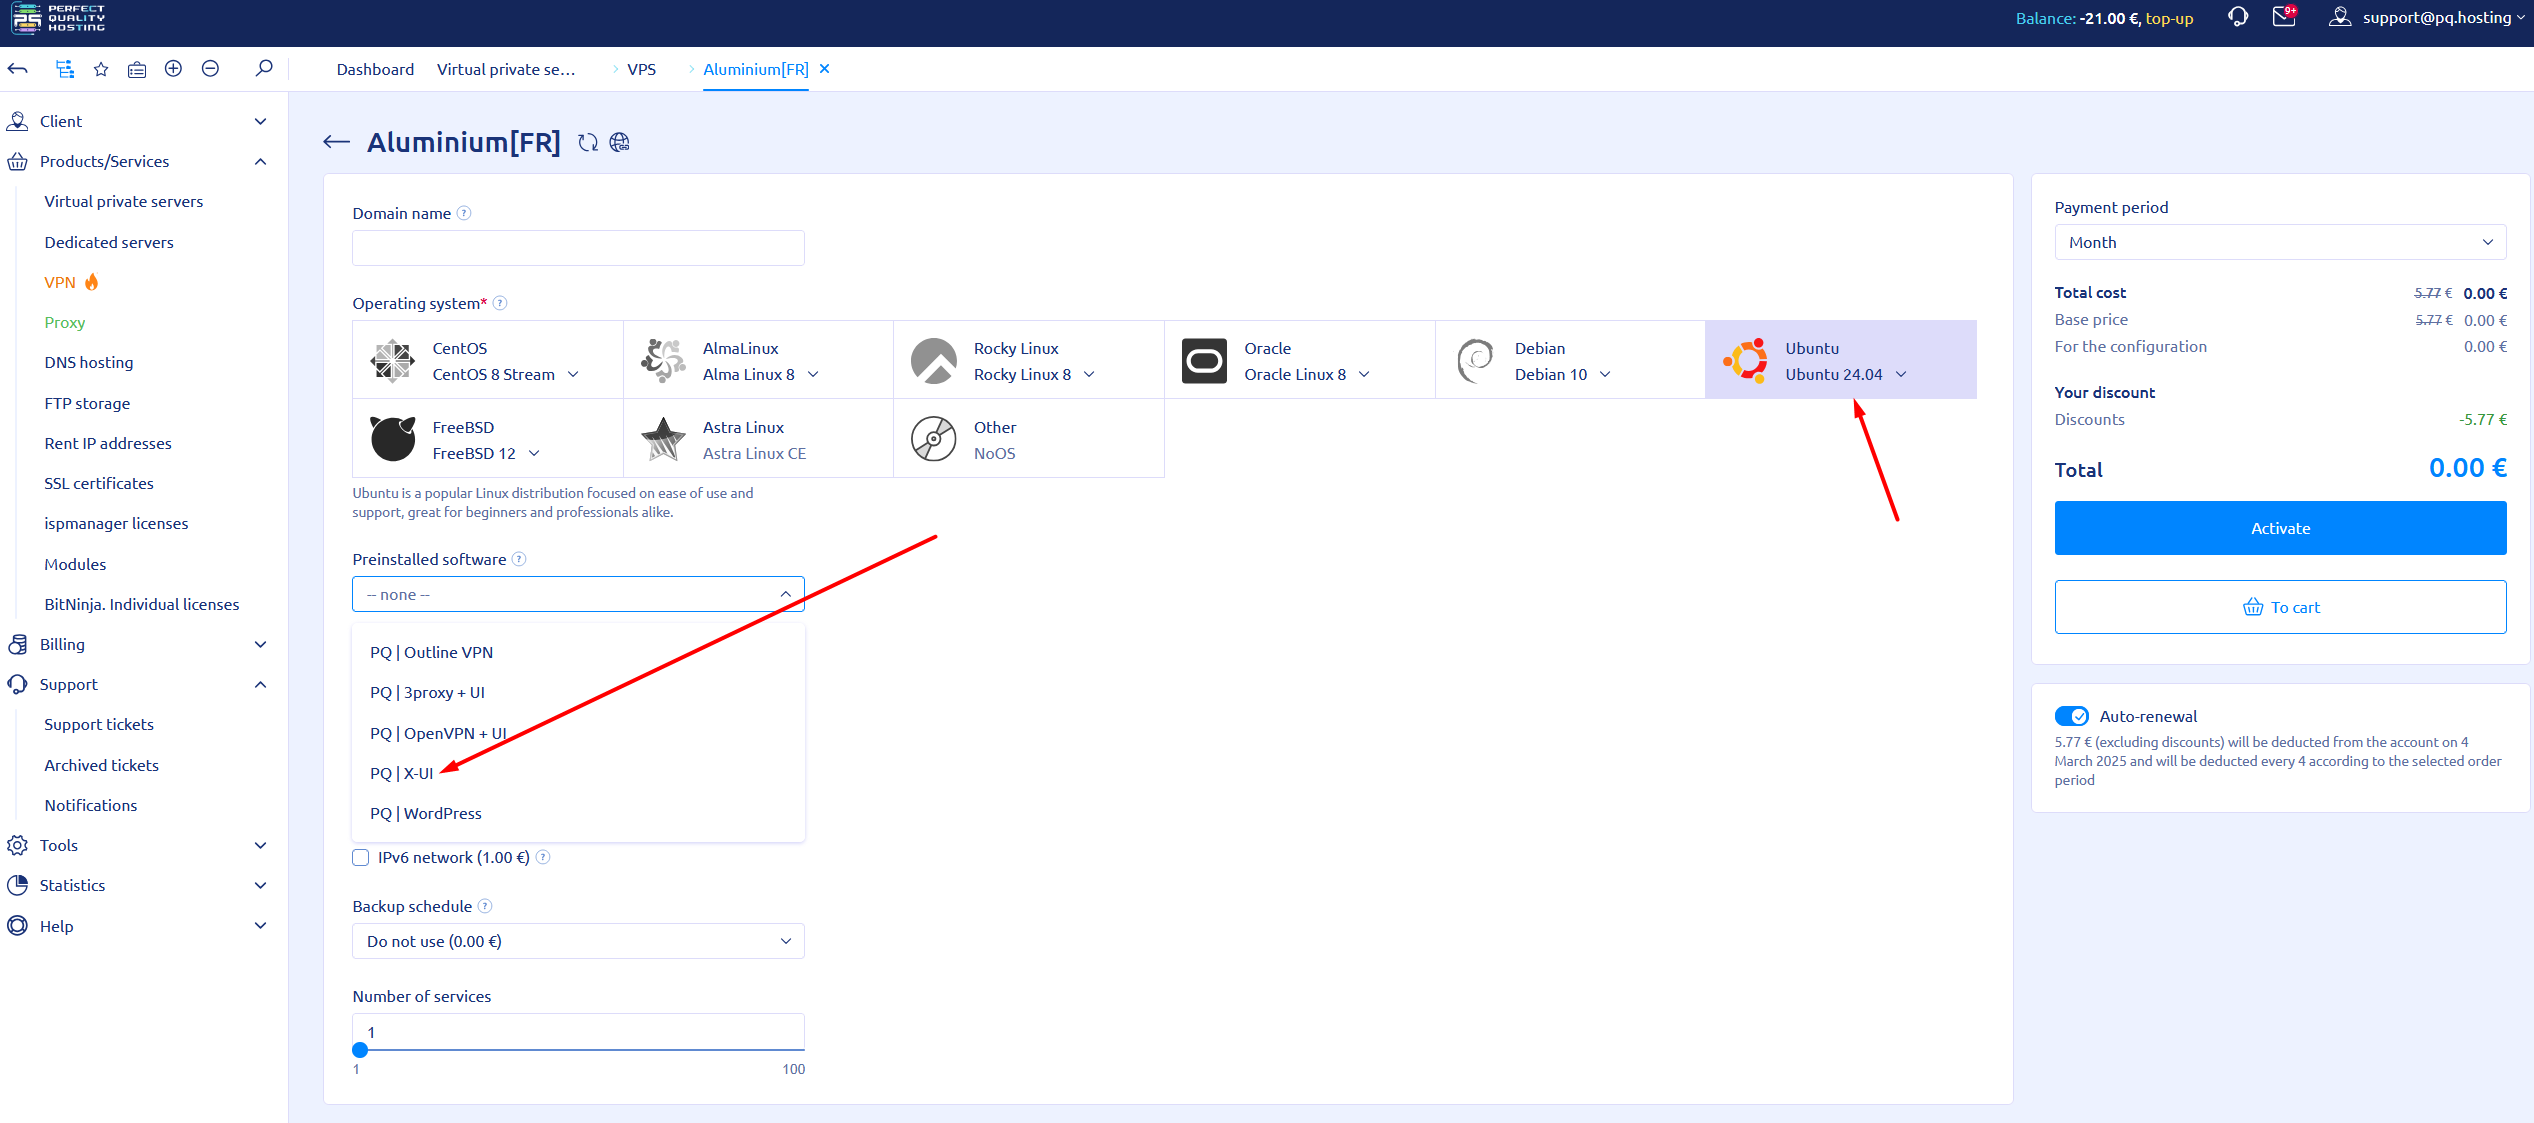 ⚡ The server will be activated within 15 minutes.
💡 Great! Now your server is ready to create a connection key. In the next section ("Logging into the 3X-UI Panel and Creating a User Key"), we will detail how to do this.
1.2 Reinstalling an existing server by installing the 3x-ui script
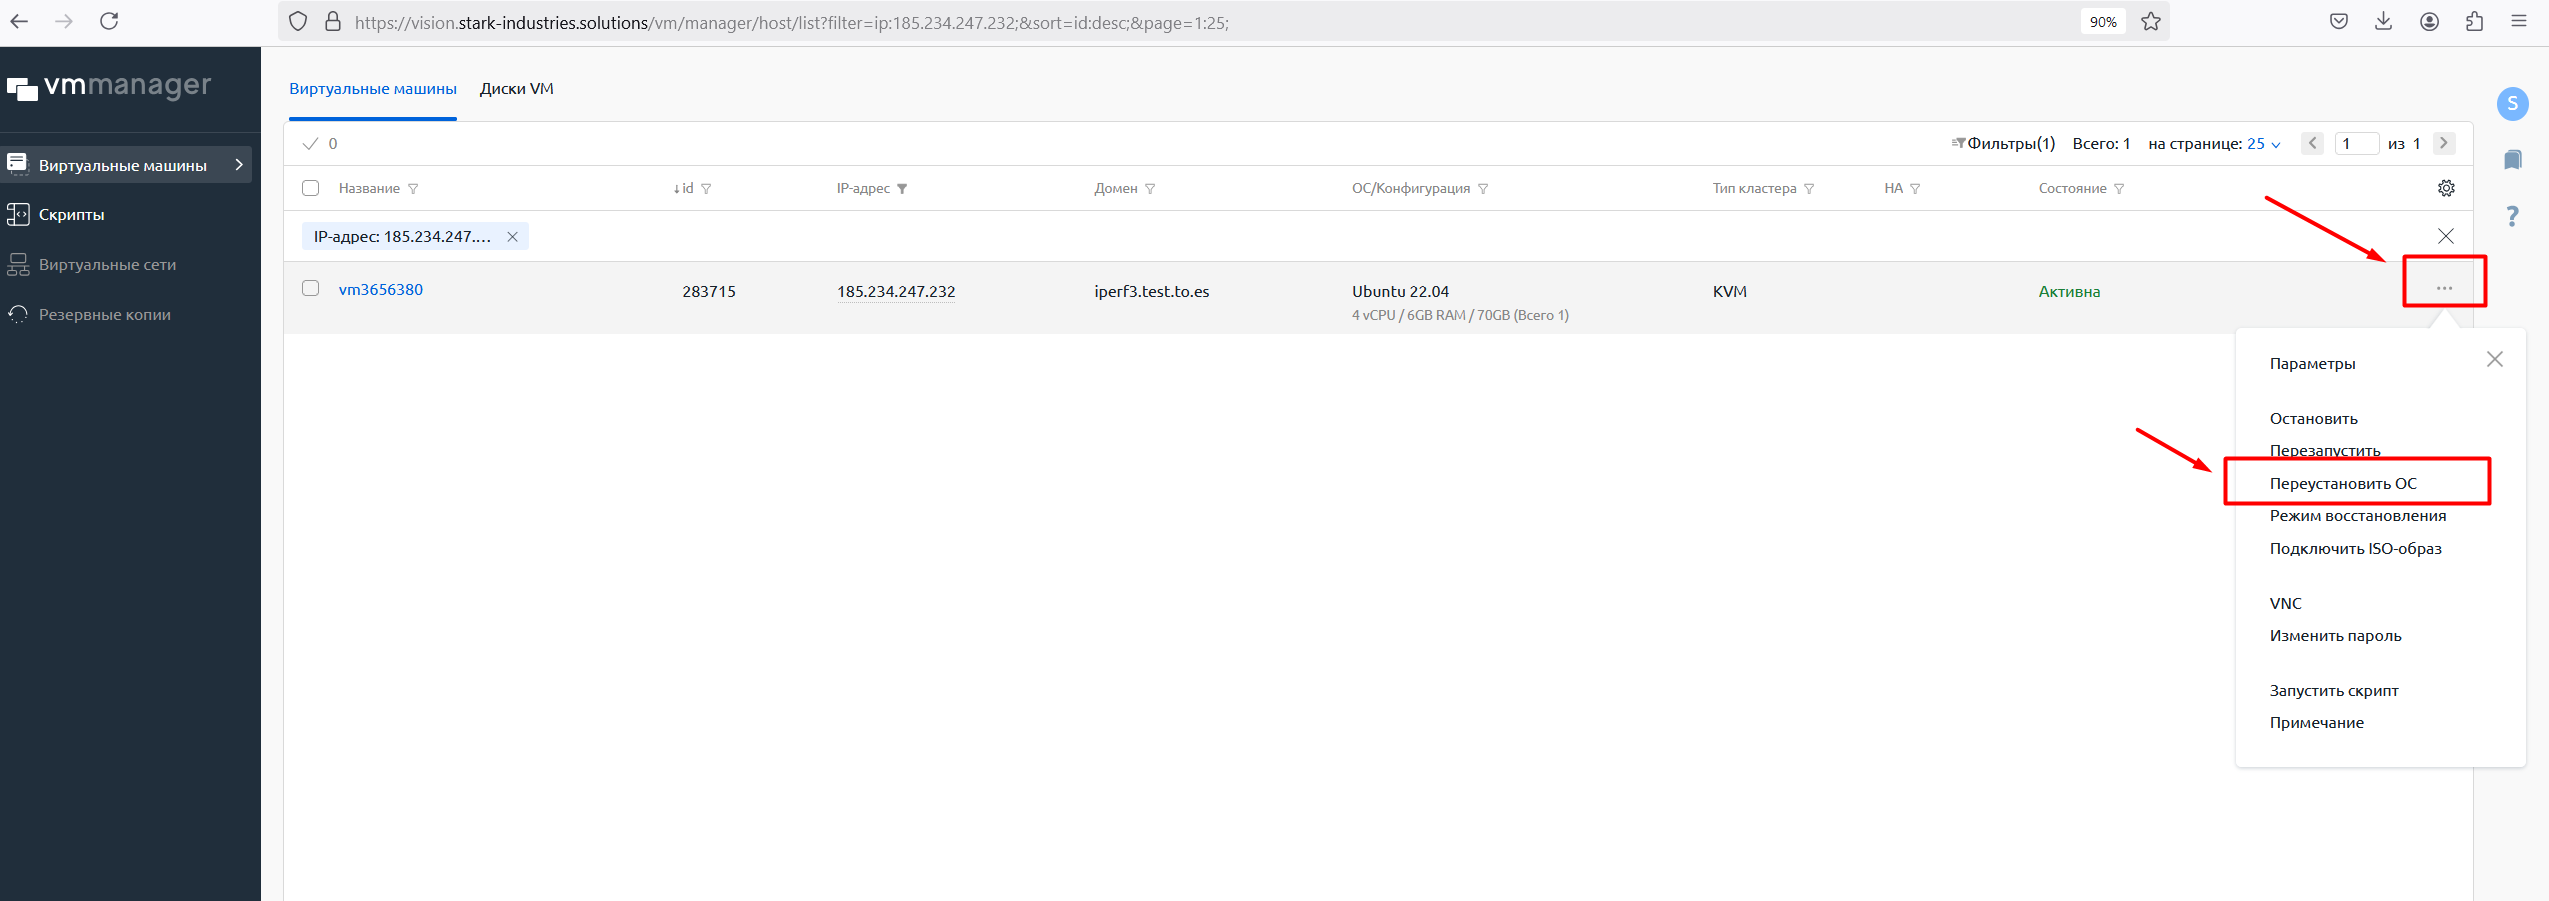
Let's go to the control panel of our server:

You will be taken to the server control panel, then click the triplet icon to the right of the existing server, select reinstall:
- Insert a new root password for your server or leave the one generated by the system
- Choose OS Ubuntu 24.04.
- Click on the Select script button and choose PQ | X-UI from the list, not to be confused with PQ | 3proxy + UI (the Parameters fields for the PQ | X-UI script can be left blank).
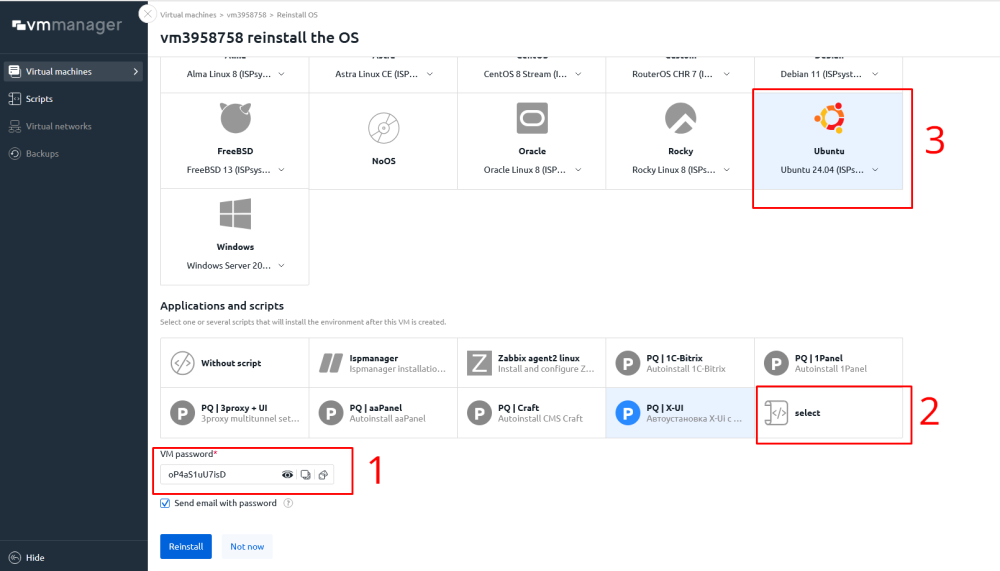
Click the "Reinstall" button
💡 Great! The server will now be reinstalled, after which it will be ready to create a configuration for connection. For detailed instructions on how to create the configuration, please refer to the section "Logging into the 3X-UI panel and creating a user key".
Logging into the 3X-UI panel and creating a user key
Connect to the server via ssh, login - root password from your email or the password you specified (in case of OS reinstallation).
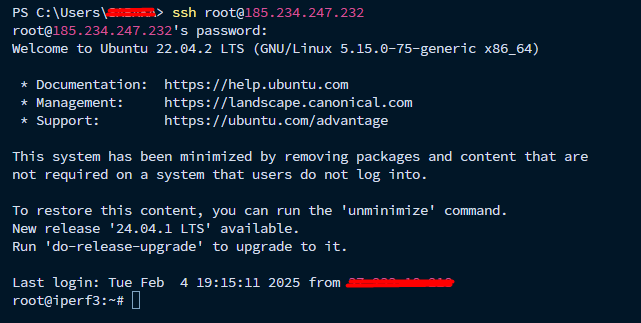
Enter this command on your server: x-ui
A menu with x-ui panel settings will open for you
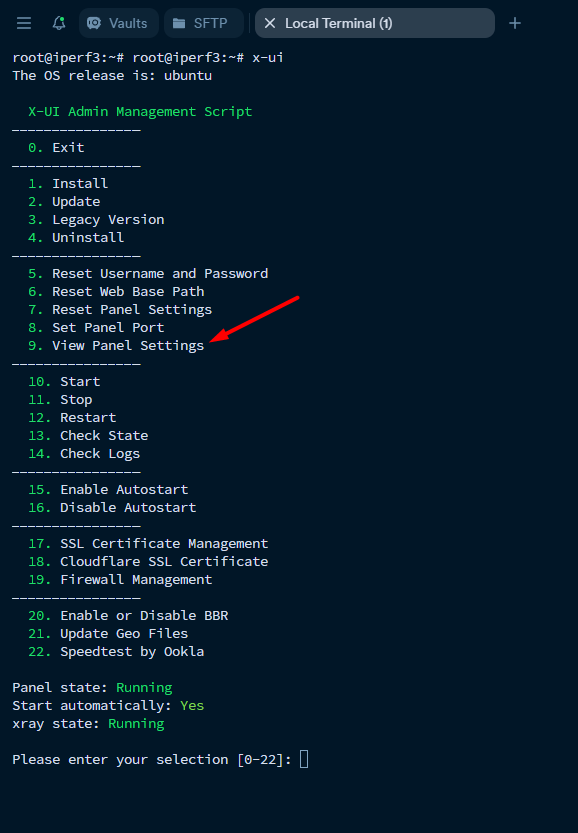 Enter the number 9 in the terminal and you will have access to the x-ui web control panel. You can copy this data to a separate file on your device so you don't have to go to the server every time for access.
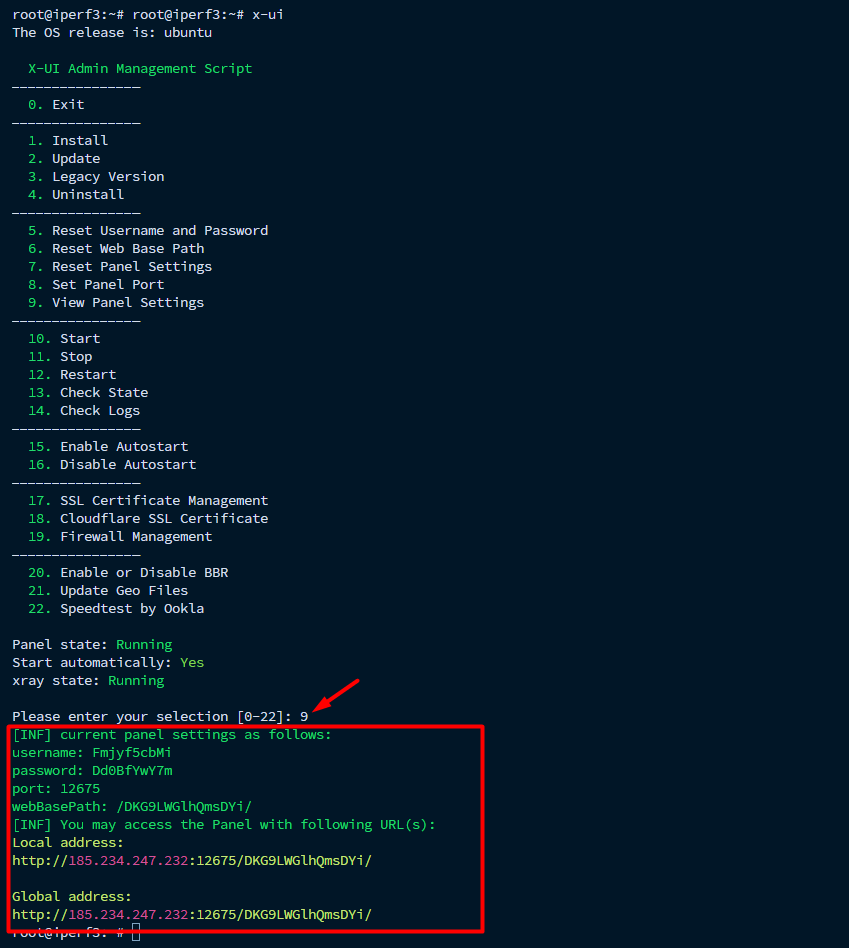 Copy the link and open it in your browser to get to the 3x-ui web panel login page. Specify the data from the file and login.
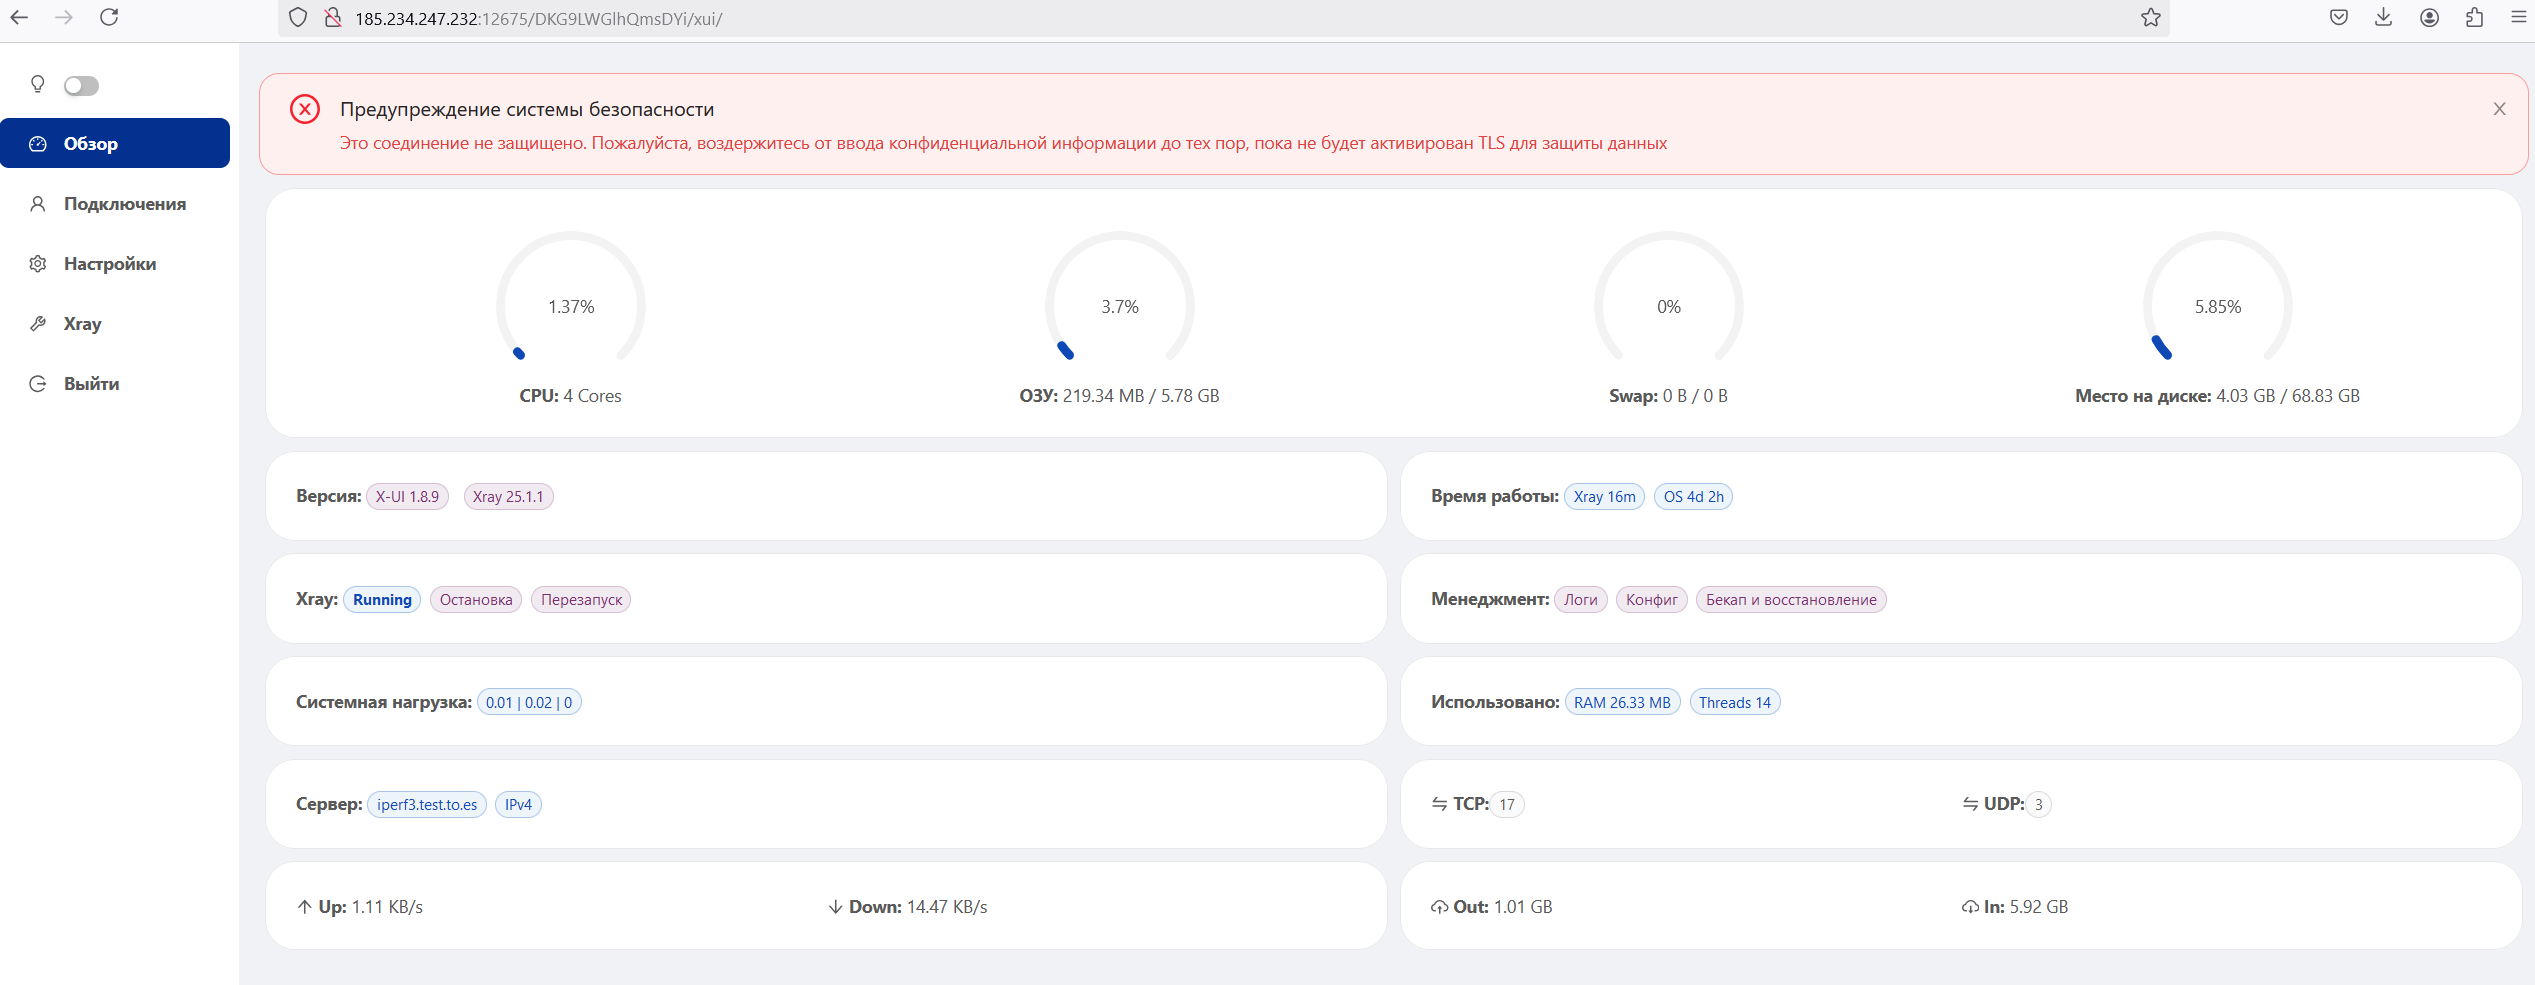
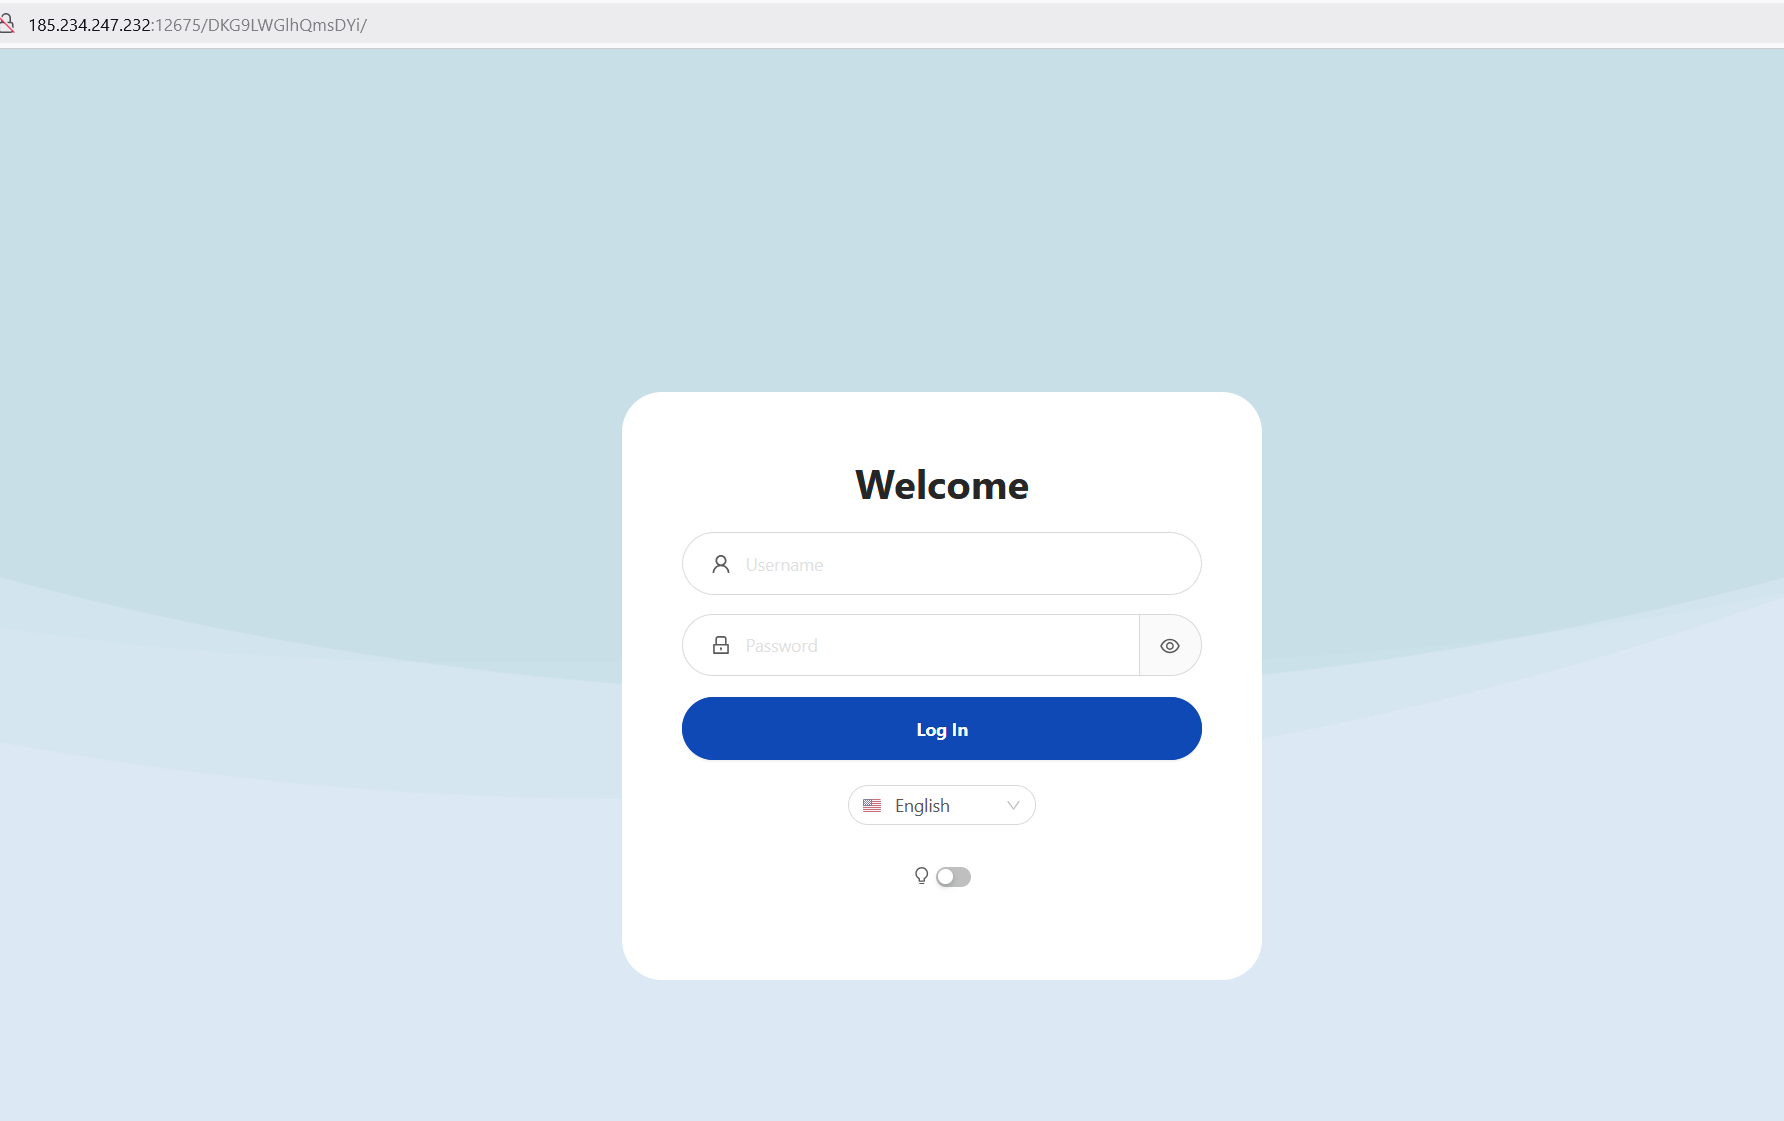 After login we will see the main page of the panel:
 Go to the Connections tab, then click on "Add Connection"
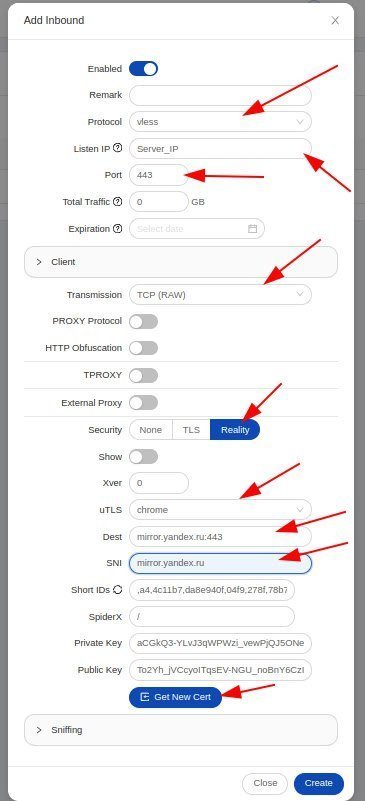
 Let's configure Vless connection:
Protocol: Vless
It is necessary to set the port to 443 or any other free port of your server
Protocol choose TCP
Security Reality uTLS Chrome Dest (Target) specify mirror.yandex.ru:443 SNI specify mirror.yandex.ru
Click on the GET NEW CERT button to generate keys
Add IP in the field "Listen IP".
After making changes, it is necessary to click on the "Create" button
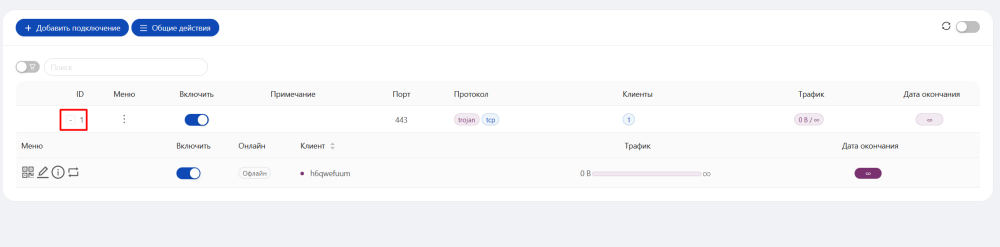
The connection is created, let's open the list of users.
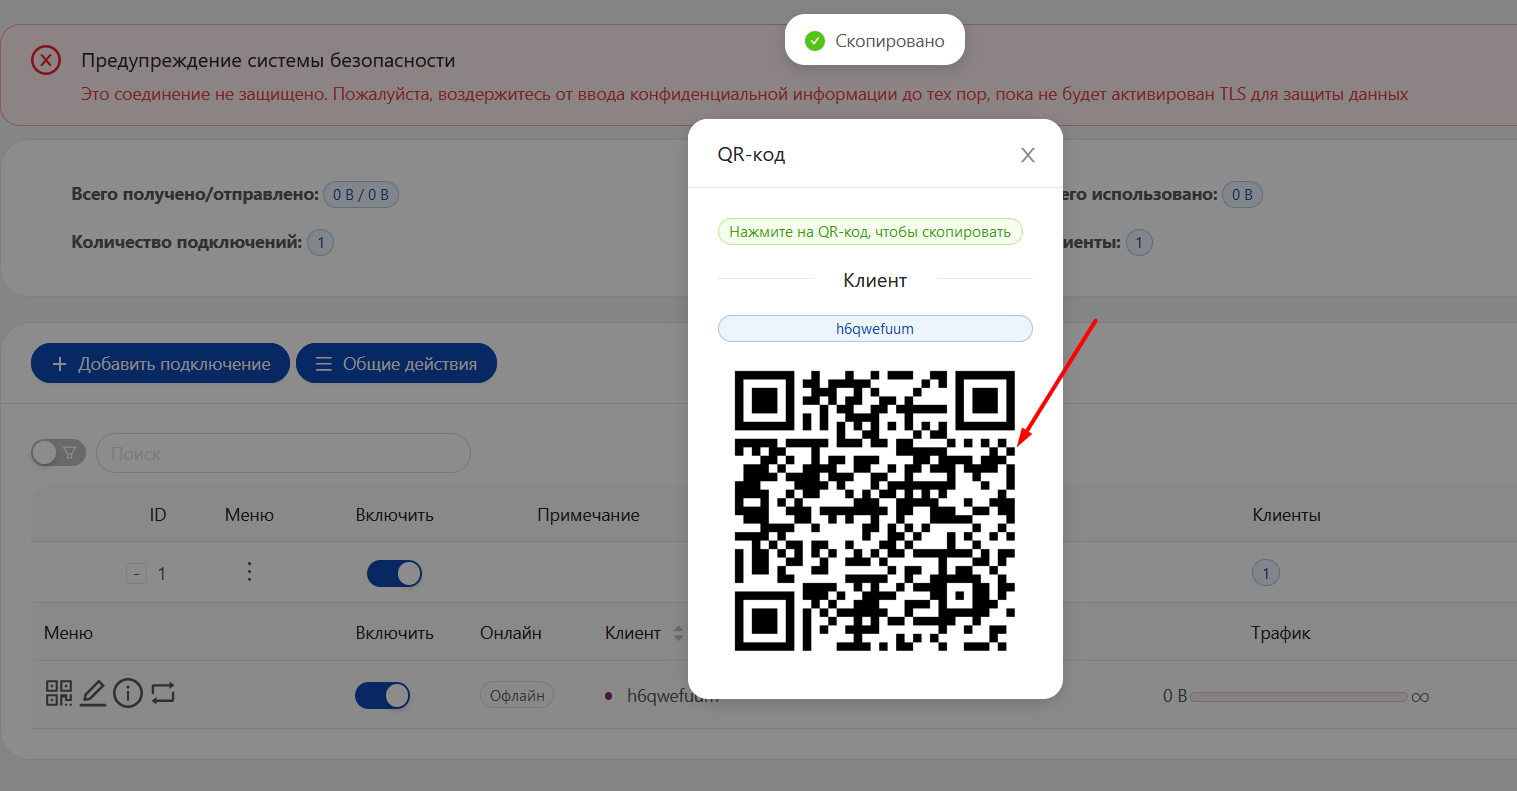
 To copy the key, click on the QR code icon and it will be copied.
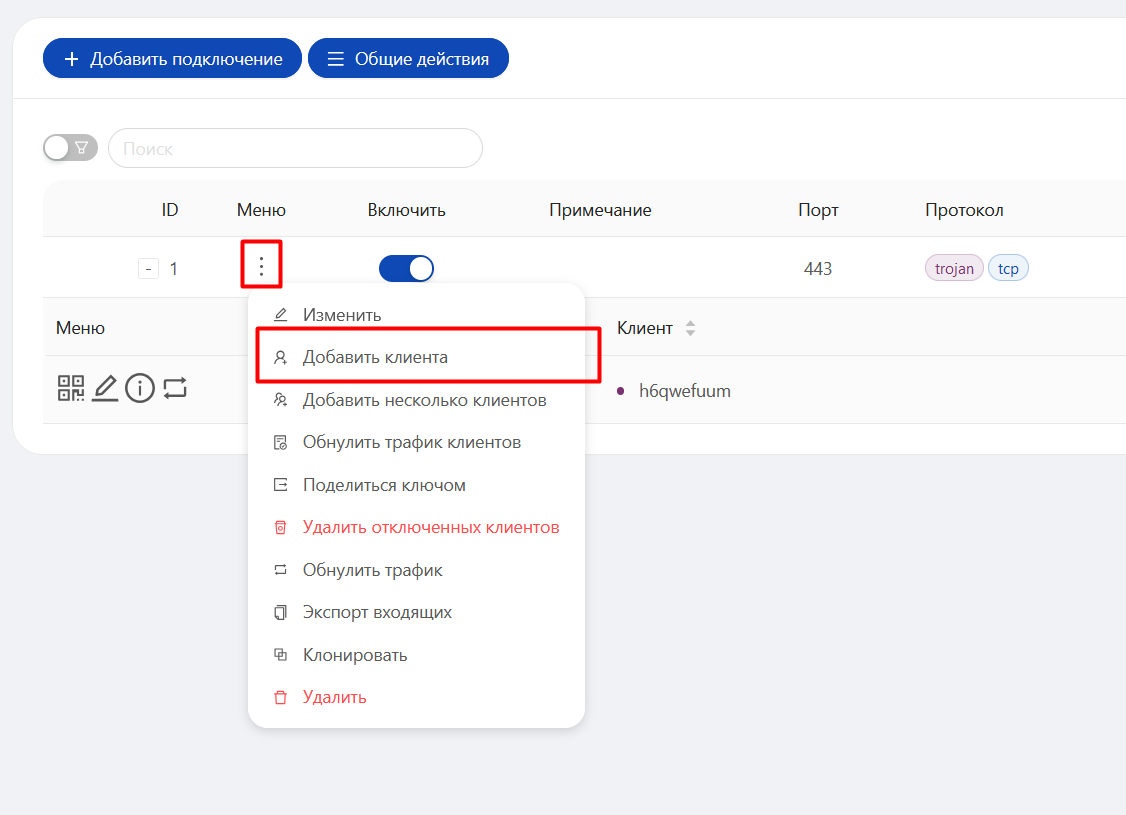
 To create an additional user, click on the icon with three dots and select "Add User" in the menu that appears.
Connecting the key to the VPN client
Several applications can be used to connect via Trojan or VLESS protocol:
1.Hiddify (For Windows, Android, Linux operating systems) - https://github.com/hiddify/hiddify-app/releases 2.Streisand (MacBook on processors from M1 and above, Iphone, Ipad) - https://apps.apple.com/us/app/streisand/id6450534064.
Connection via Nekoray, here you can download - https://en.nekoray.org/download/.
Run the applications as Administrator
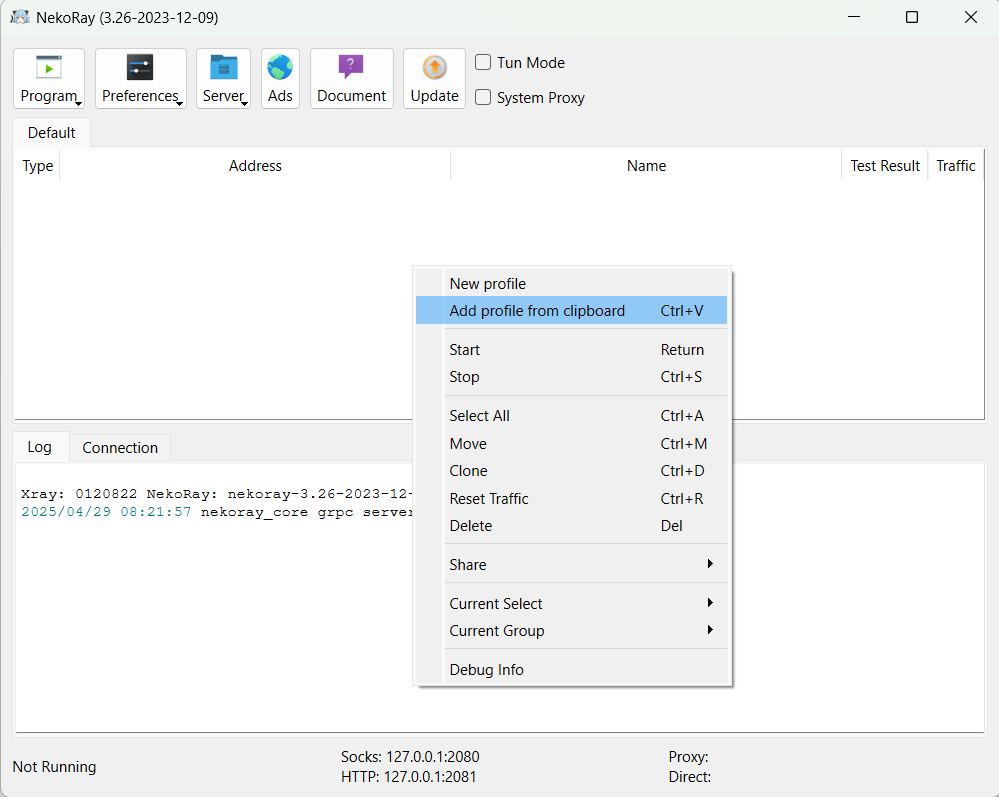
You need to copy the key from the panel and right click on the white field of the application, there will be a button to add a profile from the clipboard.
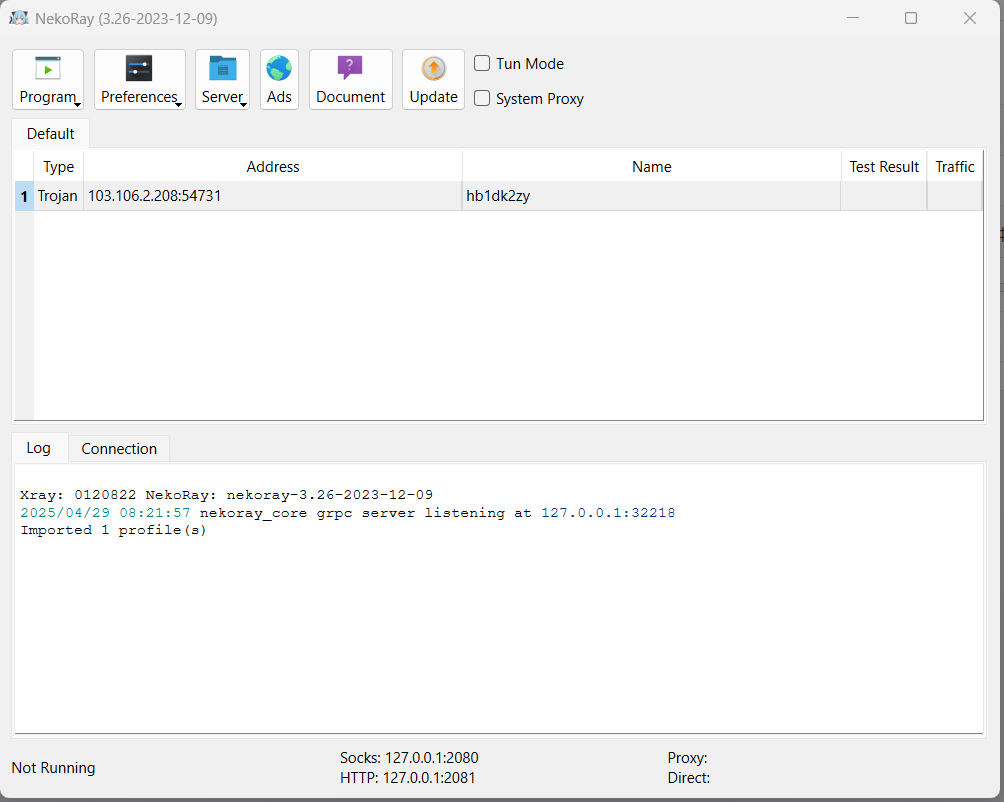
 Click the Add button and the configuration of your VPN will be added:
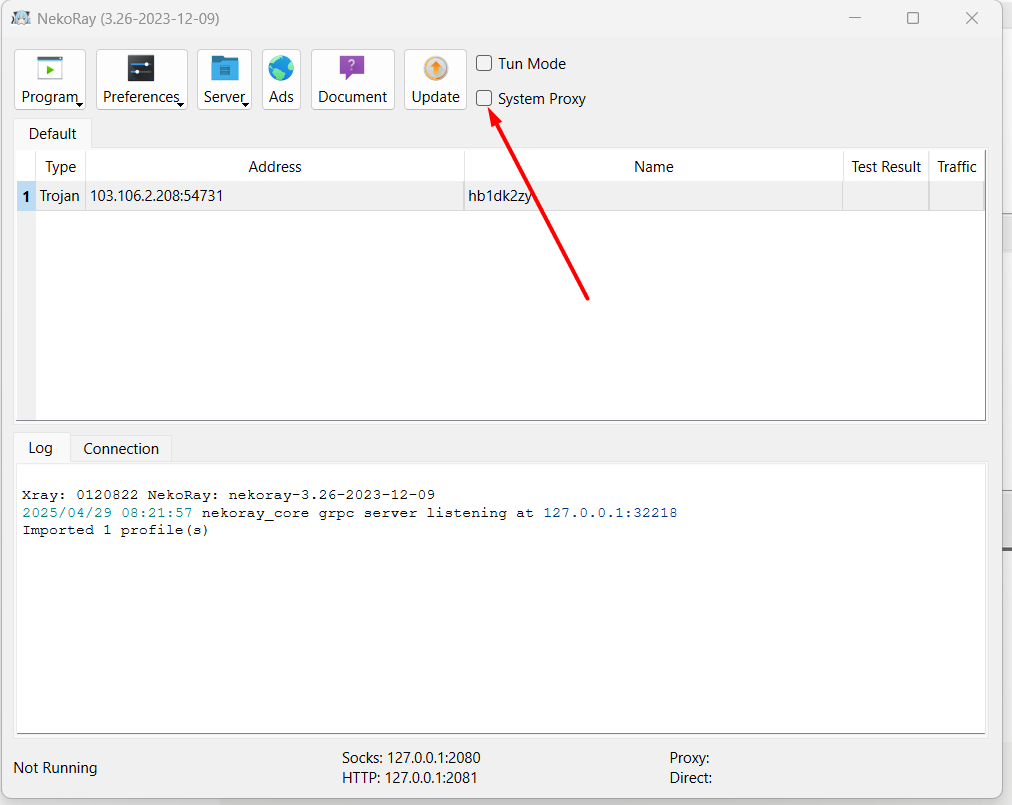
 Check the System Proxy feature
 Run the config, right click and START button.
 ⚡ Done. The application with your private VPN server is configured.
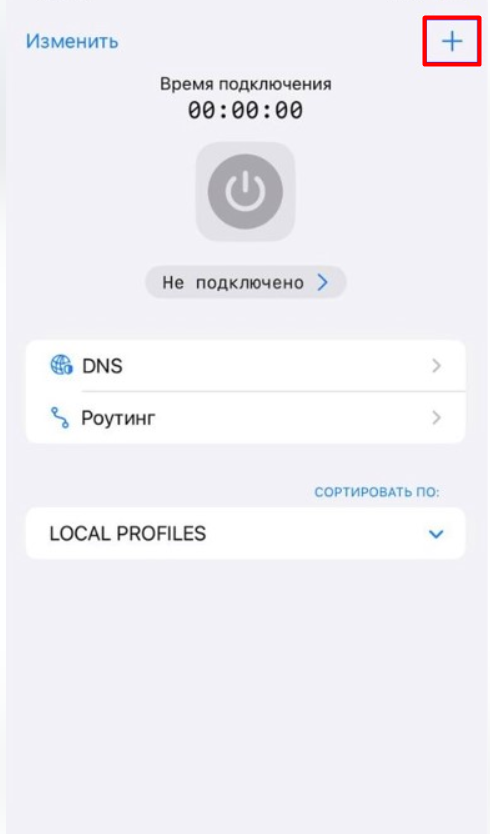
Connection via Streisand
You need to copy the key from the panel, launch the Streisand application and click on the "+" sign in the upper right corner:
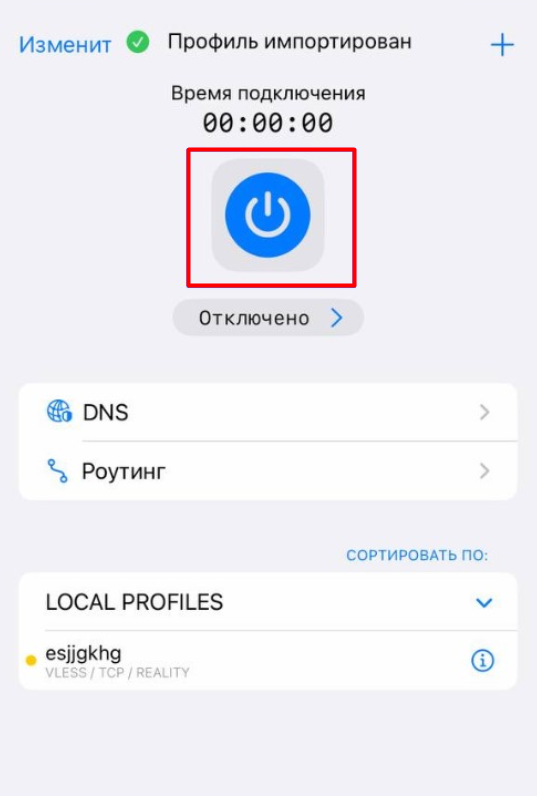
 Select "Add from clipboard" and the key is added:
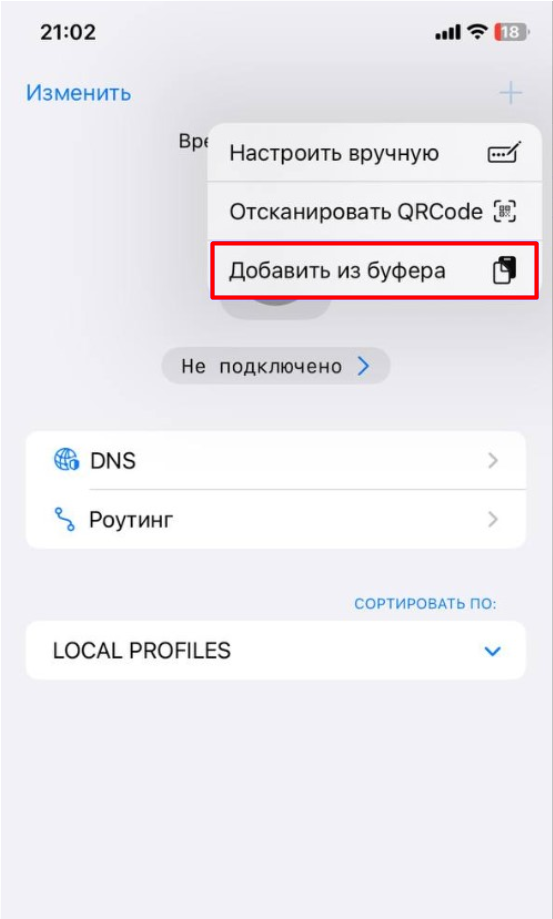 Click the button to enable VPN - from this point on, your IP address will change to the IP address of your server.
Other articles of the section


Apply the discount by inserting the promo code in the special field at checkout:


