


Installing the TeamSpeak server via the PQ.Hosting control panel
- Main
- Knowledge base
- Instructions
- Installing the TeamSpeak server via the PQ.Hosting control panel
08.10.2024, 23:14
- We go to the PQ.Hosting website and click on the "Register" button.

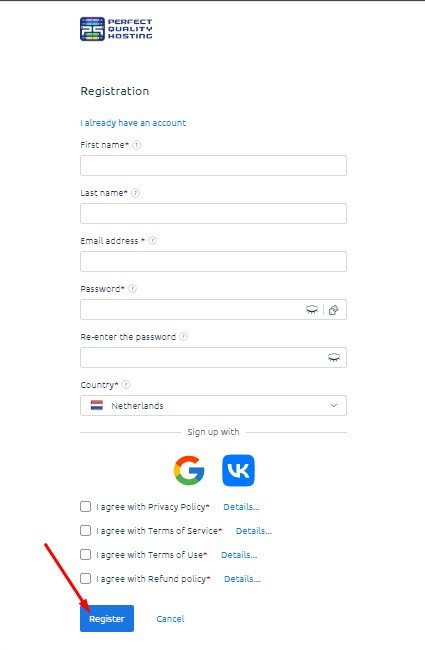
- We are going through registration:

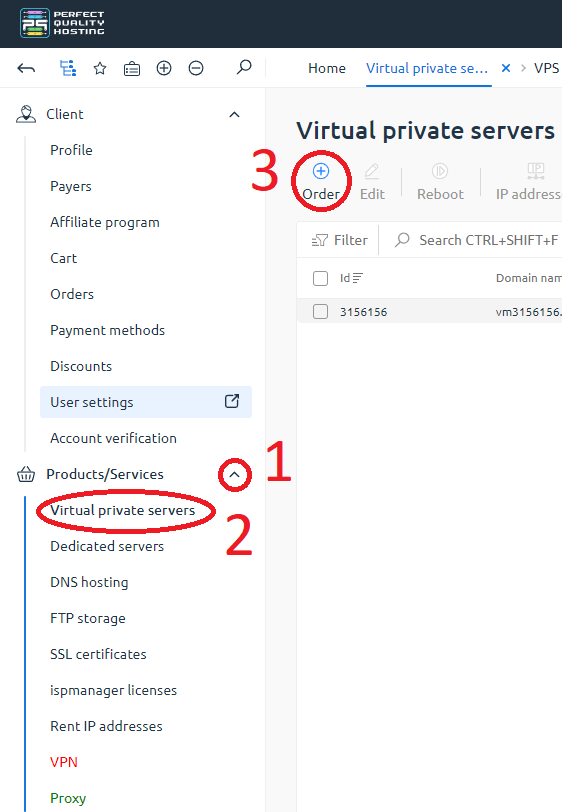
- Next, we are redirected to a page where we can place an order on the server.
1. Click on "Products/Services".
2. Select "Virtual server".
3. Click on the "Order" button.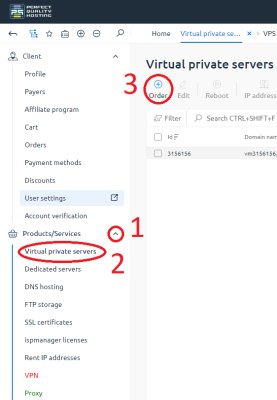
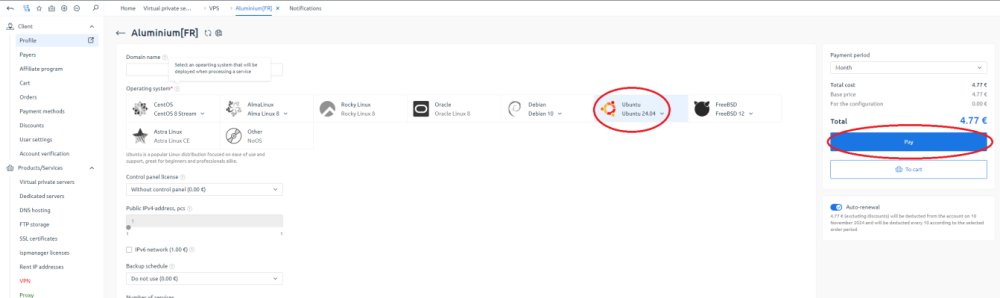
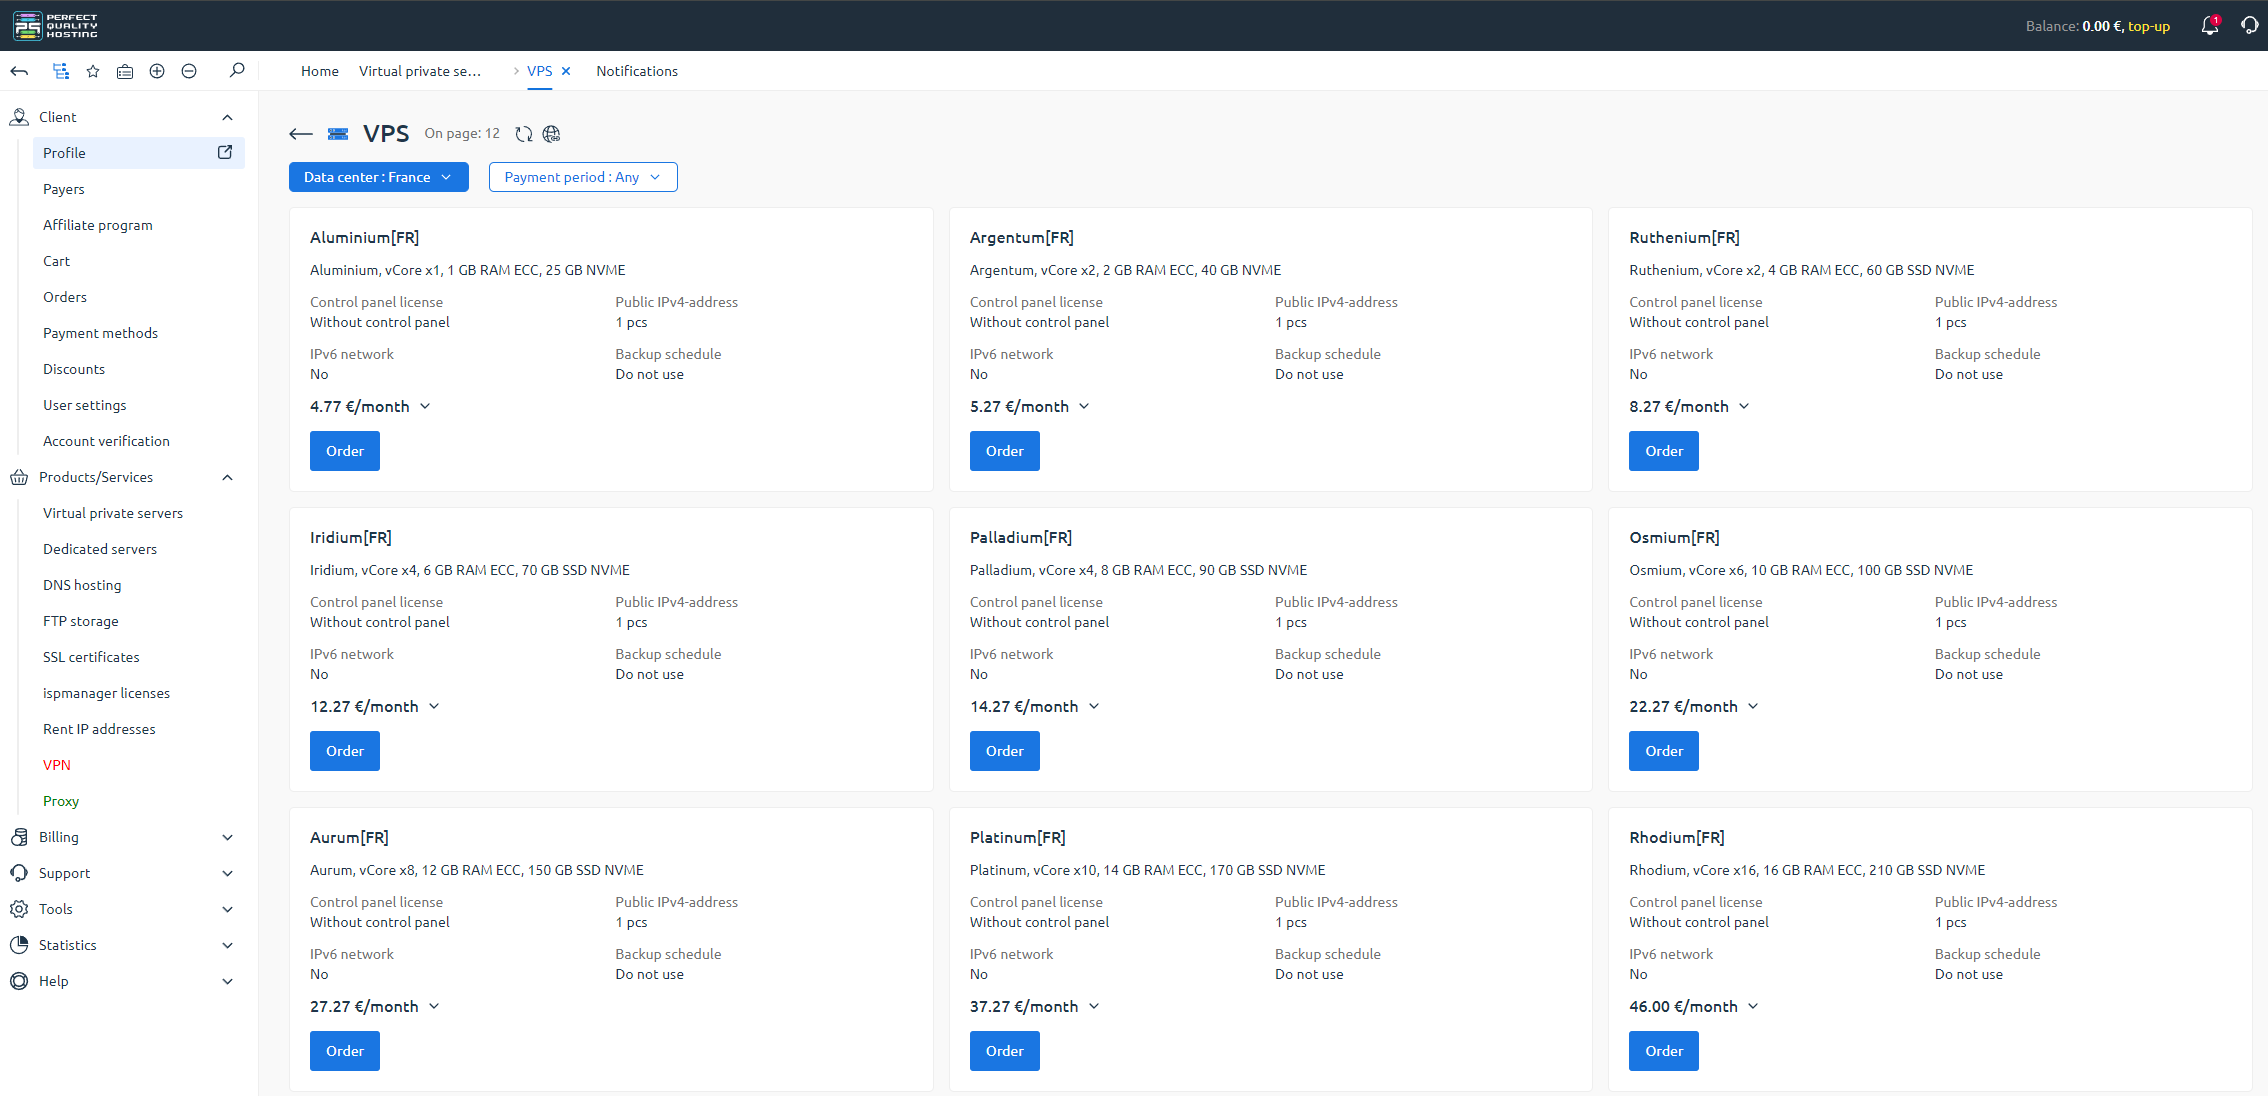
- We choose the appropriate country and tariff:

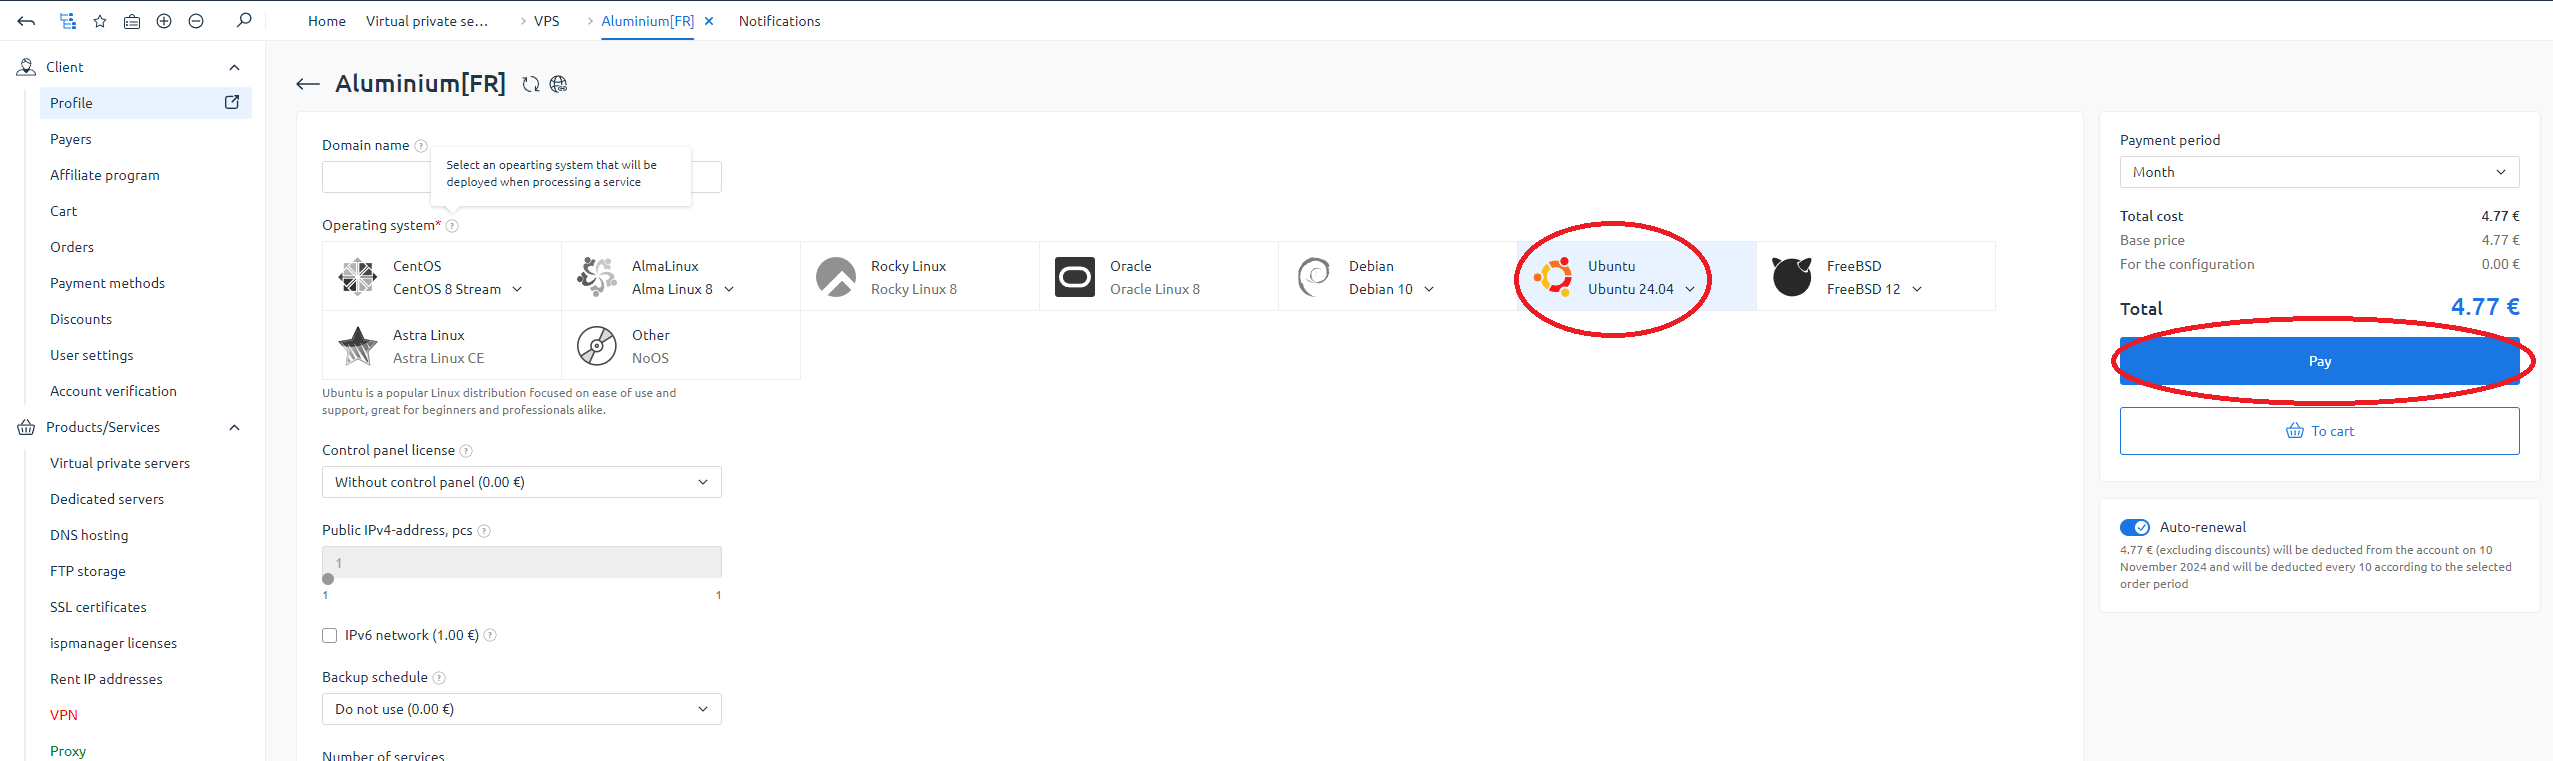
- Select the required operating system (I chose Ubuntu 24.04) and proceed to payment:
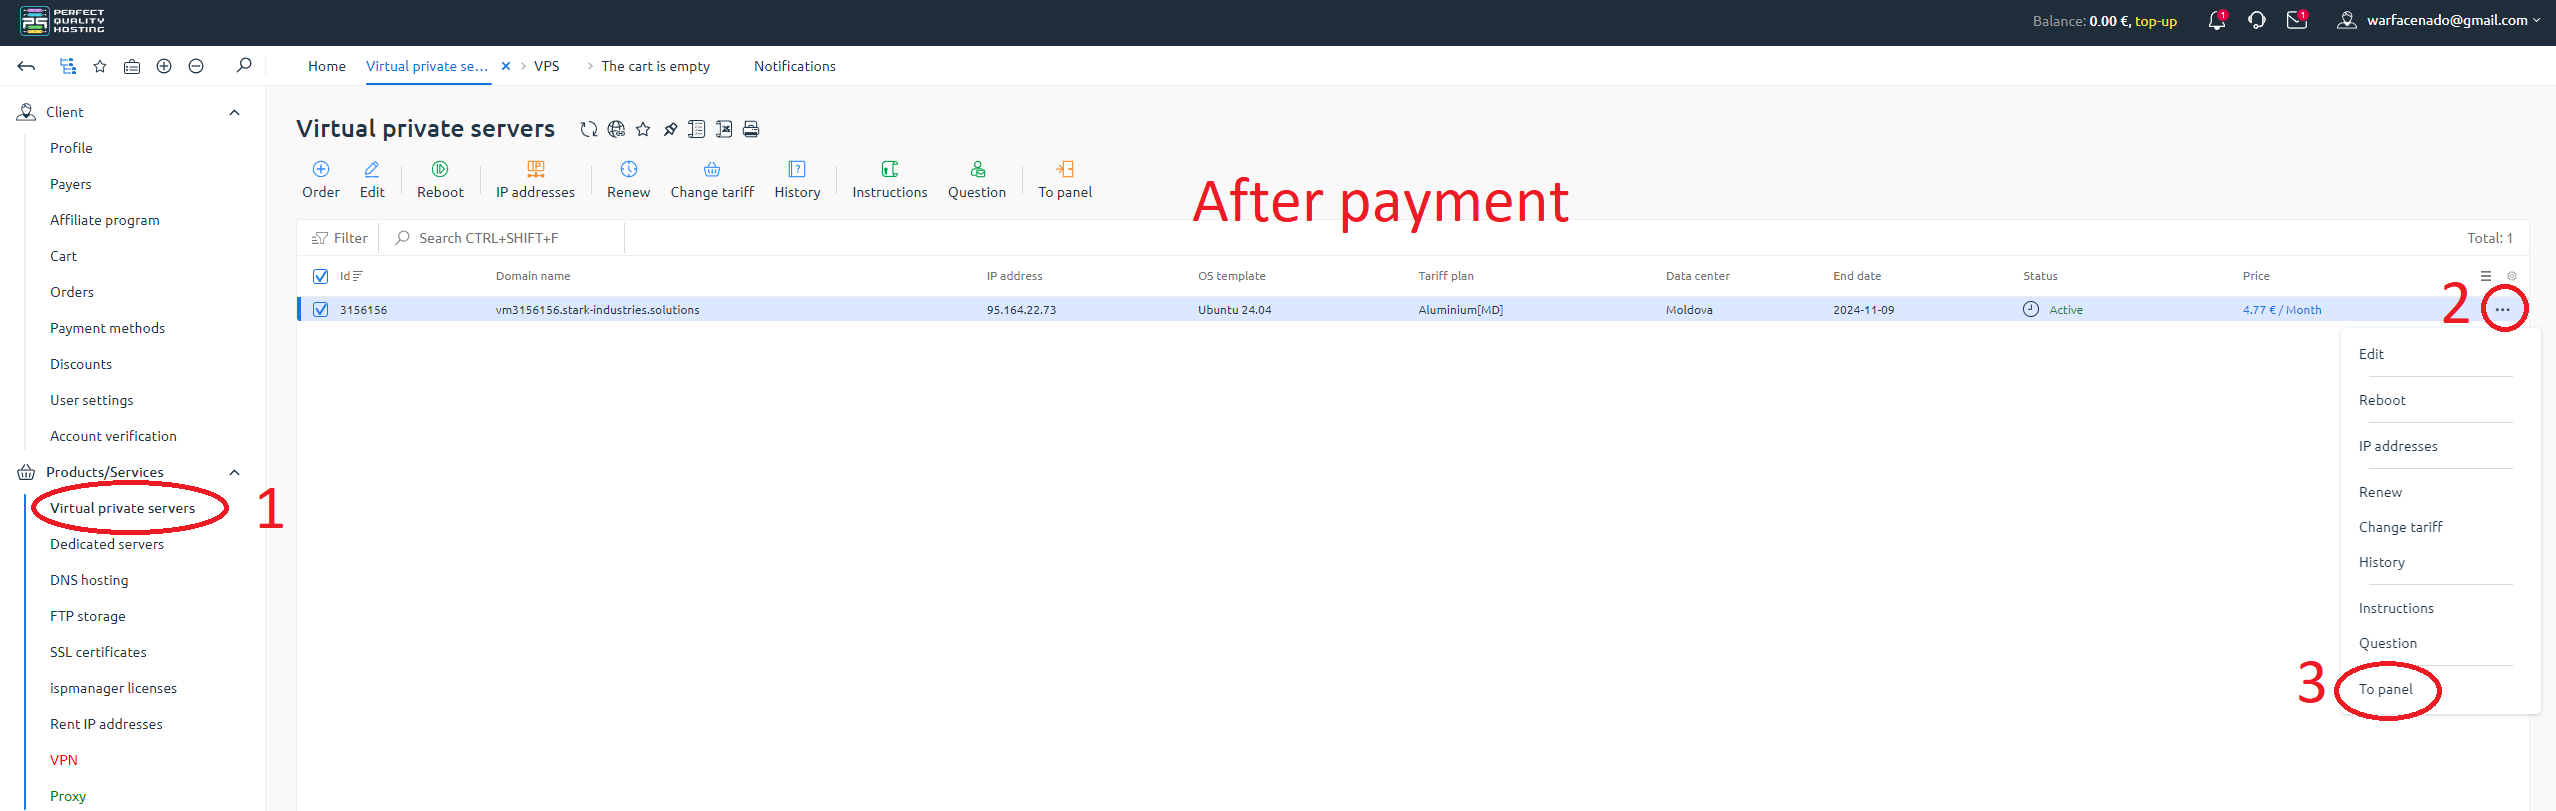
After payment, we will receive an email to the email address specified during registration. - Go to the site's control panel:
1. Click on "Virtual servers".
2. Click on the colon to the right of our server.
3. Click on the "Go to" button.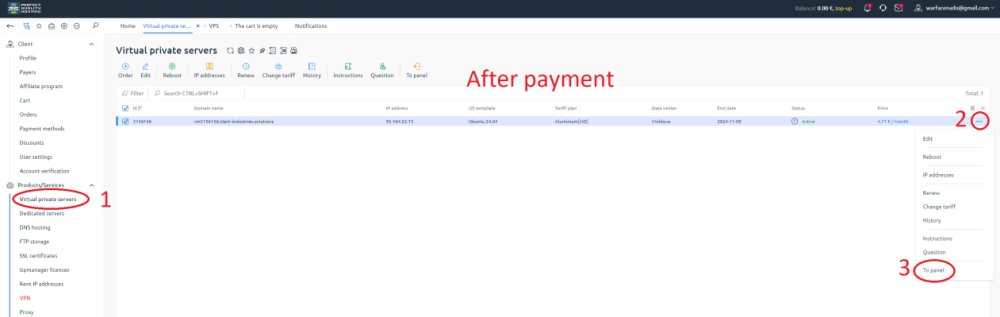
After that, we are thrown into the control panel.
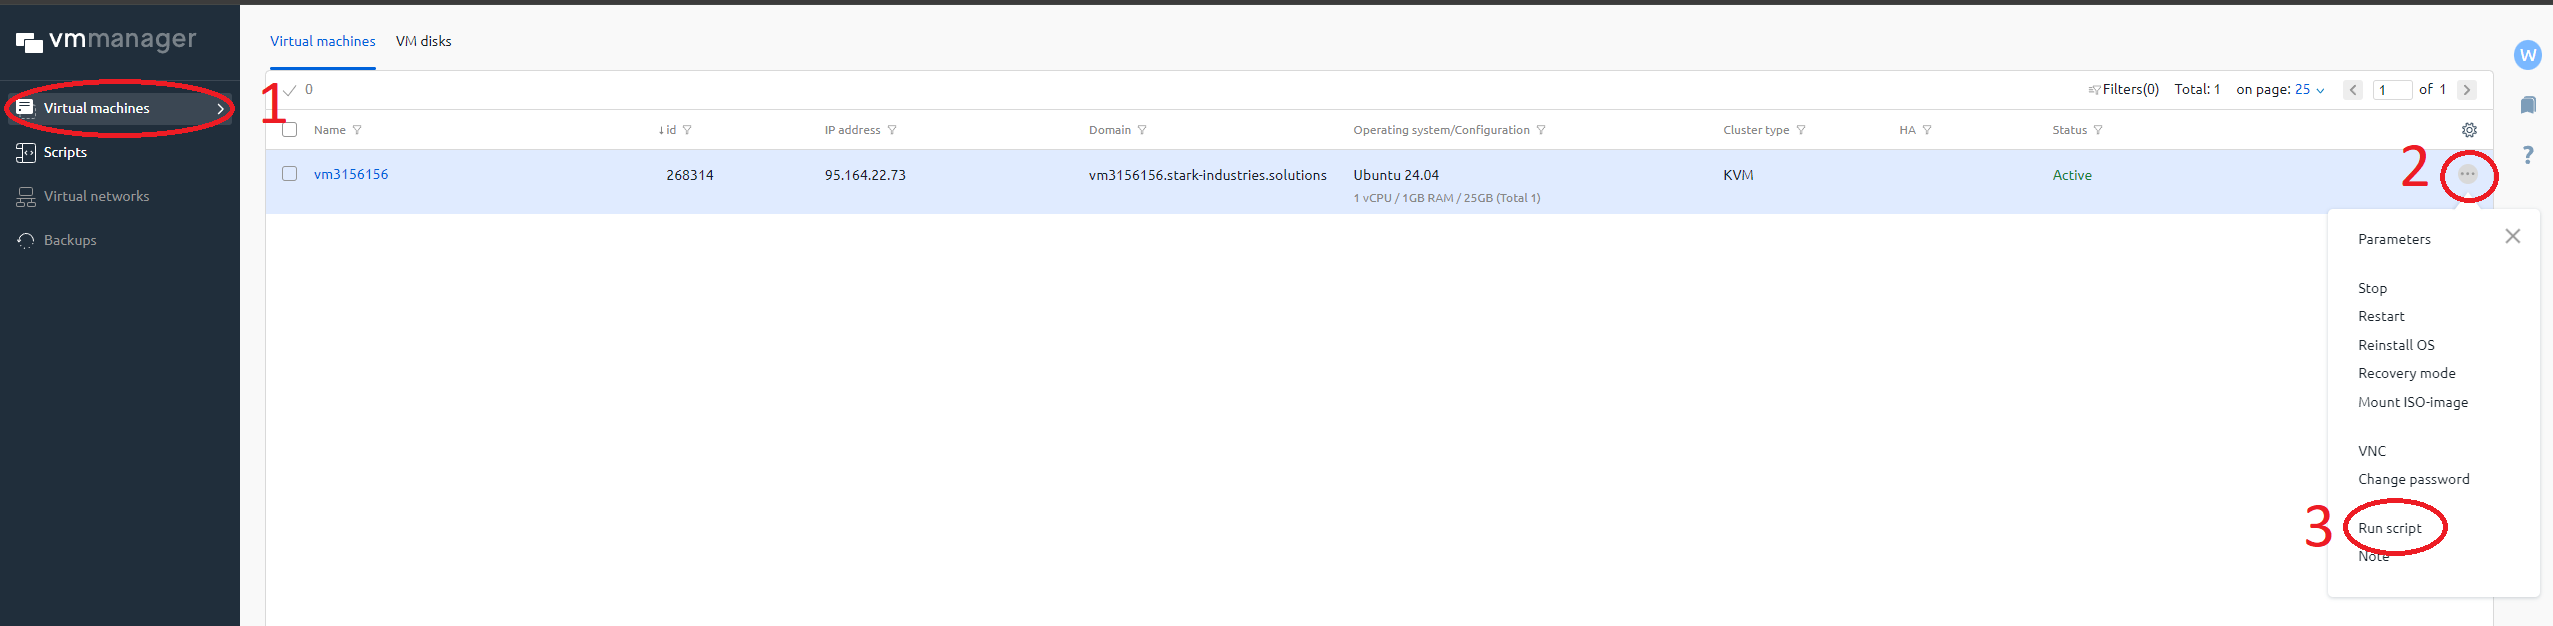
- In the "Virtual machines" section, click on the colon and select "Run script":

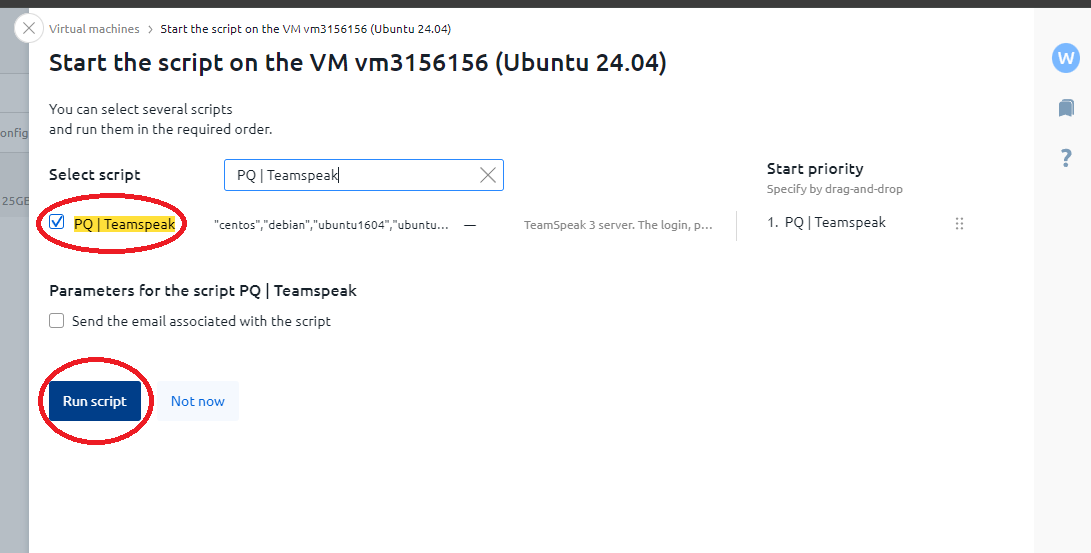
- Select the script we need (PQ | Teamspeak) and click on "Run script":

If we have done everything correctly, the script will start executing: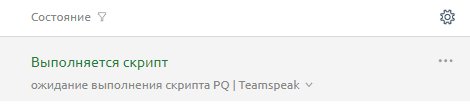
The data will be sent to your email
If the data has not been sent to the mail, you can view it on the server via ssh:
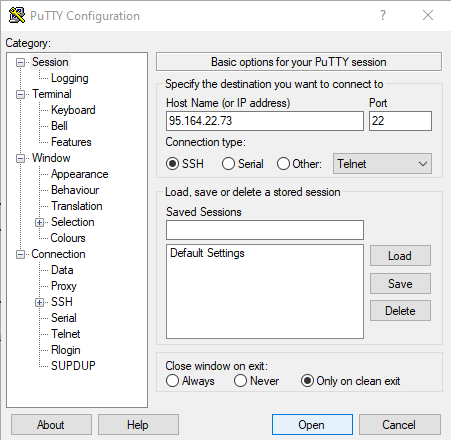
- Download the PuTTy program..
- Run it and enter the ip that came to your email when ordering the server (we leave the port unchanged).
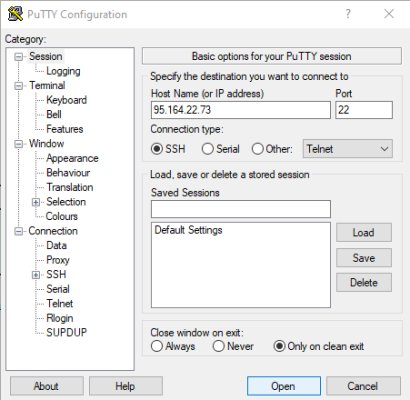
- Click on "Open", the console will open.
- We log in with the data that came to our email.

5. Run the command:
cat /root/ts3_login_data
After executing this command, we see the login, password and token for our server.
Expected response:
login=serveradmin
password=JWj2t1z8oerttMPiHZ
token=Zh90PwKKXMuCufF9wAOxU9etretrt2RFo2tHIJ
password=JWj2t1z8oerttMPiHZ
token=Zh90PwKKXMuCufF9wAOxU9etretrt2RFo2tHIJ
We need the token to get administrator rights on our TeamSpeak server.
6. Download the TeamSpeak client.
7. Launch TeamSpeak and search for our server by ip: 
8. After connecting, click on the "This is my server" button and enter the token and click on "Use": 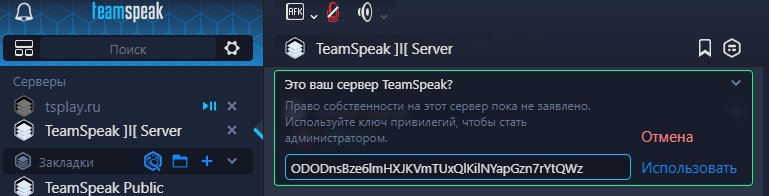
9. It's done! Now we can manage our TeamSpeak server.
Other articles of the section


ORDER servers in France with 15% discount
Apply the discount by inserting the promo code in the special field at checkout:
Effective until 17.10.24 23:59


