-
 United Kingdom+44 (20) 4577-20-00
 -
 USA+1 (929) 431-18-18
 -
 Israel+972 (55) 507-70-81
 -
 Brazil+55 (61) 3772-18-88
 -
 Canada+1 (416) 850-13-33
 -
 Czech Republic+420 (736) 353-668
 -
 Estonia+372 (53) 683-380
 -
 Greece+30 (800) 000-02-04
 -
 Ireland+353 (1) 699-43-88
 -
 Iceland+354 (53) 952-99
 -
 Lithuania+370 (700) 660-08
 -
 Netherlands+31 (970) 1027-77-87
 -
 Portugal+351 (800) 180-09-04
 -
 Romania+40 (376) 300-641
 -
 Sweden+46 (79) 008-11-99
 -
 Slovakia+421 (2) 333-004-23
 -
 Switzerland+41 (22) 508-77-76
 -
 Moldova+373 (699) 33-1-22
English
Guide: What a Subnet is and How to Rent One at PQ.Hosting
- Main
- Knowledge base
- Guide: What a Subnet is and How to Rent One at PQ.Hosting
The concept of a subnet can be best explained through an analogy. Imagine the internet as a large city, and IP addresses as houses in that city. If all the houses were placed randomly without streets or districts, finding a specific one would be difficult. A subnet functions like a city district—it groups multiple houses (IP addresses) into a designated area for easier management.
The same applies to servers and computers on the internet. A subnet helps organize devices so they can operate more efficiently together.
In this article, we will guide you through the process of renting one at PQ.Hosting and InterLIR .
Which Companies Need a Subnet?
Typically, subnets are used by large organizations with complex infrastructures. If you run a single virtual server for an online store, you likely don’t need a subnet.
However, for the following types of companies, subnet usage is almost essential:
→ IT companies and data centers.
→ Banks and financial institutions.
→ Manufacturing enterprises.
→ E-commerce businesses and large websites.
→ Corporations with multiple office branches.
Keep reading to learn how to easily rent a subnet at PQ.Hosting.
How to Rent a Subnet at PQ.Hosting
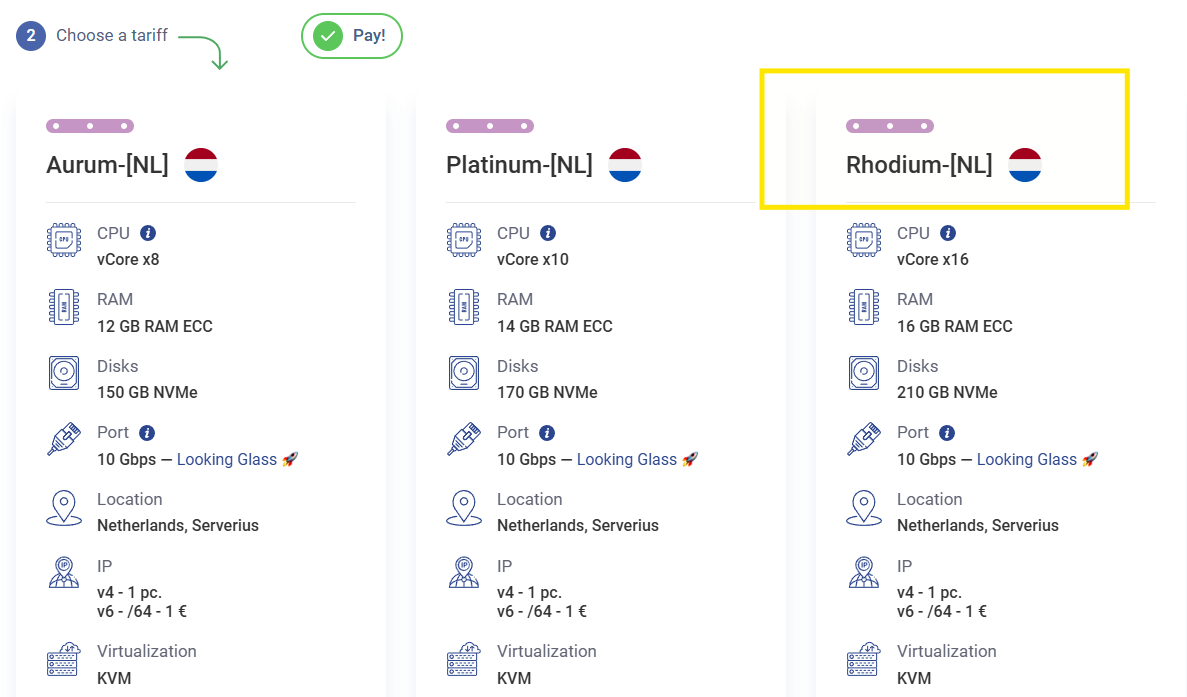
1. Order a Virtual Server (VPS) at Rhodium Level or Higher
To rent a subnet, you must first order a Rhodium-level VPS or higher from PQ.Hosting. Lower-tier VPS plans do not support subnet rental.
2. Access Billing and Navigate to "IP Address Rental"
→ Log in to the billing section on the PQ.Hosting website.
→ Go to “Products/Services” → “Rent IP address ” → Click “Order”.
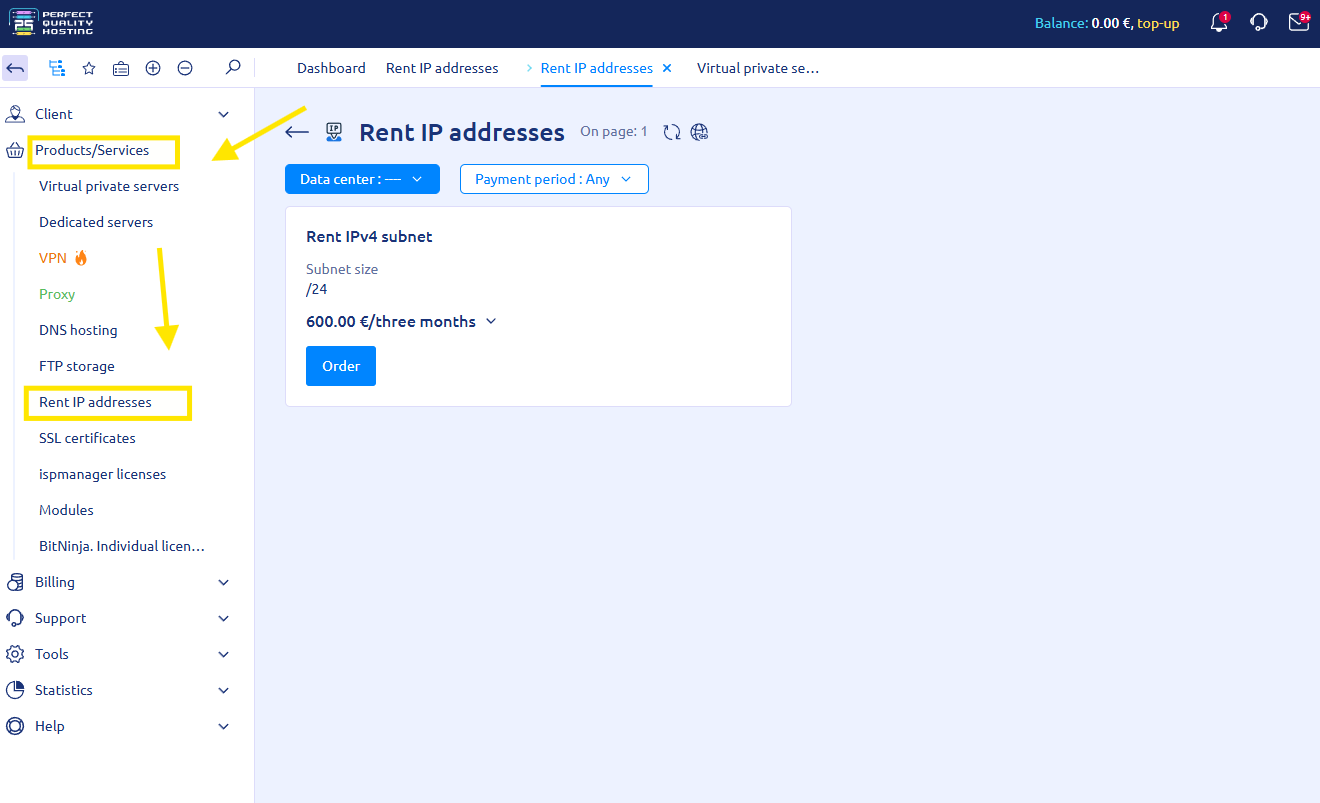
Note: To rent a subnet, you must complete the Know Your Customer (KYC) verification process.
3. Select Service Parameters and Complete Payment
→ Choose the required subnet parameters.
→ Click “Order” again and proceed with payment for the IP addresses.
4. Create a Support Ticket for Subnet Announcement
Once the payment is processed, submit a support ticket requesting the announcement of the subnet for a specific IP address on your server.
What is the subnet announcement?
Subnet announcement is the process of notifying other networks on the internet about the existence of your subnet, ensuring that traffic is properly directed.
A subnet can be announced:
→ Through PQ.Hosting's autonomous system
→ Through your own autonomous system (if available)
5. Activation and Configuration
Once the announcement is completed, your VPS will switch to "Active" status, and you can proceed with configuration.
Alternative Option: Renting a Subnet from Interlir
In addition to renting a subnet directly from PQ.Hosting, you can also order this service from our partner Interlir. Follow these steps:
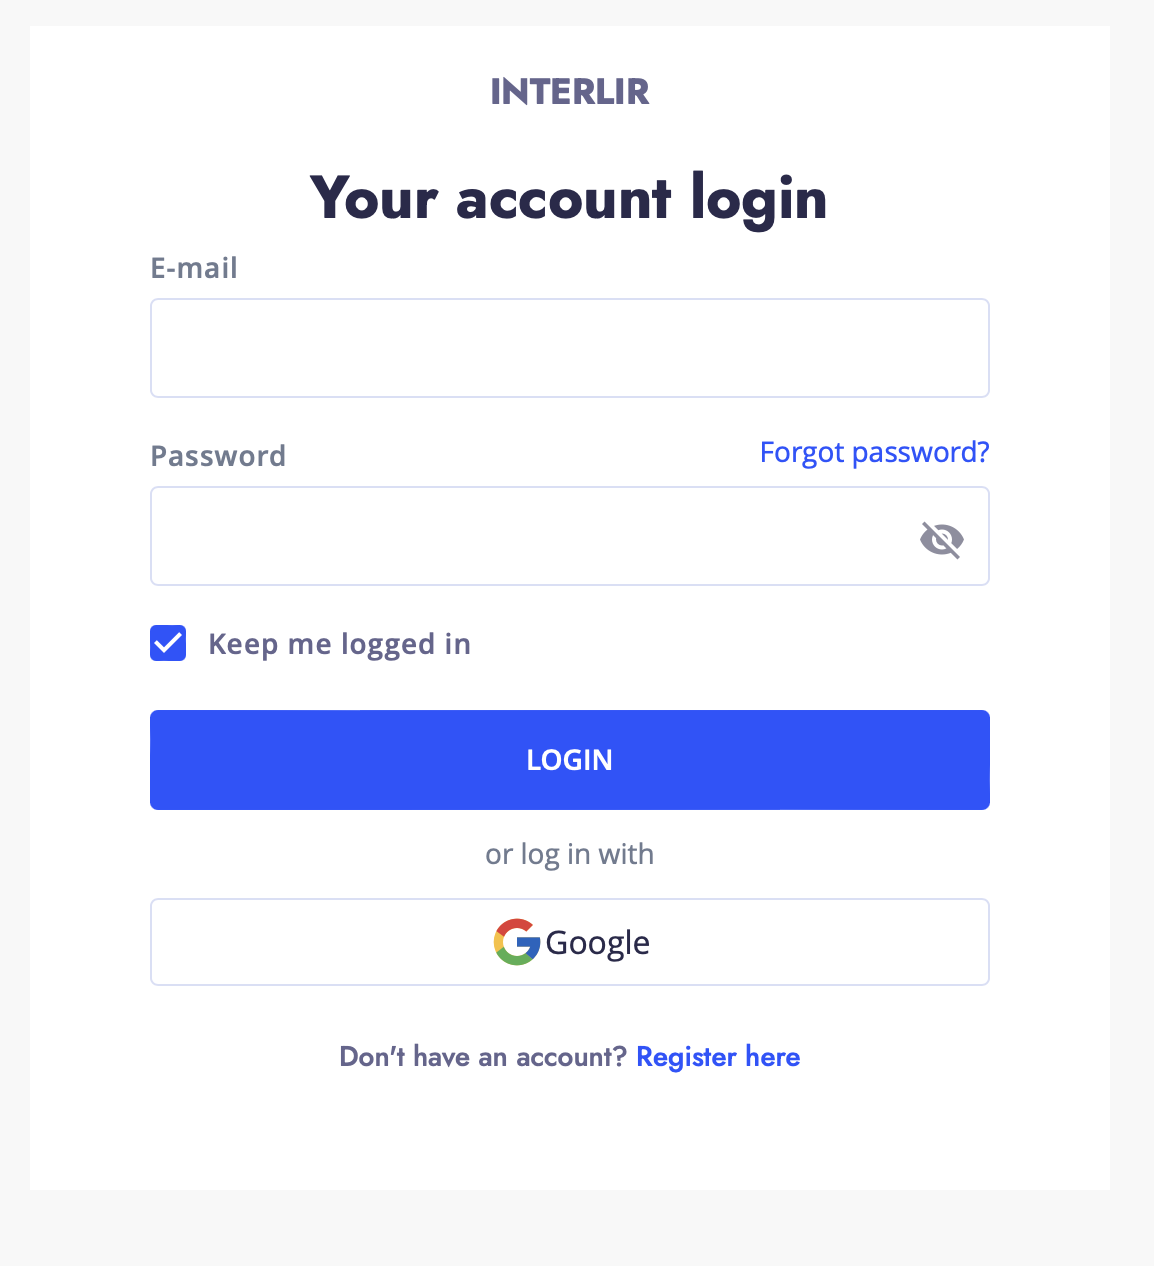
1. Visit the Interlir Website
Go to interlir.com and click the “Login” button.
2. Log into Your Account
→ Enter your credentials to log in.
→ If you don’t have an account, register and confirm your email address.
3. Add a Business Account
→ In the top right corner of the screen, add a business account by providing your company details, including proof of registration.
→ Note: InterLIR only works with businesses and individual entrepreneurs.
4. Get Full Access to the Dashboard
Once your business account is verified, you will have complete access to your personal dashboard, including the "IP Block Rental" section.
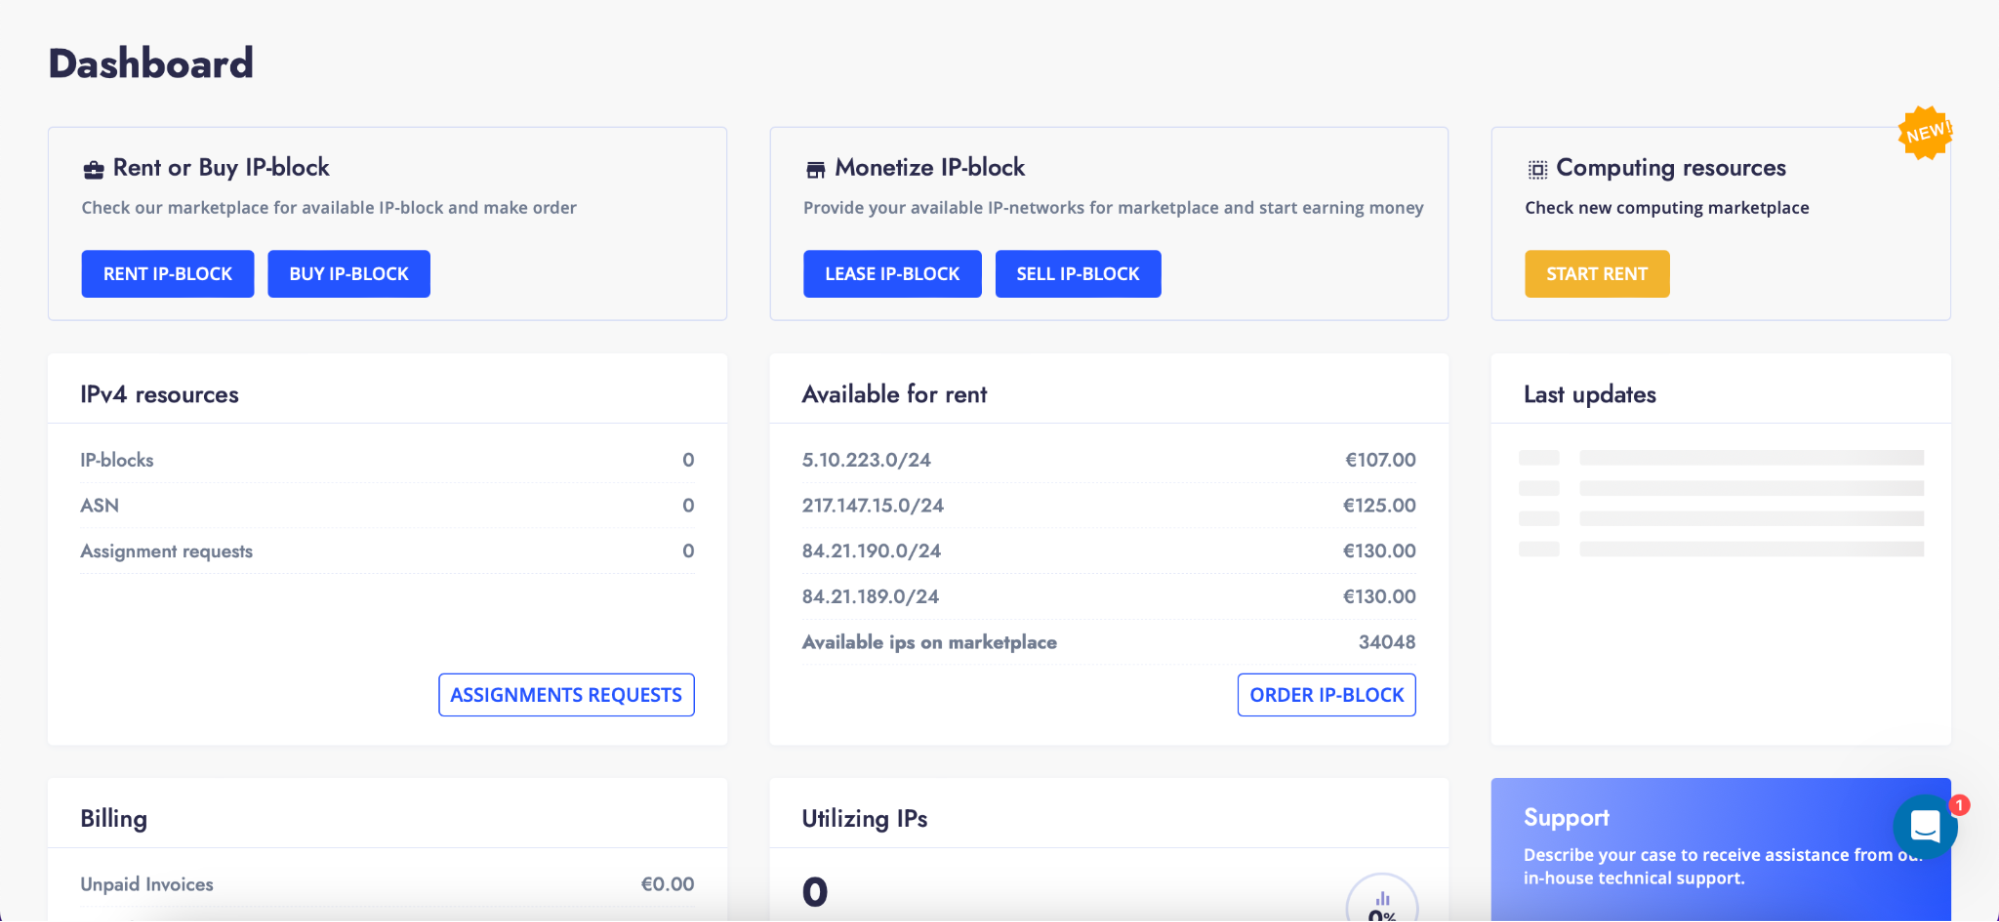
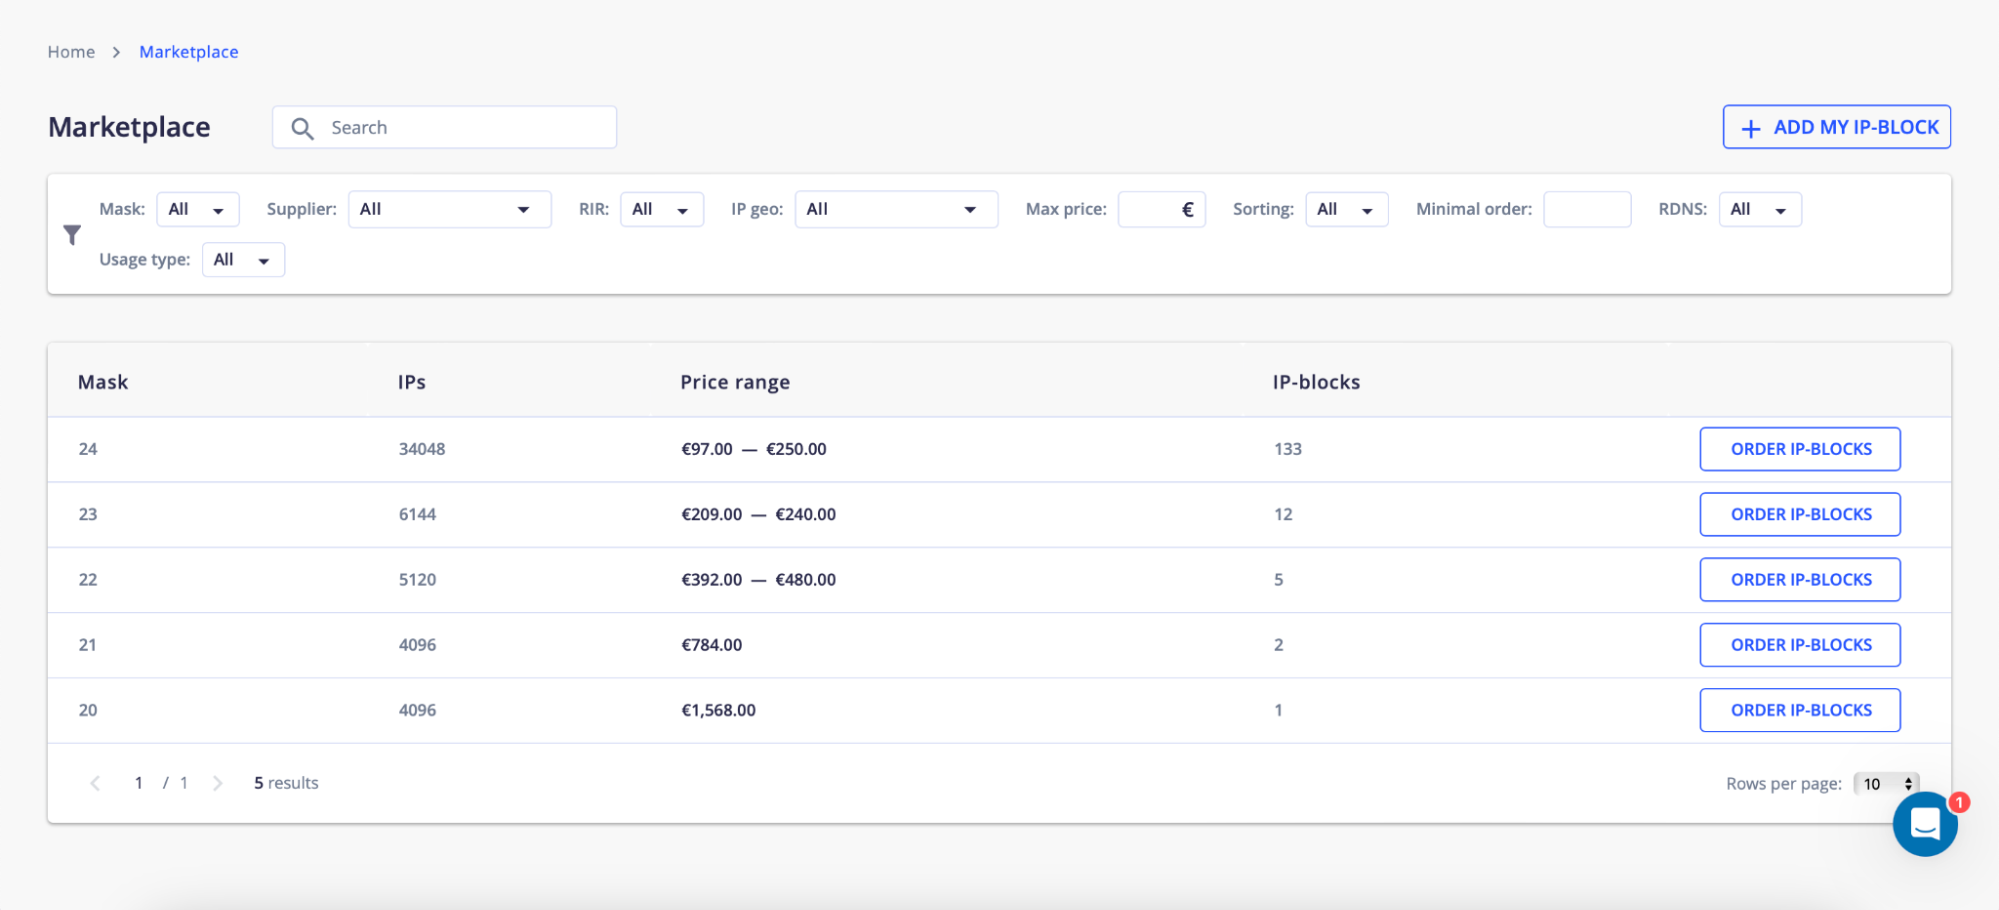
5. Browse Available IP Addresses
→ Click on “IP Block Rental” to access the marketplace, where you can view available IP addresses, pricing, geolocation, providers, rental conditions, and other characteristics.
→ Important: Before ordering IP addresses, check with your provider for any possible restrictions, such as blacklists, geographic limitations, rDNS settings, etc.
→ If you have any questions, contact InterLIR support.
6. Complete Payment
Proceed with the payment for the selected IP addresses.
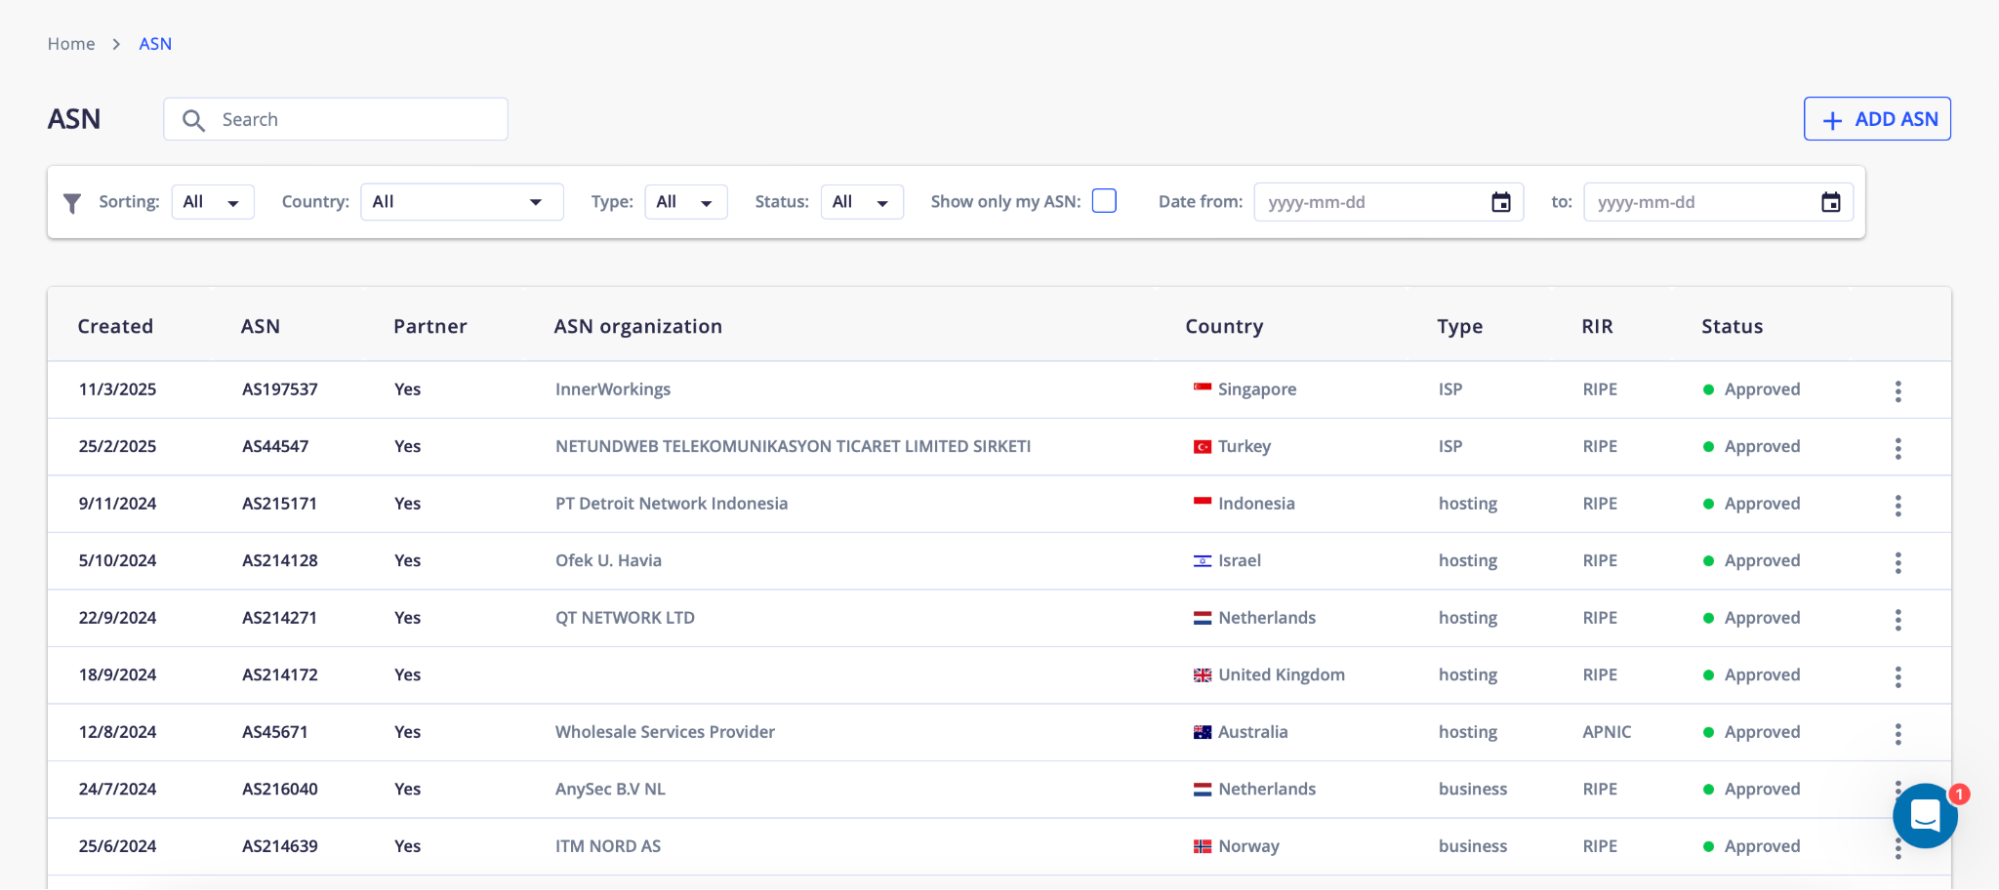
7. Assign Your Autonomous System (ASN)
→ In the left-side menu, go to "My Resources" → "ASN".
→ Here, you can add your ASN (if it’s not already listed among public ASNs).
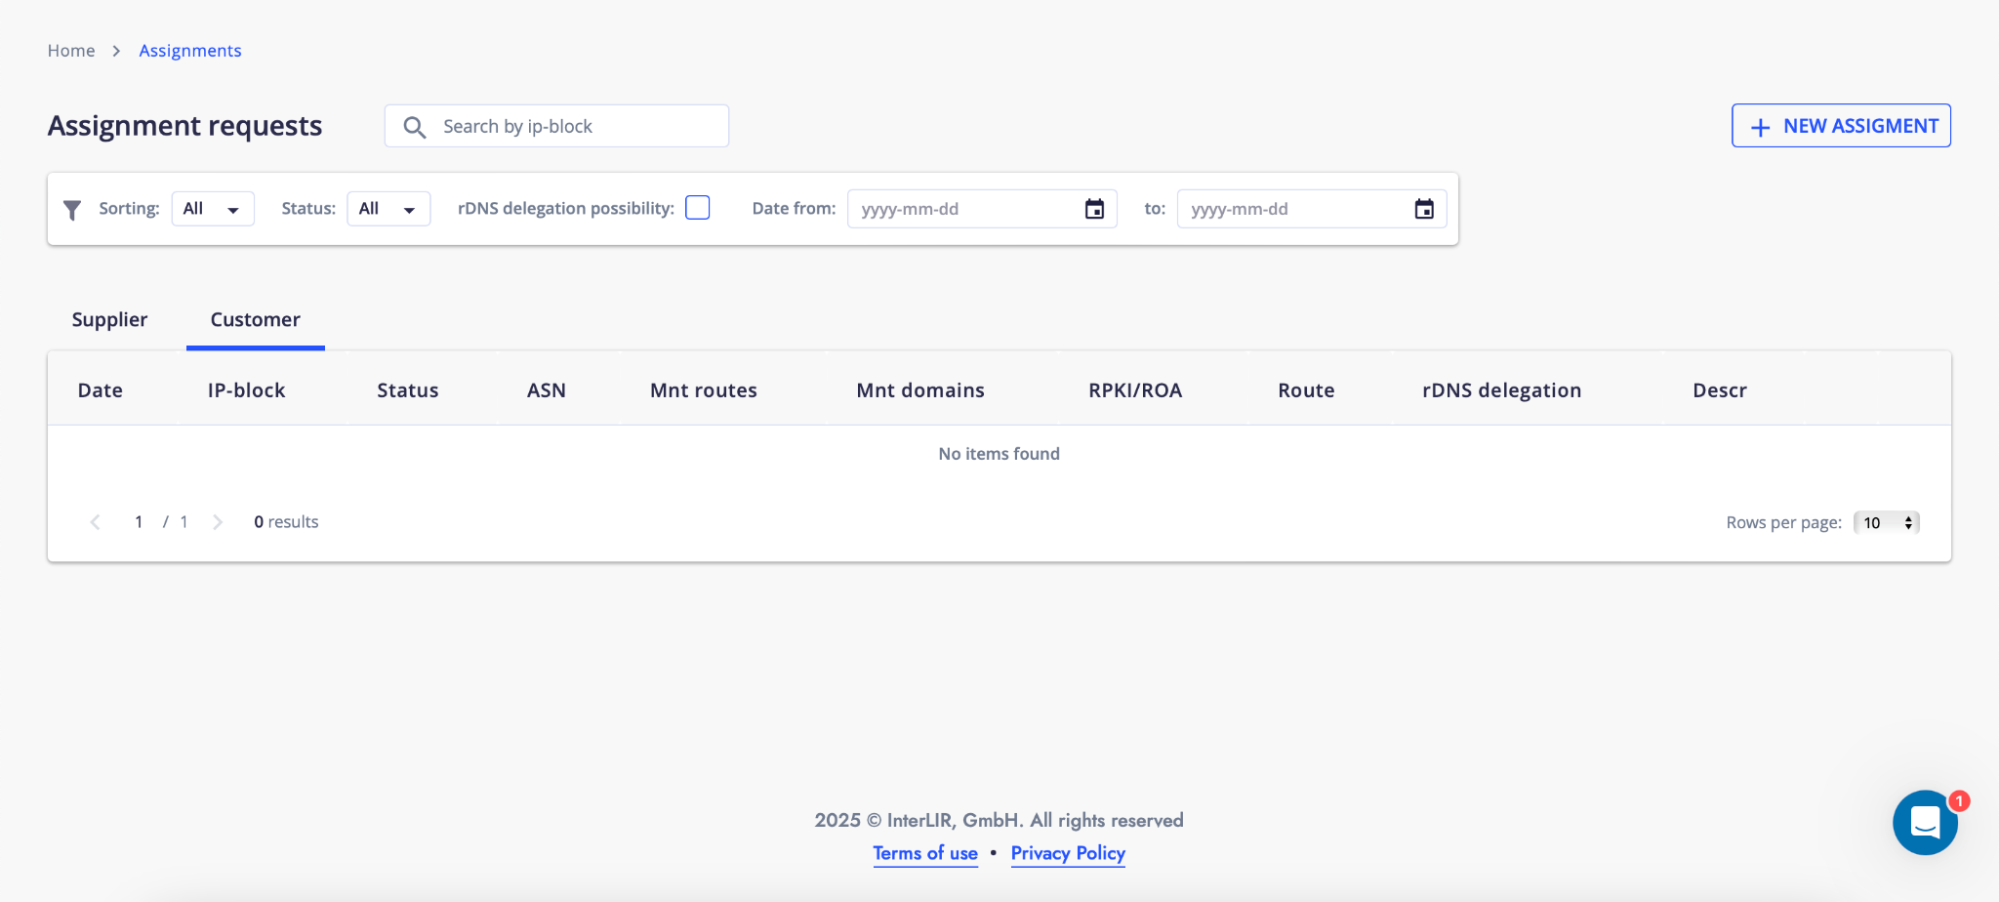
8. Submit a Request for Subnet Assignment
→ After your ASN is approved, go to "Assignments" → "Customer".
→ Submit a request for subnet assignment (route/RPKI for your ASN).
9. Route/RPKI Setup
→ Our specialists will set up route/RPKI for the specified ASN within 24 hours on business days and within 48 hours on weekends and holidays.
10. Confirmation and LOA Download
→ Once the process is complete, you will receive a confirmation.
→ In the “Assignments” section, you can select your IP and download the LOA (Letter of Authorization).
→ The LOA must be provided to your internet provider for further setup.
 By following these steps, you can successfully rent and configure a subnet via Interlir.
Other articles of the section


