-
 United Kingdom+44 (20) 4577-20-00
 -
 USA+1 (929) 431-18-18
 -
 Israel+972 (55) 507-70-81
 -
 Brazil+55 (61) 3772-18-88
 -
 Canada+1 (416) 850-13-33
 -
 Czech Republic+420 (736) 353-668
 -
 Estonia+372 (53) 683-380
 -
 Greece+30 (800) 000-02-04
 -
 Ireland+353 (1) 699-43-88
 -
 Iceland+354 (53) 952-99
 -
 Lithuania+370 (700) 660-08
 -
 Netherlands+31 (970) 1027-77-87
 -
 Portugal+351 (800) 180-09-04
 -
 Romania+40 (376) 300-641
 -
 Sweden+46 (79) 008-11-99
 -
 Slovakia+421 (2) 333-004-23
 -
 Switzerland+41 (22) 508-77-76
 -
 Moldova+373 (699) 33-1-22
English
Drawing a rectangle in GIMP
- Main
- Knowledge base
- Drawing a rectangle in GIMP
GIMP is a popular image editor that is interesting for its wide range of features, plus it's completely free. The only drawback of the program is that some of its functions are arranged in a non-obvious way. All this causes certain difficulties and users, who in turn have to look for guidance, for example, in the same toolbar there is nothing for creating geometric shapes. Next we will try to explain how to draw a rectangle in GIMP in the simplest way. Also in this article we will clarify a few important nuances.
Drawing a rectangle
It is easiest to add the figure as a separate layer, otherwise the editing process can become very complicated. To do this, use the key combination Ctrl+Shift+N. You can also call this function using the lower left icon under the list of all layers or from the Layer menu.
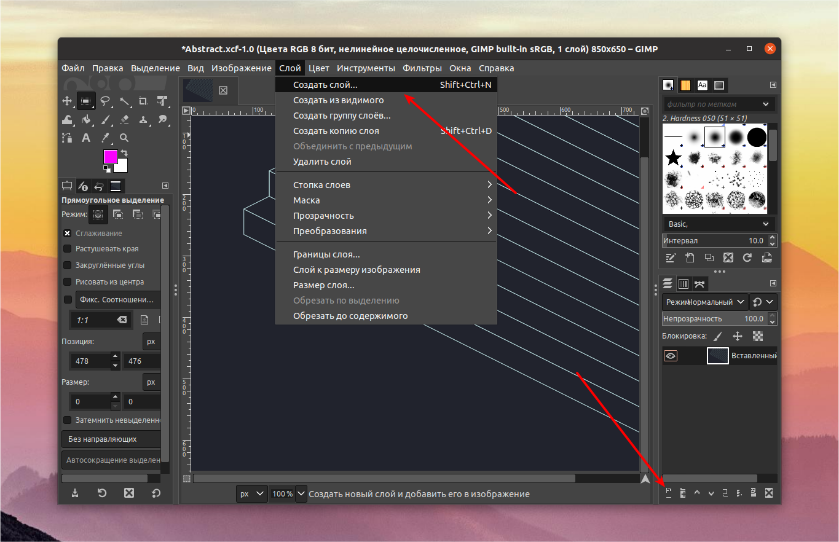
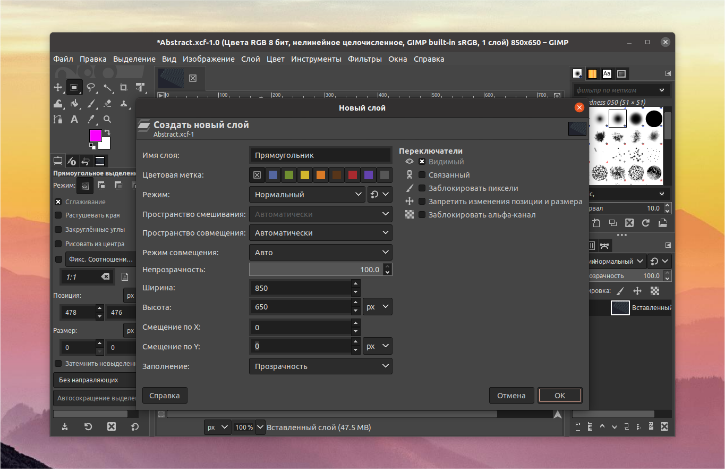
Before using the Fill option, you should select the Transparency option. Put the name and color marker at your discretion, and you don't need to touch the other items. Just click the OK button to confirm.
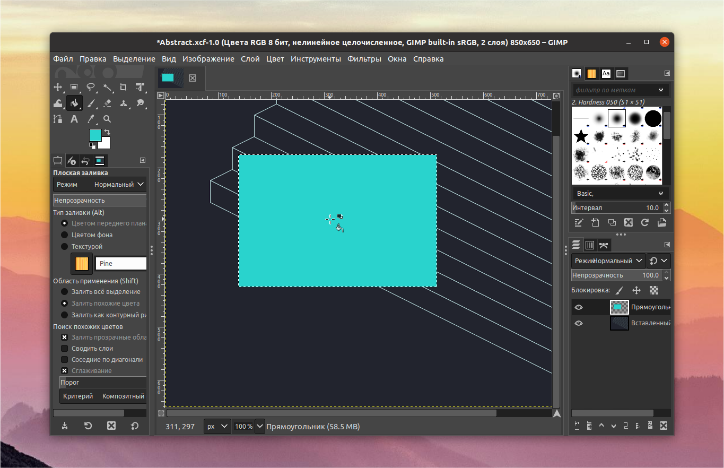
To create a rectangle, you need to select its dimensions using the Selection feature, and then set the color with a fill. Next, turn on the Rectangle Selection tool can be done by using the tool in the left pane or by using the R key on your keyboard. Drawing a rectangle starts at one of its corners. Place the mouse cursor in a suitable place, press the left button (LKM) and move the mouse away so that the desired geometric shape is obtained.

Using the parameters in the left menu, you can specify the location and size of the element in detail. There is also a tool called Blur edges and Rounded corners. You may need them in the process of work and make some tasks much easier. Just press the LKM and move the mouse in the desired direction.
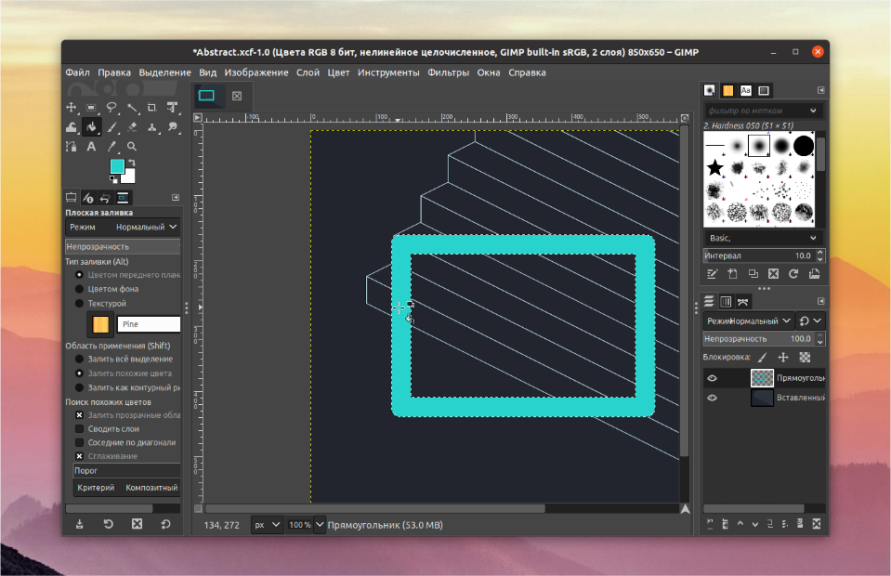
If the shape of the figure is ready, it remains to set the color. This can be done using the tool called Fill (hotkey - Shift+B). Activate it, select a suitable color using the selector under the toolbar and click on the inside of the rectangle.
You can also make a rectangle empty inside. To do this, repeat the above steps, but before applying the fill, open the Selection menu and select Border.
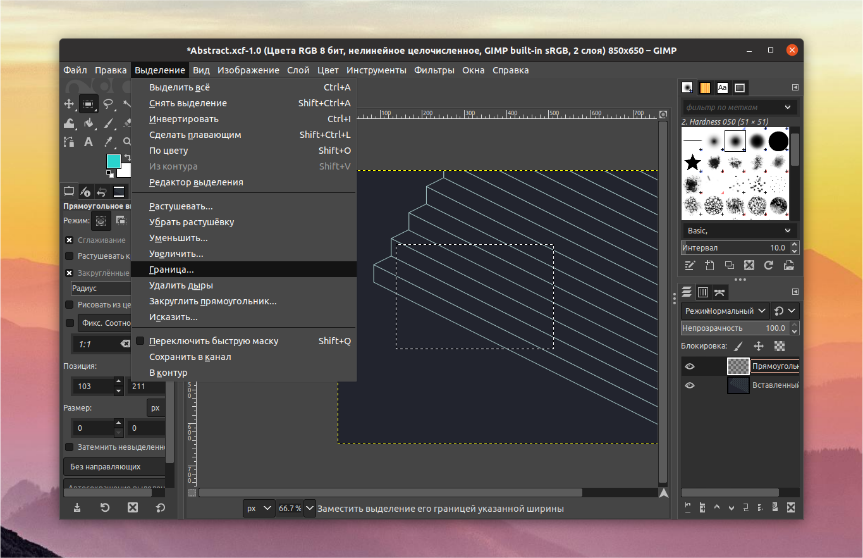
Next, select the size of the area and optionally change the style, and then click OK.
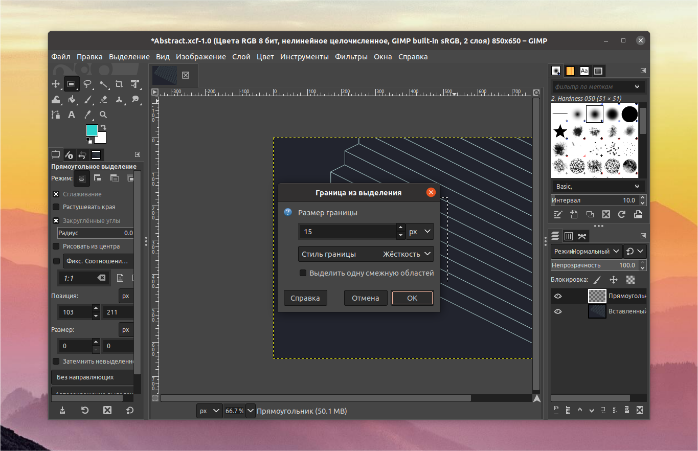
At the conclusion of this task, the user only needs to apply the fill to the resulting border.
This is a simple and effective way of drawing a rectangle in the program. You can make other geometric shapes in the same way if you need to.
Other articles of the section


