-
 United Kingdom+44 (20) 4577-20-00
 -
 USA+1 (929) 431-18-18
 -
 Israel+972 (55) 507-70-81
 -
 Brazil+55 (61) 3772-18-88
 -
 Canada+1 (416) 850-13-33
 -
 Czech Republic+420 (736) 353-668
 -
 Estonia+372 (53) 683-380
 -
 Greece+30 (800) 000-02-04
 -
 Ireland+353 (1) 699-43-88
 -
 Iceland+354 (53) 952-99
 -
 Lithuania+370 (700) 660-08
 -
 Netherlands+31 (970) 1027-77-87
 -
 Portugal+351 (800) 180-09-04
 -
 Romania+40 (376) 300-641
 -
 Sweden+46 (79) 008-11-99
 -
 Slovakia+421 (2) 333-004-23
 -
 Switzerland+41 (22) 508-77-76
 -
 Moldova+373 (699) 33-1-22
English
How to Run the Ghost Auto-Installation Script
- Main
- Knowledge base
- How to Run the Ghost Auto-Installation Script
Ghost is a modern content management platform designed for publishing articles, blogs, and media content. It was created as a lightweight and fast alternative to WordPress, with a focus on minimalist design, speed, and convenience for authors. Please note that the script will only work on servers running Ubuntu 22.04 or 24.04.
1. Log in to the Billing System. Use the credentials sent to your email upon registration.
2. Navigate to Virtual Servers. In the left menu, go to "Products/Services" and select "Virtual Servers". Find the desired server and click "Go to" to open the management panel.
3. If You Don't Have a Virtual Server you can easily order one by following these steps:
3.1. Open the PQ.Hosting homepage.
3.2. Scroll down to the "Server Rental" section.
3.3. Select the location where the VPS will be hosted.
3.4. Choose a pricing plan.
3.5. Use the left and right arrows to browse all available plans.
3.6. To select a rental period, hover over the right side of the pricing card and check the appropriate box.
3.7. Click "Order Server".
3.8. On the next page, configure the server by specifying the domain name, selecting the operating system, control panel, and other parameters. For Ghost installation, we recommend Ubuntu 22.04 or 24.04.
3.9. After completing the configuration, proceed with the payment.
4. Open the "Virtual Machines" Section. Click on the three-dot icon next to the desired server.
5. Select "Run Script". From the dropdown menu, choose "Run Script".
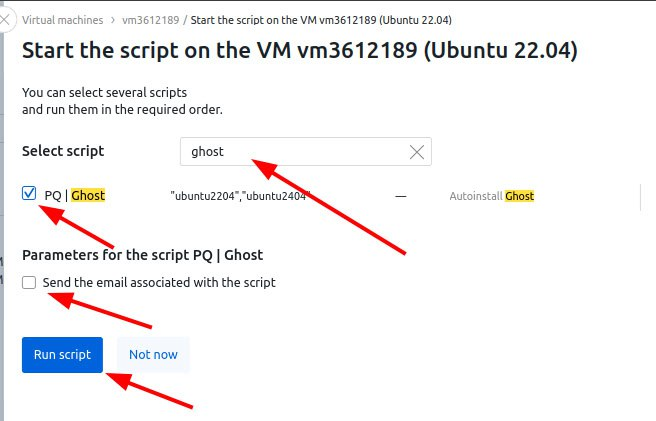
6. Search for the Ghost Script. In the search bar, type "Ghost" and select the script found.
7. Enter Your Email. The connection details will be sent to your email.
8. Start the Script. Click "Run Script" and monitor its progress in the "Status" section.
9. Wait for the Installation to Finish. Once the installation is complete, you will see a confirmation page.
10. Access Ghost in Your Browser. Open a web browser and enter:
http://vps-ip-address/ghost/#/setup
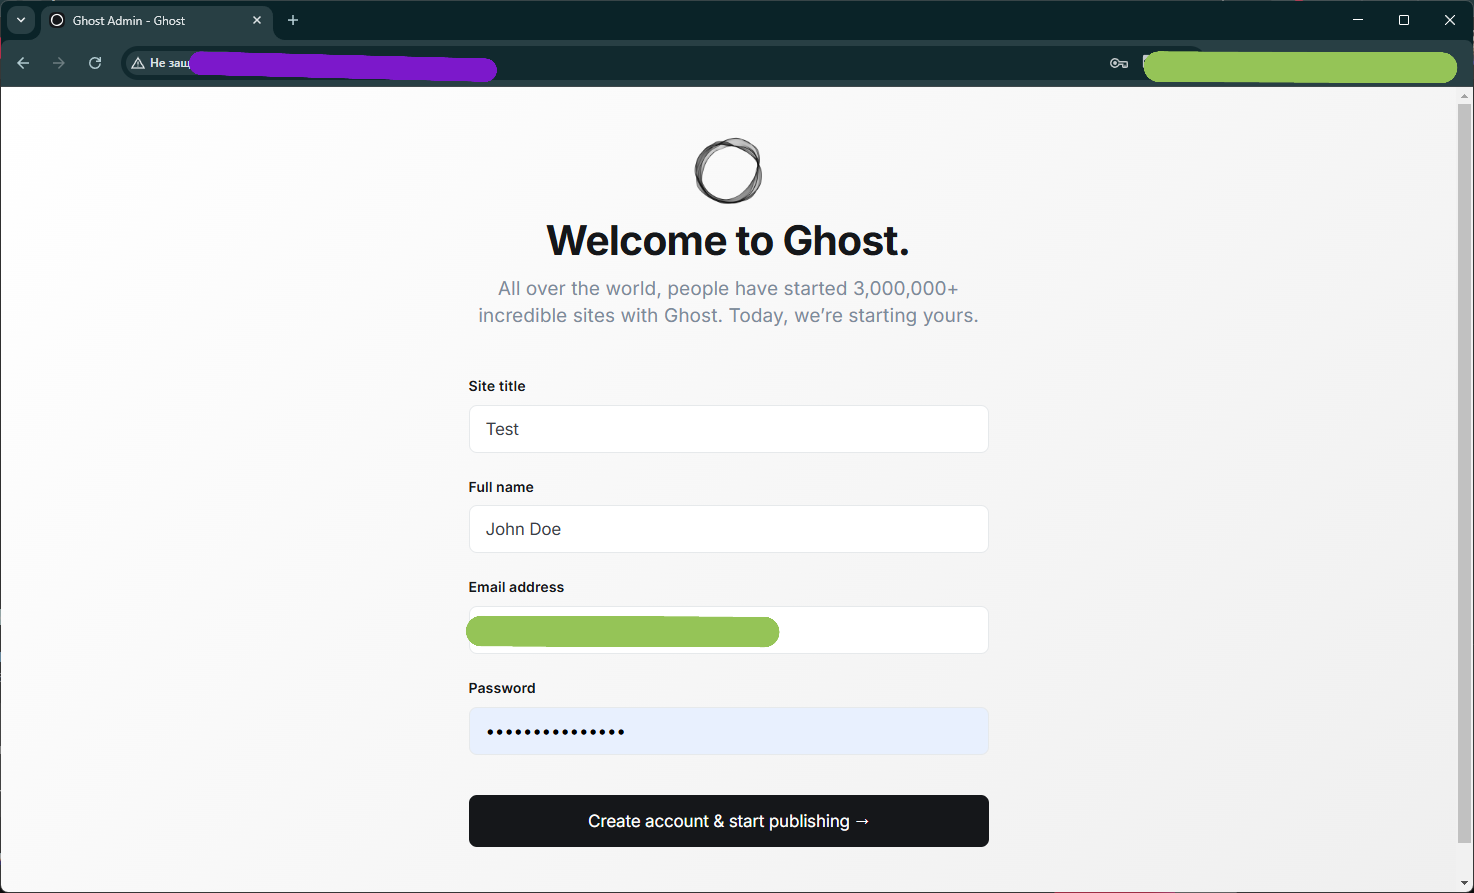
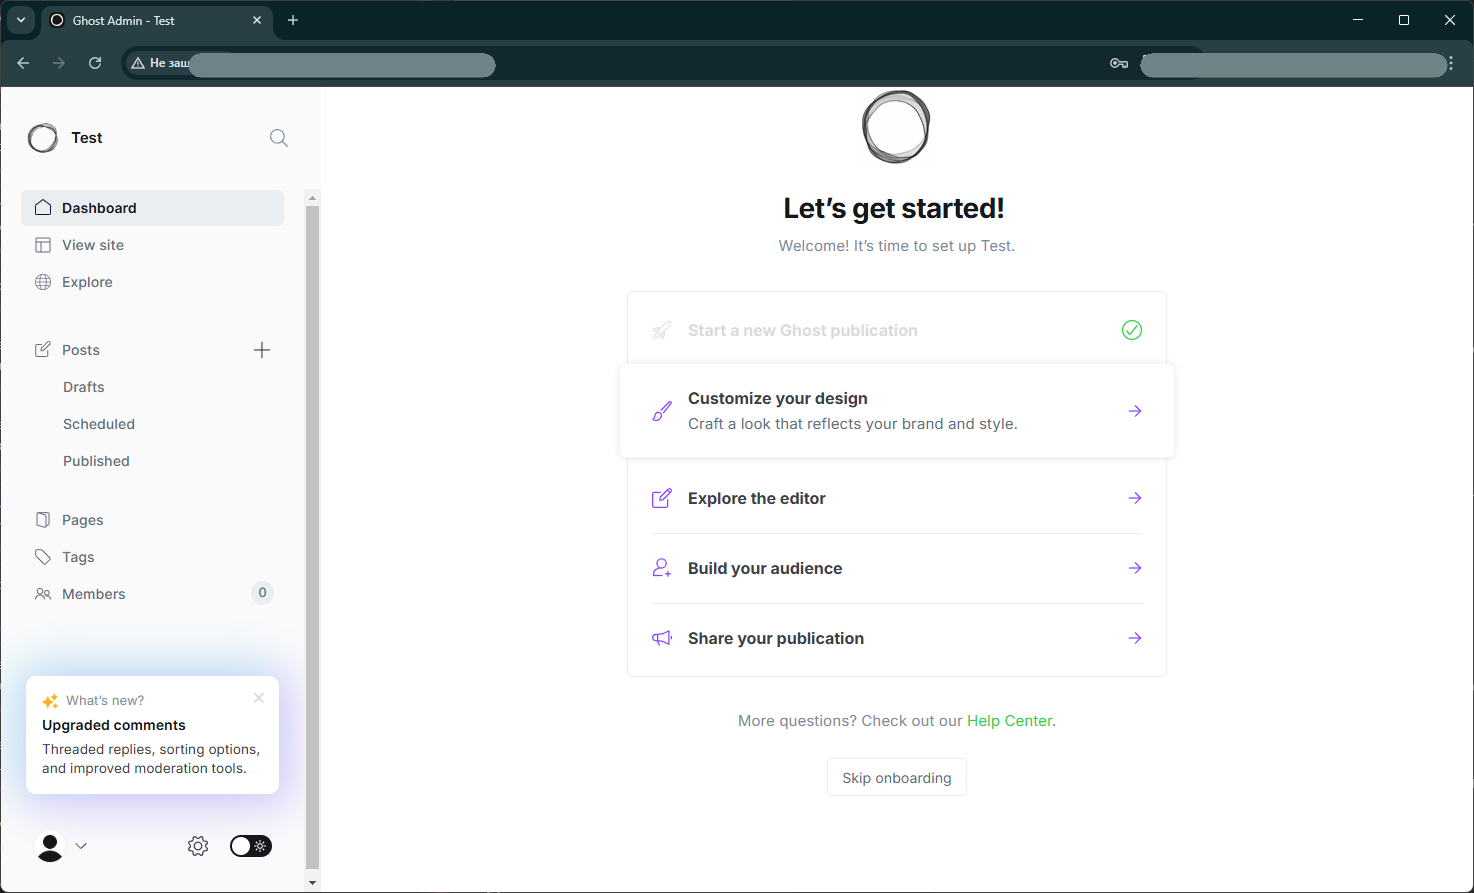
11. Create a Ghost Account. Follow the on-screen instructions to set up your site.
That's it! Your Ghost site is now ready for configuration and content publishing.
Other articles of the section


